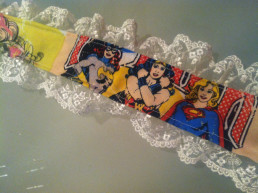
Do-it-Yourself: Geeky Wedding Garter
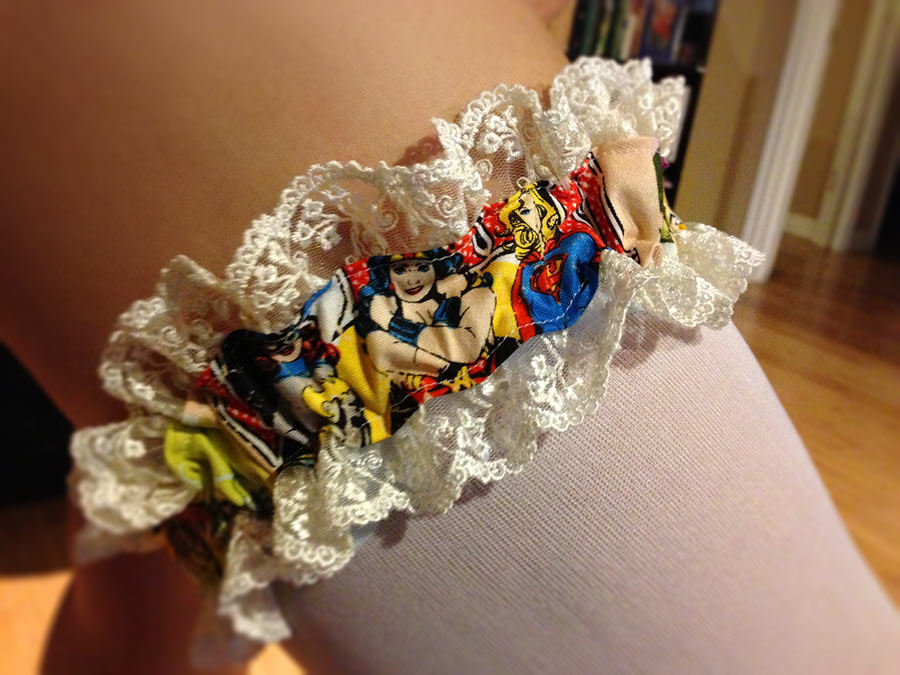 Making your own custom garter is a very easy sewing project! It adds a delightful surprise for your wedding, costume, or lingerie! It's great for the crafty geek who wants to have a little fun!
Step 1:Measure the circumference of your leg with a tape measure. Garters are traditionally worn about two inches above or below the knee, so be sure to measure where you want to wear your garter.
Step 2: Buy your materials! You will need:
- About half a yard of fabric (I used a cotton print)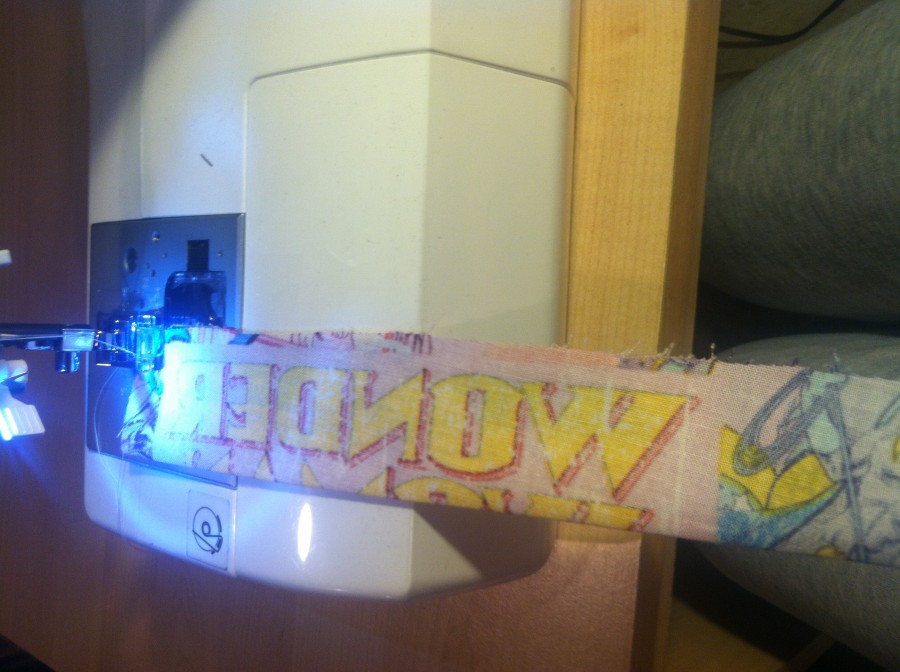
- 2 pieces of lace, each one matching your leg circumference measurement
- 1 inch wide elastic that matches the length of your leg circumference measurement
Step 3: Cut a strip of your prewashed fabric about 4 inches wide and about 10 inches longer than your leg measurement. Once you cut this strip, fold and iron it in half length-wise with the WRONG side of the fabric out. Then sew the open length closed so that you end up with a tube with the correct side of the print on the inside. Once that's done, pull the tube so that the correct side of the fabric is on the outside.
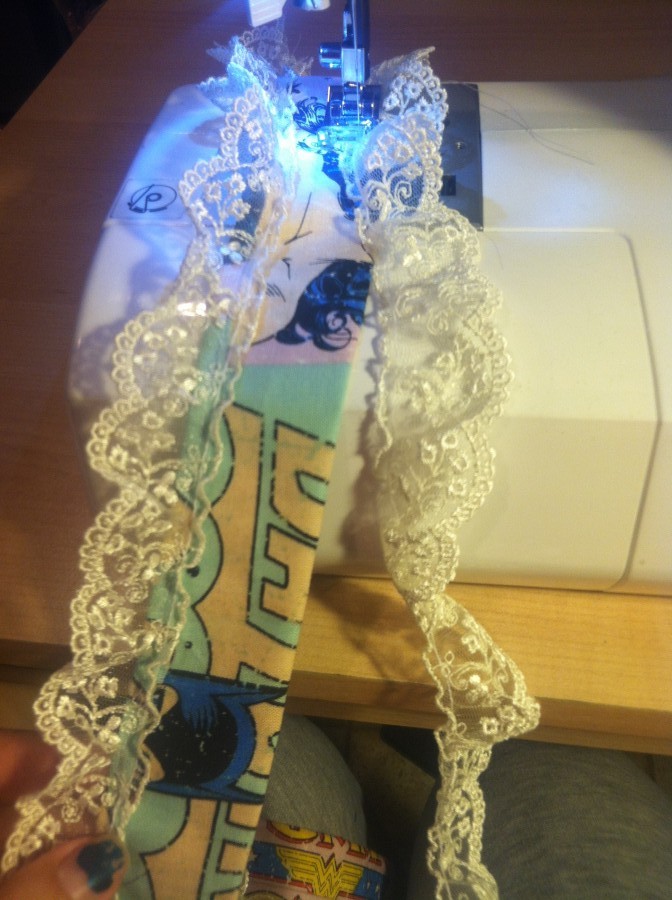 Step 4: Choose which side of the tube you like best, this will be the FRONT for the continuation of this tutorial. Now, pin and sew the lace along the both edges on the BACK of your tube. You need to stay fairly close to the edges so that you still have at least 1 inch between the seams on the tube for the elastic later.
Step 5: Stretch the elastic around your leg where you want the garter to sit. Tighten it enough to stay in place by itself, but not so tight that it is uncomfortable or cuts into your leg too much. Trim the elastic to that length.
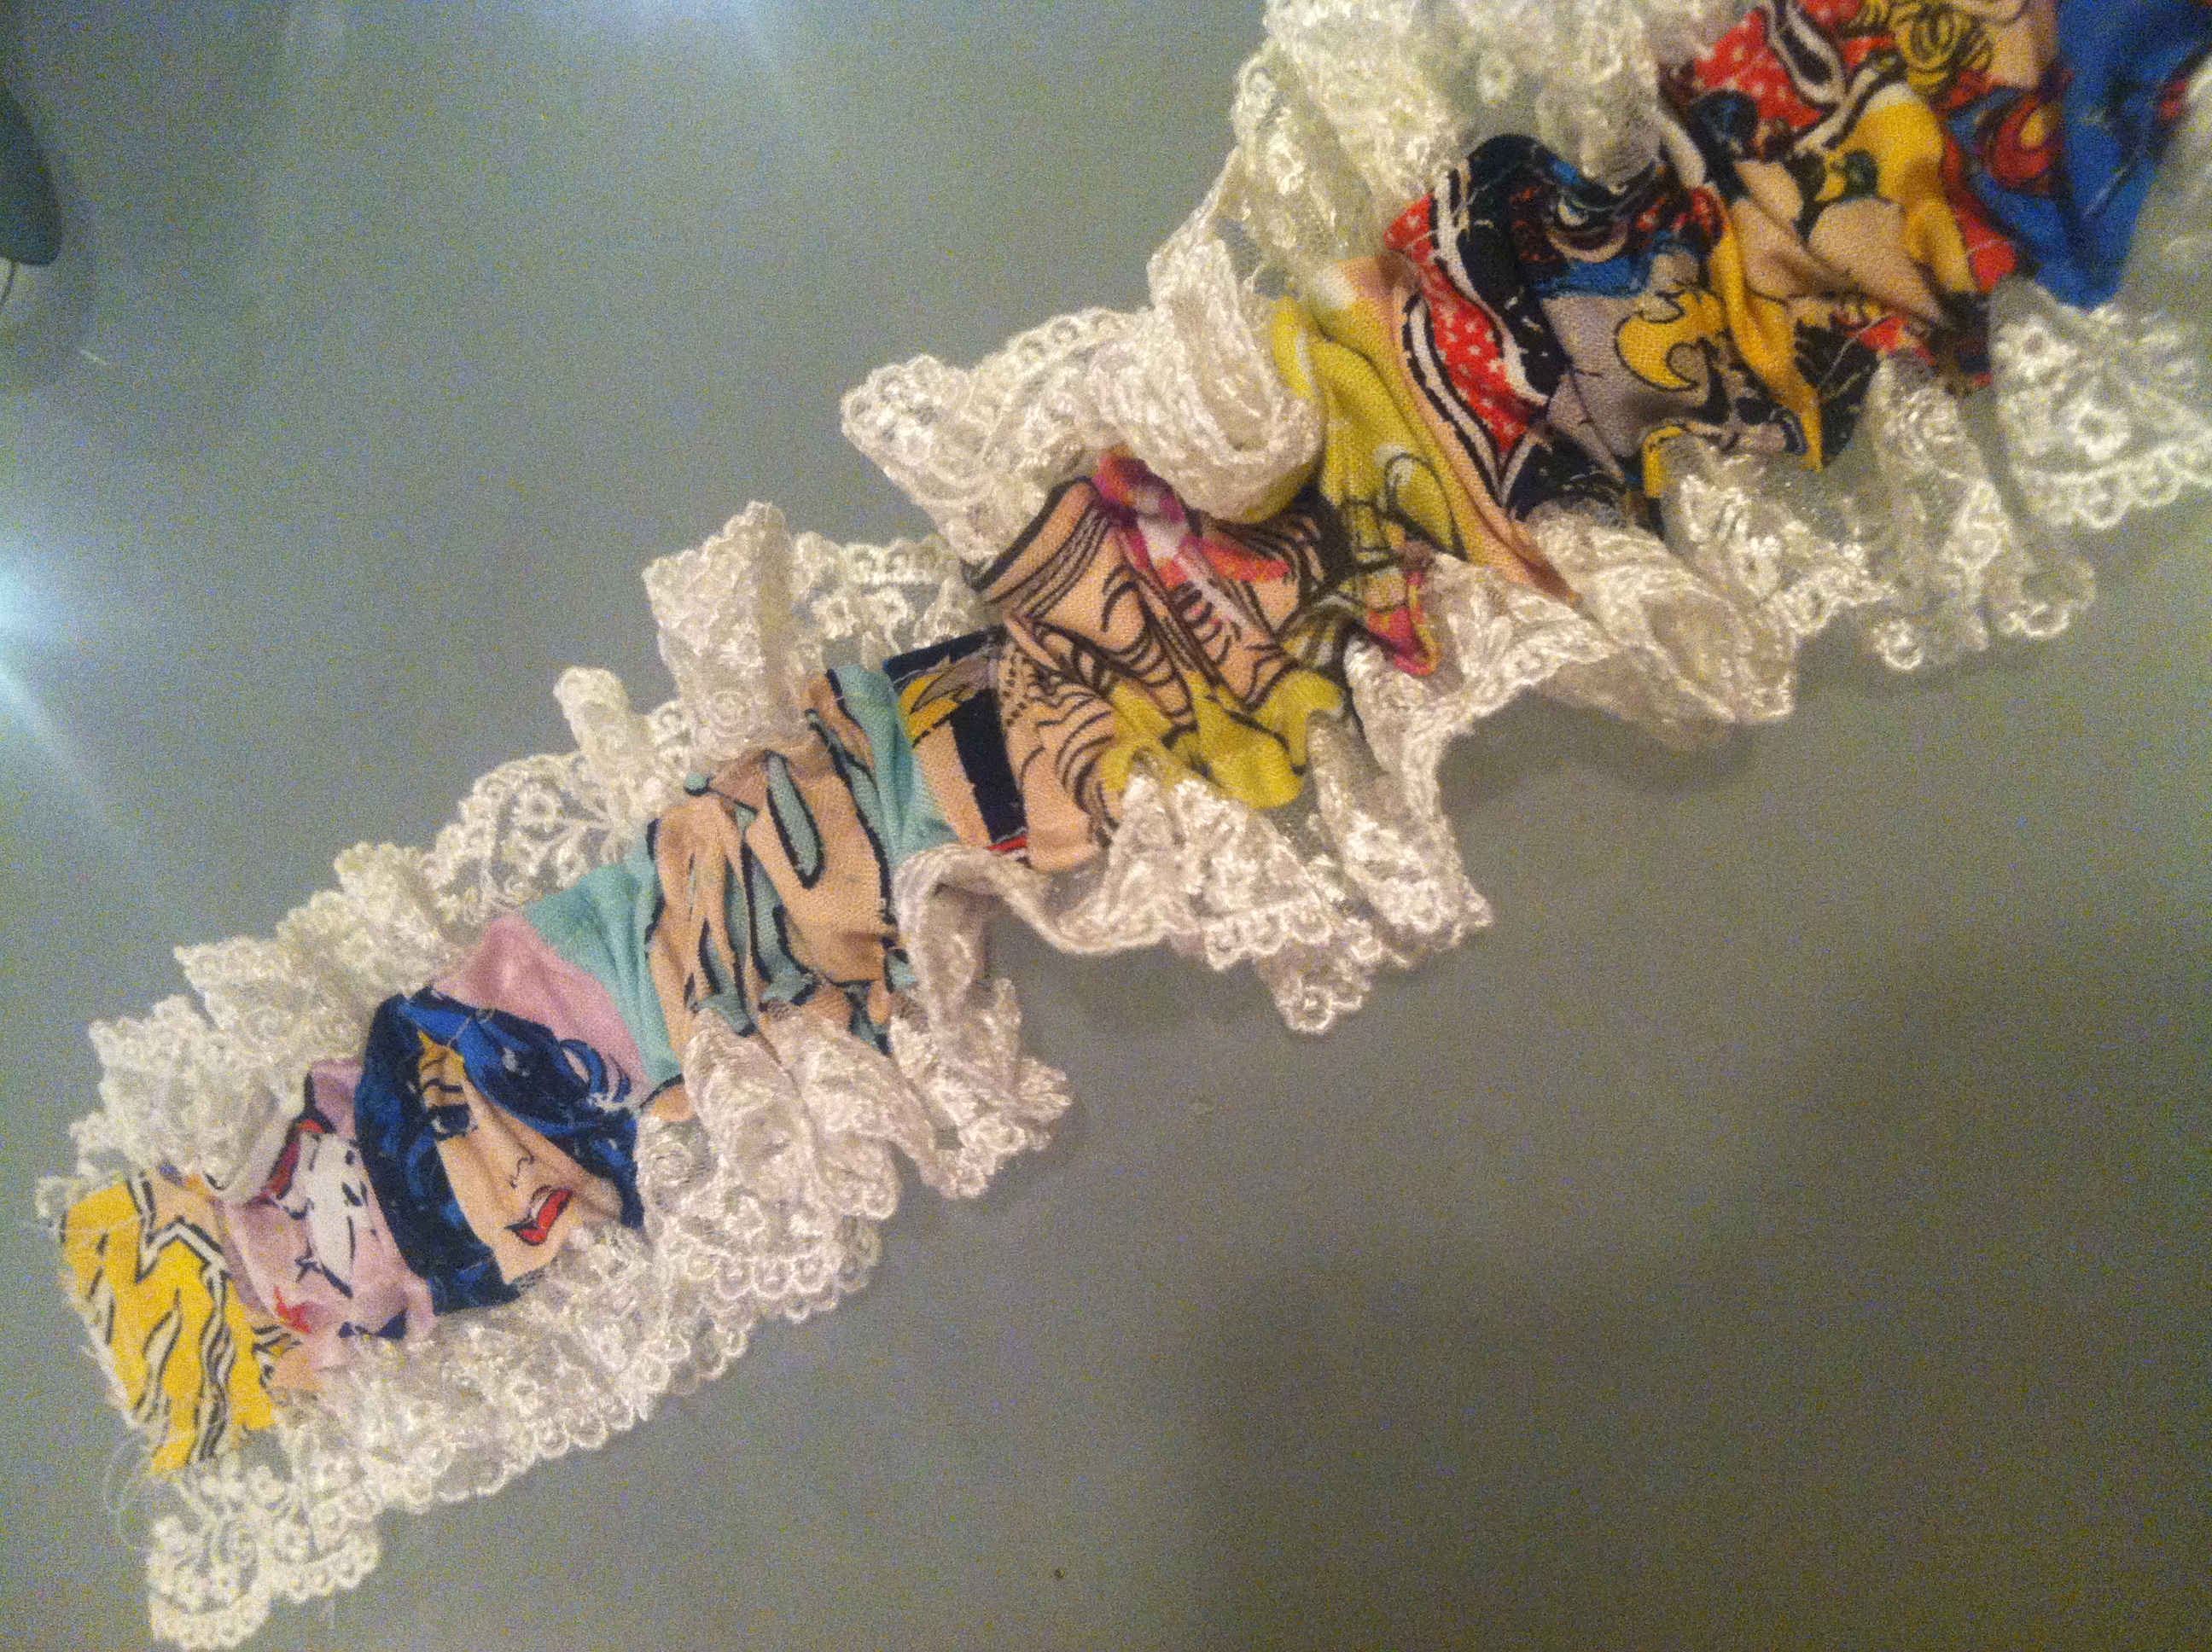 Step 6: Slide the elastic piece through the tube and stitch across each end so that the elastic is sewn to the cloth tube. Gather the tube evenly along the elastic piece to create a ruffled effect.
Step 7: Pin the ends of the garter together in a teardrop shape, make sure the FRONT is on the inside and the BACK is facing outward. Stitch these two ends together and then stitch over the edge with a zig-zag stitch so that the edges don't fray.
Step 8: Surprise everyone by wearing your lovely custom garter!
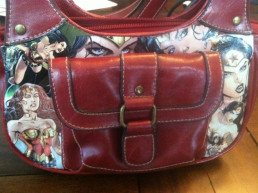
Do-it-Yourself: Comic Book Purse
 This is a great technique called decoupage, which has been around for a LONG time. I had seen it done, but it took the geek powers of @amy_geek, @ArkhamAsylumDoc, @TheStephThorpe, and all the other amazing girls in our crafting group to get me to try it. This was my first decoupage project!
Materials:
Purse
Think about what you want to do with your purse, and choose an appropriate style and color. For example, I wanted to make a Wonder Woman themed purse so I chose red leather to match Wonder Woman's outfit. Ideally, you want to decorate areas that bend and flex as little as possible. Purses with stiffer sides are better than bag- types. I found mine at the Goodwill store for $7.
 Mod Podge & Paint Brush
This wonderful substance is similar to Elmer's Glue and is available at most craft stores, but I found mine at Walmart. It comes in multiple sizes and usually costs less than $10. I chose the gloss finish type, but there are other choices. While you're there, buy a cheap paintbrush to apply the Mod Podge. I prefer the finer bristle ones because it's easier to apply the Mod Podge smoothly and they are less likely to mess up the pictures. Don't spend a lot of money though because, if you forget to wash it quickly enough, the Mod Podge will ruin your brush.
Pictures
Actually, any paper product will do, but pictures are the most interesting and easy for other people to recognize. I bought some used Wonder Woman comics at my local shop. I suggest comic books from the last few years due to their higher printing quality and vibrant colors, but anything will work. If you don't want to cut up comics, you can make color Xerox copies of them to use for your project instead.
PRO TIP: If you are buying comics for this project, look through them before you buy them! It's amazing how little a character can show up in their own comic!
Process:
Step 1: Stuff the purse with a towel so that it doesn't give when you put pressure on it, then wipe off the purse with a damp paper towel and maybe some mild soap. I don't recommend  cleaners because you never know how they will affect the Mod Podge or the purse. Once the purse is totally dry, move on to the next step.
Step 2: Decide what area of the purse you'd like to start working on and choose a picture that will fit there. Cut the picture out in a square-ish shape with lots of extra around it but be careful not to mess up other pictures you might use. It is easier to trim away extra when you start applying it to the purse than to try to fill in gaps in your collage. Hold the picture up to the DRY purse, then trim away the extra so that it fits the space. If you'd like, you can use a light pencil or your fingernail to mark the edges before you trim them.
Step 3: With your paint brush, apply a medium layer of Mod Podge to the area you intend to place your first picture. It shouldn't be dripping, but you should be able to see the white coloring. CAREFULLY place the picture on the Mod Podged area and smooth it out with your fingers. The now-wet paper will rip if you pull on it too much.
 Step 4: Spread a thin layer of Mod Podge over your image with your paint brush. This layer should be pretty thin and clear when applied, and will dry completely clear. Be sure to add extra to the cut edges of your picture and flatten them with your paintbrush. You don't want any edges or seams sticking up. If wrinkles appear, smooth them with your brush or the tips of your fingers. This might be a sign that you didn't stuff your purse enough, so add more stuffing!
Step 5: Repeat steps 2 - 5 with other pictures until the purse is covered to your liking! You do not have to wait for the Mod Podge on one picture to dry before starting on the next. Don't be afraid to overlap them!
Step 6: After the bag is done being decorated, add more thin layers of Mod Podge on top of the decorated areas to keep them protected. Wait at least 48 hours before using your purse. You can always add another layer of Mod Podge if you see areas becoming worn!
Congrats! You now have a custom piece of accessory artwork to enjoy!

