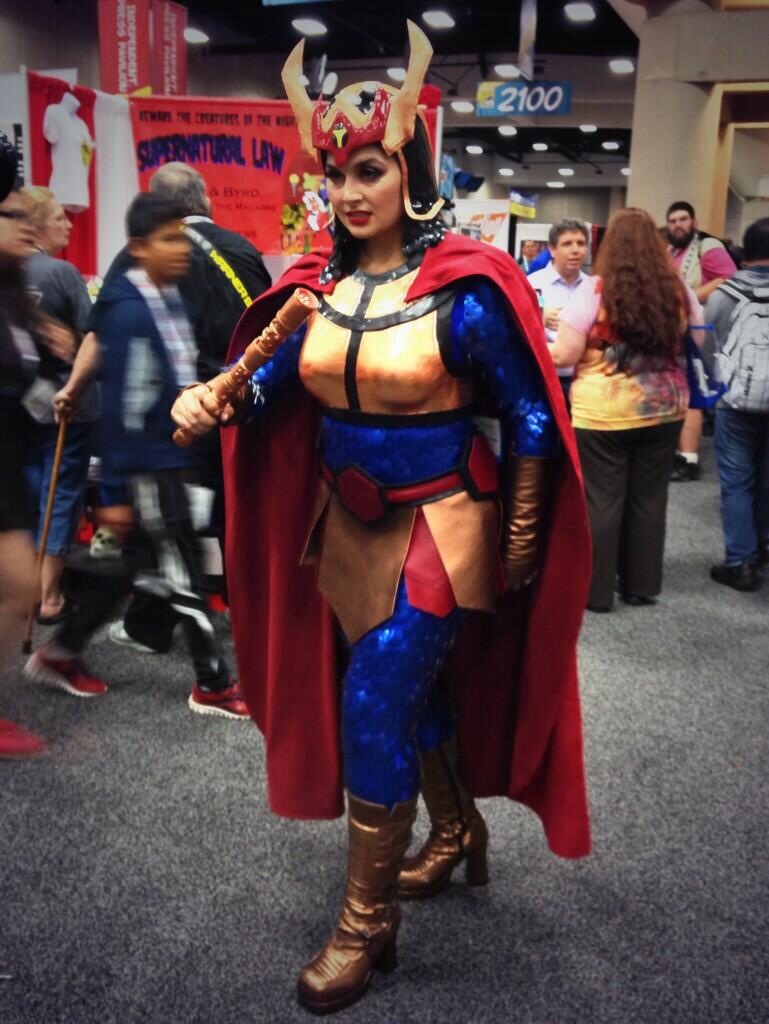
Do-it-Yourself: Costume Helmet (Big Barda)
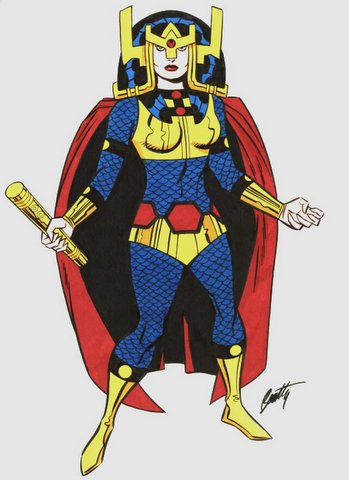 I have always loved Big Barda's design. Over the years it has changed significantly, but her samurai-inspired helmet has remained a trademark of her look. I decided early on that I wanted to go with a more real-world design for the helmet, but make sure that it was still clearly recognizable. Who am I to improve on Jack Kirby's work? Despite the sleek design of the helmet, this was easily one of the most complicated cosplay projects that I have tackled.
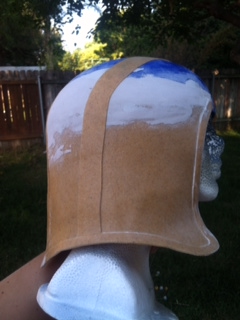
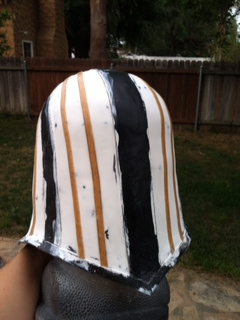
I started with a practical base, which came in the form of a child's toy Dodger helmet that I picked up at the thrift store for $2.50. I cut the bill off of it and used it for the foundation of Barda's Helmet. I then used craft foam to measure, design, and test the a few different designs for the back of the helmet that comes down around the neck. I had to be careful that I could still turn my head without trouble, but still have it come down as far as possible.
 Once I finalized the pattern for the back of the helmet with the cheap craft foam, I traced it onto Worbla and made the final version. I used industrial glue to cement the new Worbla piece to the Dodger helmet.After the glue dried, I used my heat gun to bend the Worbla into exactly the shape I wanted. This included adding a slight curl to the bottom of the helmet, and making sure it was symmetrical. Finally, I used Bondo to smooth the seam and make the Worbla and Dodger helmet look like one item. My little detail sander is a godsend for working with Bondo on small or detailed items like this. GET ONE!
 Adding more details with Worbla was the next step. Barda has very distinctive patterning on her helmet, and this is where Worbla really shines. It's so easy to cut a small strip and then bend it to fit along the edge of almost any shape. It attaches to itself when heated, but I also used glue since I'm not sure if it would have securely attached itself to the Dodger helmet and Bondo.
Then I used Gesso to make it completely smooth, by adding a thin layer then sanding, then adding another layer and sanding. Barda's helmet needs to look completely smooth and very futuristic. The Gesso and sanding made the parts of the helmet completely level and smooth, and also insured a uniform texture for the primer paint to attach.
 After what felt like endless hours of sanding, I added the smaller details to the helmet with Worbla. In the picture to the left, I painted the details from the previous step black so you could see the difference. The Worbla attached to the Gesso, and is always incredibly easy to use on details like this. I used Gesso where the strips of Worbla met to make the details seamless and to avoid the gaps that can sometimes show on the final process.
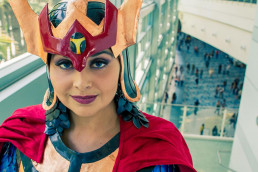
Now it's time to paint the helmet. Big Barda's helmet is a shiny smooth black, so this took a while. The technique is to lay a thin coat of spray paint over the whole helmet, wait for it to dry COMPLETELY, then use extremely fine sandpaper lightly on any areas that aren't perfectly smooth. After that's done, you do it again. A lot. Eventually, you will get a nice smooth finish that doesn't look like spray paint.
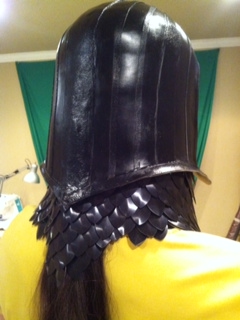
Barda's helmet goes all the way down to her shoulders, and like many comic book outfits that defy logic, she can still turn her head. Physics doesn't work like that for me and so I had to come up with an alternative. I used black scale maille around the neck to extend the look down to give the illusion of the helmet reaching my shoulders. It ended up matching perfectly, and is one of my favorite details on this cosplay. I created the scale maille piece and attached it with Velcro to the inside of the helmet. The fact that it was removable made painting and finishing the helmet easier.
 Clear coating can be one of the most stressful parts of a project. I wanted maximum shine on my helmet, so I used a high gloss clear coat. I highly recommend that you use the same brand of paint throughout a project (if possible), and ALWAYS test different paints together on scraps before using them on your work in progress. Nothing is more heartbreaking than having something almost finished and then watching the paint bubble or flake because of a chemical reaction. I carefully added multiple clear coats, leaving many hours between each coat to insure that it was completely dry when the next was added. THIS IS REALLY IMPORTANT!
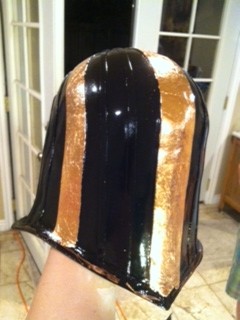
I used copper leaf to add the metallic shine. As always, practice leafing on scraps before working on your final piece, and take your time. Fine paintbrushes are very helpful for leafing corners and edges. It can be really tricky to get it looking right. After I finished leafing the main helmet, I added more layers clear coat. This i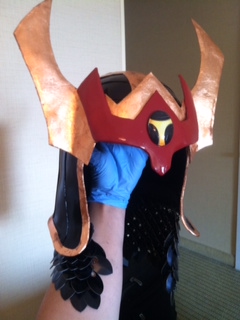 s a vital step after leafing and prevents the metal from tarnishing or peeling off.
Now the majority of the helmet was done, and I could create the decorative front. I wanted it to have some weight and depth to it, so I used Kamui Cosplay's tutorial and sandwiched a layer of craft foam between two layers of Wonderflex. The Wonderflex should be larger than the craft foam so that you can heat seal it around the edges. I molded these pieces with heat to perfectly fit to each other, and to the finished section of the helmet. After these pieces cooled, I painted them or copper leafed them just like I did the other parts of the helmet. To finish it off, I used industrial glue to attach these pieces to the rest of the helmet.