
Skyrim Wedding Picture

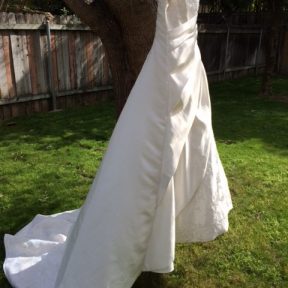
What happens when a costumer and a photographer/VFX artist fall in love? EPIC PICTURES! This visual celebration of our nuptials and our obsession with Skyrim, has been a long time in the making and we debuted it on February 17th in honor of our first wedding anniversary.
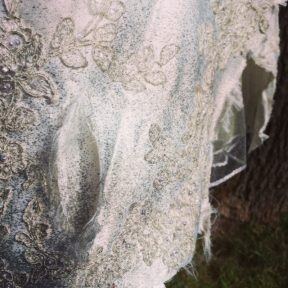
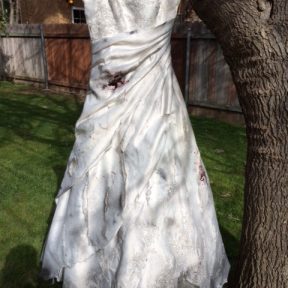
Each member of our wedding party, including our ring bearer and flower girl, were photographed individually in front of a green screen. The clothes were all bought at local thrift stores and we had a blast ripping them up, then covering them in movie dirt and blood. Actually, I was a little too vigorous while ripping up my stunt bridal gown with scissors, so there is actually a good amount of real blood on mine. #legit
While this started as a fun project to celebrate our fandom, it's quickly become very popular! Our picture was even featured on Kotaku.com! We really love that other fans have enjoyed our work and really appreciate all the well wishes!
Now, to plan for next year...
Do-it-Yourself: Costume Helmet (Big Barda)
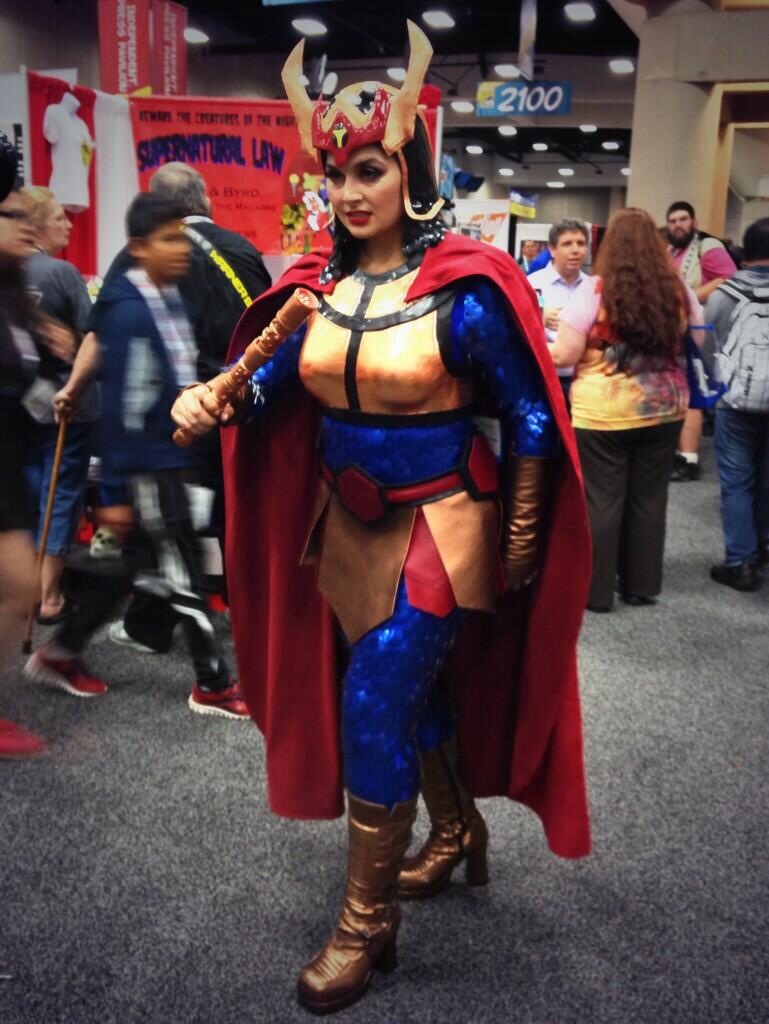
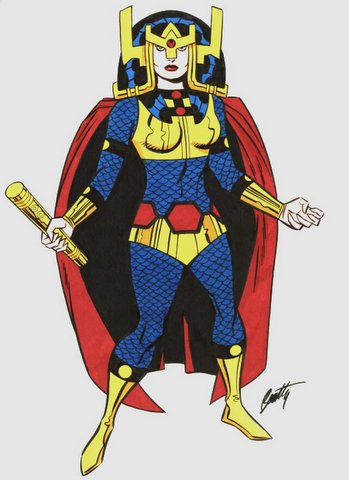 I have always loved Big Barda's design. Over the years it has changed significantly, but her samurai-inspired helmet has remained a trademark of her look. I decided early on that I wanted to go with a more real-world design for the helmet, but make sure that it was still clearly recognizable. Who am I to improve on Jack Kirby's work? Despite the sleek design of the helmet, this was easily one of the most complicated cosplay projects that I have tackled.
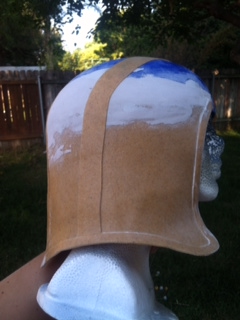
I started with a practical base, which came in the form of a child's toy Dodger helmet that I picked up at the thrift store for $2.50. I cut the bill off of it and used it for the foundation of Barda's Helmet. I then used craft foam to measure, design, and test the a few different designs for the back of the helmet that comes down around the neck. I had to be careful that I could still turn my head without trouble, but still have it come down as far as possible.
 Once I finalized the pattern for the back of the helmet with the cheap craft foam, I traced it onto Worbla and made the final version. I used industrial glue to cement the new Worbla piece to the Dodger helmet.After the glue dried, I used my heat gun to bend the Worbla into exactly the shape I wanted. This included adding a slight curl to the bottom of the helmet, and making sure it was symmetrical. Finally, I used Bondo to smooth the seam and make the Worbla and Dodger helmet look like one item. My little detail sander is a godsend for working with Bondo on small or detailed items like this. GET ONE!
 Adding more details with Worbla was the next step. Barda has very distinctive patterning on her helmet, and this is where Worbla really shines. It's so easy to cut a small strip and then bend it to fit along the edge of almost any shape. It attaches to itself when heated, but I also used glue since I'm not sure if it would have securely attached itself to the Dodger helmet and Bondo.
Then I used Gesso to make it completely smooth, by adding a thin layer then sanding, then adding another layer and sanding. Barda's helmet needs to look completely smooth and very futuristic. The Gesso and sanding made the parts of the helmet completely level and smooth, and also insured a uniform texture for the primer paint to attach.
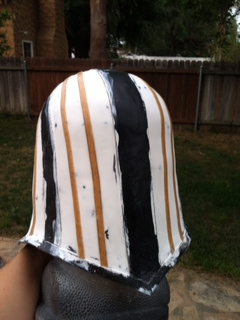 After what felt like endless hours of sanding, I added the smaller details to the helmet with Worbla. In the picture to the left, I painted the details from the previous step black so you could see the difference. The Worbla attached to the Gesso, and is always incredibly easy to use on details like this. I used Gesso where the strips of Worbla met to make the details seamless and to avoid the gaps that can sometimes show on the final process.
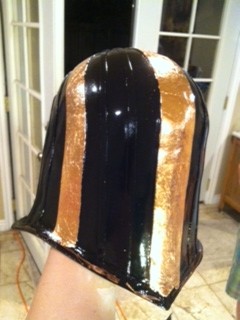
Now it's time to paint the helmet. Big Barda's helmet is a shiny smooth black, so this took a while. The technique is to lay a thin coat of spray paint over the whole helmet, wait for it to dry COMPLETELY, then use extremely fine sandpaper lightly on any areas that aren't perfectly smooth. After that's done, you do it again. A lot. Eventually, you will get a nice smooth finish that doesn't look like spray paint.
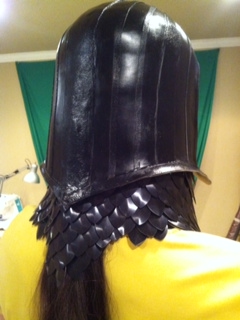
Barda's helmet goes all the way down to her shoulders, and like many comic book outfits that defy logic, she can still turn her head. Physics doesn't work like that for me and so I had to come up with an alternative. I used black scale maille around the neck to extend the look down to give the illusion of the helmet reaching my shoulders. It ended up matching perfectly, and is one of my favorite details on this cosplay. I created the scale maille piece and attached it with Velcro to the inside of the helmet. The fact that it was removable made painting and finishing the helmet easier.
 Clear coating can be one of the most stressful parts of a project. I wanted maximum shine on my helmet, so I used a high gloss clear coat. I highly recommend that you use the same brand of paint throughout a project (if possible), and ALWAYS test different paints together on scraps before using them on your work in progress. Nothing is more heartbreaking than having something almost finished and then watching the paint bubble or flake because of a chemical reaction. I carefully added multiple clear coats, leaving many hours between each coat to insure that it was completely dry when the next was added. THIS IS REALLY IMPORTANT!
I used copper leaf to add the metallic shine. As always, practice leafing on scraps before working on your final piece, and take your time. Fine paintbrushes are very helpful for leafing corners and edges. It can be really tricky to get it looking right. After I finished leafing the main helmet, I added more layers clear coat. This i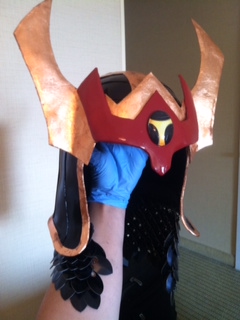 s a vital step after leafing and prevents the metal from tarnishing or peeling off.
Now the majority of the helmet was done, and I could create the decorative front. I wanted it to have some weight and depth to it, so I used Kamui Cosplay's tutorial and sandwiched a layer of craft foam between two layers of Wonderflex. The Wonderflex should be larger than the craft foam so that you can heat seal it around the edges. I molded these pieces with heat to perfectly fit to each other, and to the finished section of the helmet. After these pieces cooled, I painted them or copper leafed them just like I did the other parts of the helmet. To finish it off, I used industrial glue to attach these pieces to the rest of the helmet.
What is Inappropriate Cosplay?

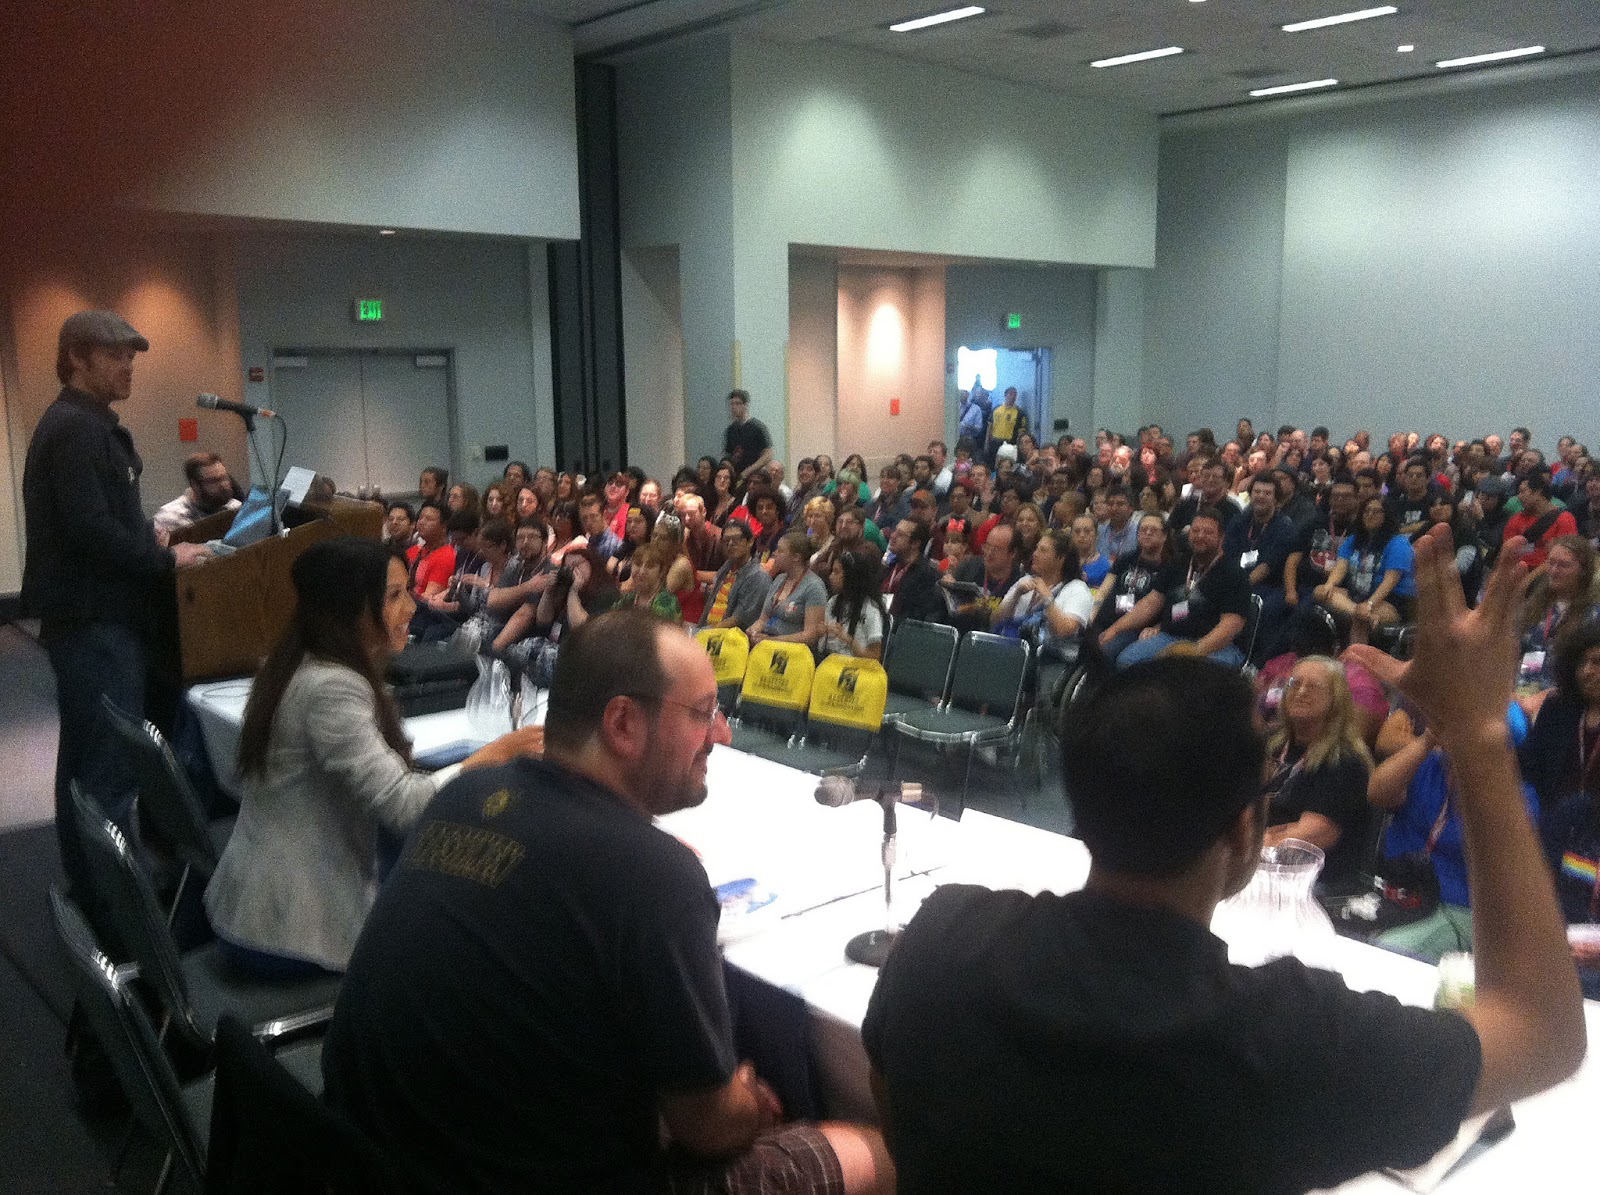
In October, I traveled to Seattle to speak about the Psychology of Cosplay at Geek Girl Con. It was an amazing panel organized by Dr. Andrea Letamendi, a clinical psychologist and cosplayer, and included Jessica Marizan, Chaka Cumberbatch, and myself as panelists. We discussed a ton of really great concepts, and the inevitable topic of "inappropriate" cosplay was brought up and discussed by the panelists.
I want to be completely clear about my feelings on this topic: THERE ARE INAPPROPRIATE OUTFITS TO WEAR TO PUBLIC EVENTS, AND AS COSPLAYERS, WE HAVE TO BE AWARE OF OUR AUDIENCE.
Now, the main focus of these debates is often skimpy/sexy cosplay. While I tend to be more modest than many other cosplayers, I have no problem with revealing cosplays. I have worked with children long enough to know that the human body, contrary to what many believe, is not damaging to the average child's psyche. I know I'll probably get emails about that statement, but it's true. The cosplays that really worry me are the bloody and violent ones. Those can really freak out kids in a way that cleavage never could.
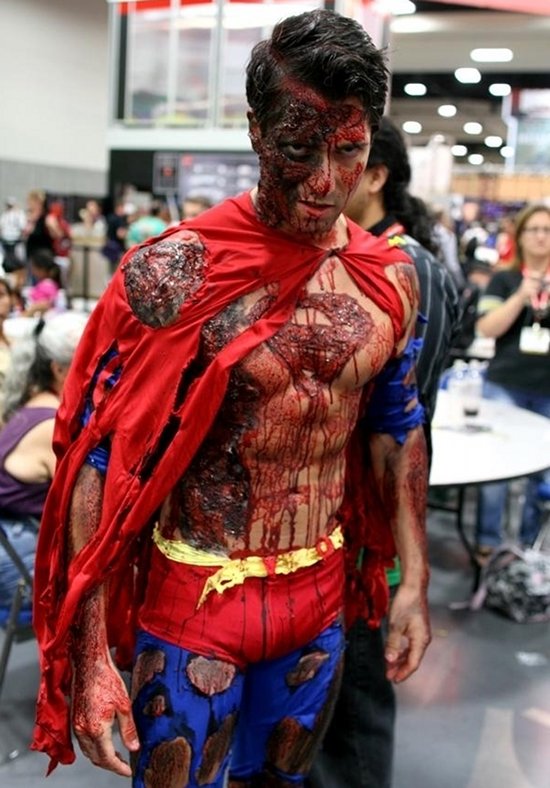
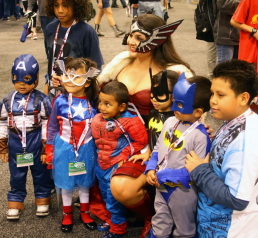
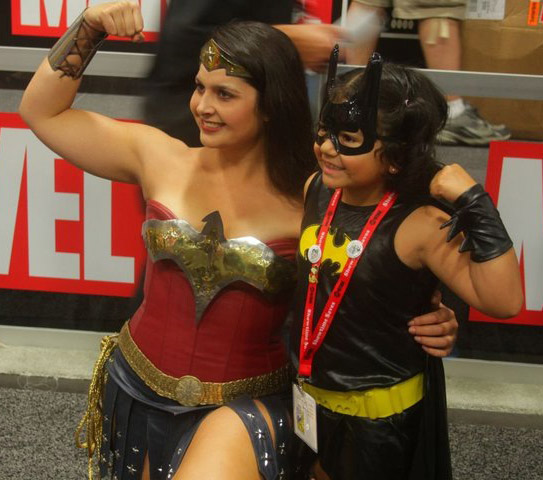
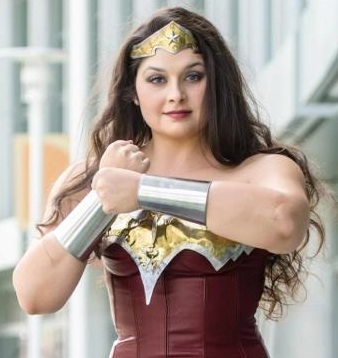
My best example of this is from a convention that I attended in 2012. I was dressed up as Wonder Woman, and as always, was having a blast posing with kids. One of the most excited fans was a little Superman, proudly wearing his foam muscled outfit from the Halloween store. He flexed his muscles and flew circles around his parents to show me how fast he was. "Cute" doesn't quite cover it. Later that day, I was wandering the halls and I ran into a mutilated Superman cosplayer limping around and posing with people. From a makeup/costume viewpoint, he really looked incredible. He really resembled Superman and his massive injuries/blood looked real even from up close. I was admiring his work from a distance, when I saw my little Superman friend from before stopped dead in the middle of the aisle. The look of horror on his little face made my stomach drop. He started crying, and had to be carried off by his parents.
We are portraying characters that people love, and in some cases, look up to as personal heroes. This is especially true for children, who are a significant portion of the con-going population. We have to balance self-expression with our responsibility to respectfully portray these characters that have left such a deep mark on pop-culture. The last thing our community needs is policing and limiting of creativity, but we need to be empathetic. Be reasonable with the blood effects, or save it for select events and photo shoots. If we have the passion to step into the shoes of the most powerful characters in fiction, surely we have the power to step into the shoes of young fans and their families.

Surviving Comic-Con
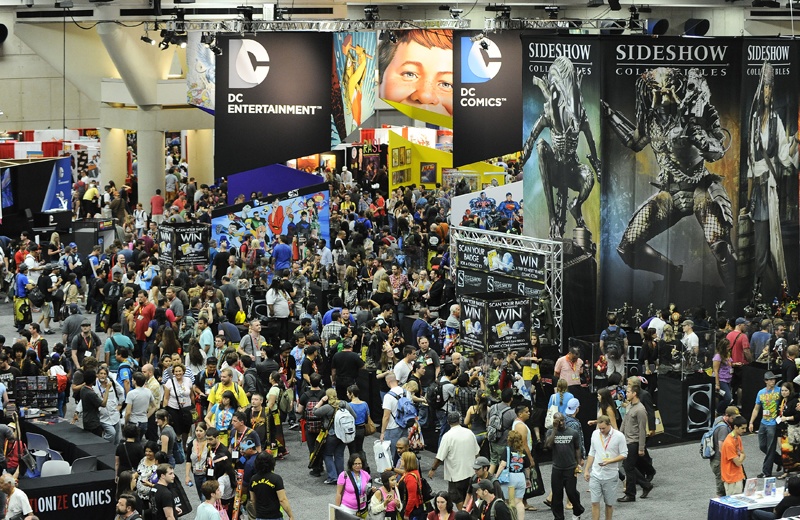
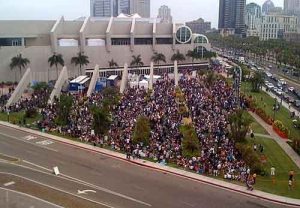
 Comic-Con. Everyone, from cosplayers to comic publishers, is frantically preparing for one of the biggest pop culture events of the year. It's a huge gathering of people on the scale of Mardi Gras or the Super Bowl. Here is my list of tips to having a great time at such a chaotic event. (If you're a cosplayer, you may also want to read my Cosplay Must Haves article!)
1. Have a Plan & Update the Plan!
Spend some time at comic-con.org and make a rough-draft plan before you even leave for San Diego. Figure out what panels are MUST-SEE for you, if there are any exciting events or meet-ups, where your favorite creators are holding signings, and where your favorite booths will be. After you have your rough-draft, highlight your three top choices for each day.
When you get to SDCC, be sure to check updates online and to check the programs they hand out for updates and changes to the schedule. Twitter is also an awesome tool for staying on top of adjustments to scheduling.
YOU WILL HAVE TO MAKE HARD CHOICES. You will never get to everything you want to see. Be prepared for this.
 2. Bring Provisions
You should always carry water, food, hand sanitizer, and painkillers with you. Food and water are incredibly expensive, and you could easily lose an hour standing in line at the Starbucks in the convention center. Bring a backpack or messenger bag full of power bars, trail mix, bottles of water, candy. If your feet or head start hurting in the middle of the day it's always better to be able to deal with it immediately, and you want to avoid getting sick when dealing with the (mostly) unwashed masses.
PRO TIP: I love collapsible water bottles for conventions. They are easy to refill at water fountains and take up less space in your bag when they are empty.
I also recommend bringing a cooler of food with you to leave in your hotel, especially if you are staying anywhere near the Gaslamp district. It's much cheaper/easier to make yourself a sandwich for lunch, or have some milk and cereal in the morning than dealing with the waits and upped prices of local restaurants for every meal. Requesting a fridge is ideal, but those are usually limited and gone unless you arrive on Monday or Tuesday before the Con.
Con-Bag Check List:
- Snacks & Water
- Sharpies to get autographs
- chargers & power strip/ extra batteries
- maps
- painkillers
- hand sanitizer
- cash (many booths don't accept cards!)
- iPod/handheld gaming device & headphones to combat line boredom
- Travel stick of deodorant & mints/gum
- camera/phone that takes pictures
3. Stay Connected
The massive amounts of people really put the strain on technology at SDCC. All cell networks are stretched within an inch of their life, and it's often hard to get service in parts of the convention center. If you are splitting from your party, or want to meet up with specific people, plan it ahead of time or early in the morning before everyone starts using the network. You will waste less time if everyone knows to meet at the outside stairs at 10am, instead of texting and calling and trying to round people up on the fly.
Pack extra batteries for your camera, phone, and even your laptop if you are able. If not, be sure to bring your charger with you and a surge protector. You will be the most popular person in your line if you share the charging power with those around you. It will also guarantee that you are allowed to use the outlet, even if someone's already plugged into it. While you're in the convention center turn off GPS and other non-essential functions on your phone to save battery life. Most of that stuff doesn't work within the heavy concrete walls anyway.
 4. Be Comfortable
If you're a cosplayer, you're screwed. Everyone else, dress as comfortably as possible. Comfortable shoes are the most important thing. You will be on your feet ALL DAY. ALL DAY and maybe most of the evening!!! Wear something with support that is made for running or walking and be sure they are already broken in.
Dress in something that breathes (cottons, natural fabrics) so that you stay comfortable and sweat can evaporate instead of getting sticky. You will probably want to sit on the floor at some point due to exhaustion and lack of seating, so be sure your outfit can handle that. Wear a sweatshirt around your waist, even if it's a warm day. Some of the panel rooms or outside areas can get pretty chilly with the air blasting.
Bring a backpack or messenger bag to carry swag in. If you really like free stuff, bring an extra empty one with you! They bags they hand out are cumbersome and can be hard to carry in crowded areas.
5. Have A Map
Actually, have a few maps. You will want a map of the show floor and convention center. You can print these out early at the Comic-Con website or pick them up on site. A map of the downtown San Diego is really handy as well. With internet/cellular service somewhat unreliable at times, it really helps when you are trying to find events away from the convention center. These are usually available for free from your hotel, or you can print one out before you leave home.
AVOID DRIVING AS MUCH AS POSSIBLE! Walking, even to something many blocks from the convention center, will be faster since most of downtown is at a perpetual standstill. You can always hire the bike carriages that are all over the place if you don't feel like walking. If you are driving in each day, GET THERE EARLY!
6. Wear Sunscreen
It's San Diego for heaven's sake! You never know when your panel's line might end up outside, or if you'll be stuck sitting by a window. You don't want to become a french fry if the walk from your hotel takes longer than expected.
7. Be Prepared for Panels
 Panels can be a nightmare. There are whole survival guides written about attending SDCC panels, and you still wouldn't know everything that you need to know. Here are the basics:
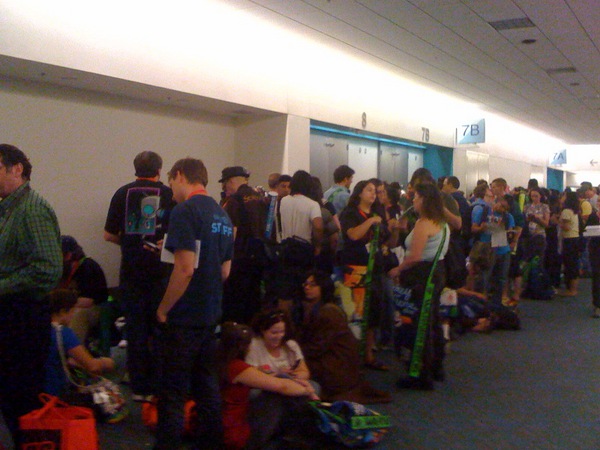
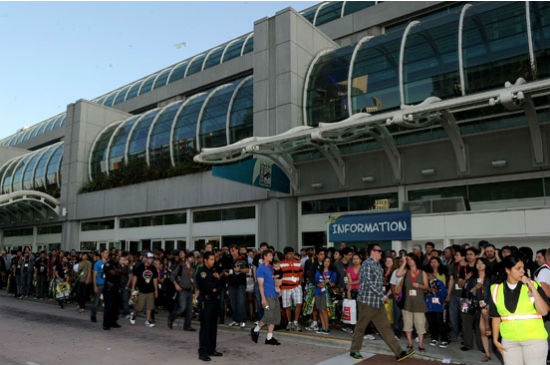
There are lines for the panels, and the more popular something is, the longer the line will be. Hall H has the longest lines (see picture of Hall H line to the right), but with good planning it is usually doable. Some people sleep overnight to get into Hall H, and rumors of famous stars visiting the line late at night abound. If you're planning to spend lots of time in the Hall H line be sure you only have one normal sized chair or sleeping bag and are not saving spots for people not in the line (bathroom breaks are ok). It is also outside, so be ready.
The big thing to know is that they don't clear the room after each panel. So people will sit through many panels to guarantee that they see the one they want in a few hours. Hell, many people just hang out in Hall H all day and never see the rest of the convention. This can be frustrating for people in line because sometimes the room hits max capacity before the whole line is allowed in. Again, if something is really popular, go early and politely sit through the panel(s) before it.
Before spending all your time trying to get into a panel, check to see if it will be posted online. It's a great way to see a panel without dealing with the crowds or when there is a scheduling conflict. You might have to do a little hunting around, but thanks to YouTube, a huge amount of panels are available to watch later. If you go to a panel and want to participate, PLEASE ASK GOOD QUESTIONS. Nobody wants to hear a rant about your feelings on their work for the last 10 years. Make sure your asking something that involves the panel topic and doesn't make the panelists hate you.
 8. Be Early For Everything
Leave yourself extra time to get everywhere. No matter how well you plan your day, there will be issues that come up. This is most important with getting to and from the convention center at busy times. The shuttles can sometimes get off schedule, so catching an early one will ensure that you don't miss your favorite stuff and give you more time on the convention floor. Arrive early for signings, panels, and screenings. There are always lines and the sooner you arrive, the better chance you have of actually getting to participate.
There is no real rule of thumb for this, but it will easily take you two or three times as long to get anywhere.
9. Hygiene
There is a massive number of people at Comic-Con. I don't want to stereotype our subculture, but I've attended enough gaming and comic conventions to know better. PLEASE SHOWER EVERY DAY! PEOPLE NOTICE!! Parts of the convention center get very warm and everyone sweats. I don't care how worn out you are, SHOWER. I highly recommend packing a small travel stick of deodorant in your bag to freshen up throughout the day, especially cosplayers who are wearing bulky or heavy outfits. Please also be sure to brush your teeth daily since you will most likely be conversing with other humans at some point. Mints or gum are a great way to stay fresh throughout the day.
By Sunday, many parts of the convention center develop a distinct odor. If you're not part of the solution, you are part of the problem.
10. Interacting with Cosplayers
 The people who are dressed in costume are called "cosplayers," and they are people too. In fact, they are fans just like you! They are not paid by the convention, and they buy their tickets and hotel rooms just like everyone else. Cosplayers are there to enjoy themselves, not to entertain you. Be respectful. They come from all walks of life and you never know when a cosplayer might be an off duty cop with a passion for sewing. DO NOT TOUCH A COSPLAYER WITHOUT ASKING FIRST! COSPLAY DOES NOT EQUAL CONSENT!
Most cosplayers do love to pose for pictures because we are incredibly proud of the outfits we have made and love the characters. It's always great to meet another fan and very flattering to be asked for a photo. Ask first, and it's always great to have you pose in the picture with us. If you are planning on posting the picture online, please talk to the cosplayer about it first. Most have Facebook pages or DeviantArt pages that you can easily credit.
Be careful of our costumes! We put hundreds of hours and often hundreds of dollars into making them. Some pieces may look very sturdy, but often they are very fragile. Grabbing something or touching something can seriously damage it. Ask before grabbing a prop to pose with or before putting your hand on their shoulder armor.
11. Have Fun
Comic-Con is an amazing experience, and a yearly tradition for many fans. The most important thing is that you enjoy yourself. Take time to soak in the experience and appreciate how cool it is to have so many geek brothers and sisters all in one place!

Batgirl's Doctor is In: Dr. Andrea Letamendi
 Andrea Letamendi is one of the most interesting figures on the convention scene. She holds a Ph.D. in Clinical Psychology, and puts her knowledge to geeky use by speaking about the psychology of Superheroes, Science Fiction, and Cosplay. When she isn't speaking on panels, Andrea works as a researcher at UCLA, does work for Marvel and DC, and creates amazing cosplays of her own.
Kimi: You’re known as @ArkhamAsylumDoc on twitter, do you have a favorite Arkham inmate in the Bat-verse?
Andrea Letamendi: Oh yes, I have many favorite Arkham Baddies. I can’t deny the power that the Joker has psychologically–he is such a mesmerizing and puzzling character because his acts of villainy and destruction do not always seem rationale or explainable. My favorite villain from Gotham’s Rogue Gallery is the Penguin, because of his tragic story. He seems to frequently try to reach out and connect with others, perhaps just looking to be understood, and that is incredibly relatable.
 K: You were recently depicted in Batgirl #16 as Barbara Gordon’s clinical psychologist. Why did Gail Simone immortalize you as part of DC cannon?
AL: Last year, before the Batgirl annual, Mrs. Simone reached out to me to ask some questions about trauma recovery. Essentially she was writing about an important time in Barbara’s life during which she was recovering–both physically and psychologically– from the severe injury from a gunshot wound when the Joker attacked her (See: The Killing Joke). As a Batgirl reader and DC fan, I was more than thrilled to answer anything she wanted to know. My background in treating soldiers who have returned from Iraq and Afghanistan with psychological and physical injuries best prepped me to give anecdotes and explain the relationship between the therapist and the healing client. Little did I know that Mrs. Simone would not only write some of my suggestions into her comic, but also include me as a character! It was truly a surprise– and I feel the honorary gesture was not just toward me but for the psychology community as a whole.
K: In addition to being an adviser for Marvel and DC, you are also well known as a cosplayer. What pushed you to start cosplaying?
AL: I have essentially been cosplaying since I was a teenager, if you count “dressing up as a Jedi character that you made up” cosplay. I’ve always felt drawn to dressing up as characters I love, but it truly wasn’t until I started attending conventions in 2006 that I initially became involved with cosplay and the cosplay community.
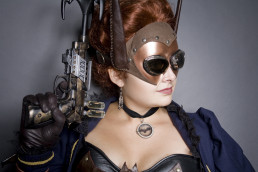
 K: Which costume is your favorite to wear to conventions?
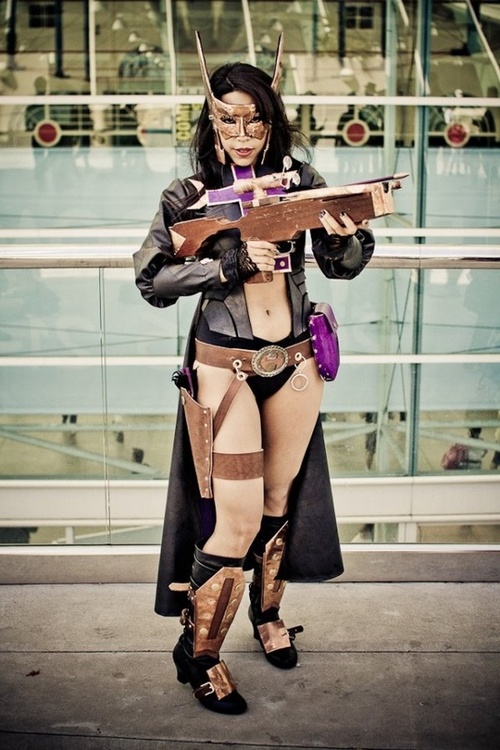
AL: My favorite costume is probably my Steampunk Huntress costume, although I have a Battlestar Galactica costume in the works and it may quickly become one of my favorites!
K: You’ve found a way to bridge the gap between your love of psychology and your love of comics, are you trying to do the same with psychology and cosplay?
AL: I’ve found that my love of cosplay has led me to ask questions like “what draws us to certain characters?” and “why do we feel fulfilled or content when we’re wearing someone else’s clothes?” I also believe there’s something empowering and psychologically inspiring when we dress up as a superhero that we look up to, even if they are fictional. In my mind, it was inevitable that these two universe’s collide, which is why me and my colleague created a Cosplay Survey and plan to continue exploring the motivations, expressions, and backgrounds of cosplayers. I also believe that we can use real-world data to debunk or disconfirm myths about cosplayers. I feel as though psychological science can tell a story that allows people to see how adaptive, healthy, resourceful, and social cosplayers really are.
K: What conflicts have you faced between your geeky hobbies and your career?
AL: Actually, even though I initially felt distanced and a bit misunderstood in my field, I’ve recently discovered that people are generally interested–and even quite inspired–by some of the work I’m doing in the comics and cosplay community. I have to say that I was surprised by this and it reminds me that people just want to get to know you and that the field of Psychology can be particularly open and supportive of these other hobbies. I’d like to think that goes with other social sciences disciplines.
 K: Briefly, what have you learned about the Cosplay community through your surveys and your Psychology of Cosplay panels?
AL: We have learned that cosplayers represent a very diverse and social group. I think the single most important thing we have learned is that we simply do not have any evidence that cosplayers share any one feature or characteristic beyond their passion for costuming and performing. Stereotypes about cosplayers, therefore, are not currently supported by anything other than bullies on the internet.
You can visit Andrea's blog at Underthemaskonline.com or follow her on Twitter @ArkhamAsylumDoc.

Pre-Event Skin Care
 Prepping your face for a big event or convention is as important as prepping your costume. Unless it's covered by a mask, your face is a major focal point of your cosplay. You should do everything you can to take care of it!
Rules of Event Prep:
DON'T Try Anything New!
The clock is ticking down until the convention. You're frantic to get your costume done, your trying to figure out your schedule, and the excitement is building. Now is NOT the time to try a product or procedure on your face for the first time. That tanning lotion that your friend loves could leave you looking orange, you might be allergic to that new moisturizer, and even new makeup might do some damage. Experiment when you have a little more time to fix any problems that pop up, and stick with your regular routine right before the convention.
Plucking and Waxing
Make sure you pluck a few days before the convention and/or get waxed at least a week before the convention, but ONLY if you've had it done before! This gives your skin plenty of time to heal up if there is any irritation. Waxing is more unpredictable and tends to show up more when it goes wrong, so leave more time to fix the problem. DON'T TRY WAXING FOR THE FIRST TIME RIGHT BEFORE A CONVENTION!
 Hydrate
Water is the magic beauty potion you've been overlooking for years. Start drinking as much water as you can about two weeks before the convention. It will keep your skin clear and help you avoid flaky dry spots. It will also help you avoid chapped lips, red eyes, dark bags under your eyes, and maintain a healthy weight. Drinking 6-8 glasses of water helps your whole body, so drink.
Avoid Alcohol
Yes, I'm a party pooper. You should avoid drinking during the last week before a convention. One glass of wine probably isn't going to do much, but alcohol dehydrates your body, which causes red eyes, puffiness, bags under your eyes, and more.
Sleep!
A lot of beauty problems can be solved just by getting 8-10 hours of sleep. Red eyes, bags under the eyes, and swelling can all be signs that you didn't get enough sleep last night. Plan on having your costume done, your bags packed, and everything ready to go so that you can spend the night before relaxing and resting.
Daily Skin Care
Wash Your Face at Night
Washing your face strips your skin of natural oils and can dry out your skin. You should really only wash your face at the end of the day to remove makeup and other build up. Washing your face before bed also keeps oils from building up on your pillowcase, which helps prevent breakouts. In the morning, just splash your face with some water instead of scrubbing away all the natural moisture that your skin produces.
 Moisturize
As someone who has an oily face, this can be a rather tricky prospect for me. There is a fine line between keeping my skin smooth and creating a mountain range of zits overnight. However, proper moisturizing helps fight wrinkles and helps makeup look its best. You should moisturize every morning, preferably using a product with at least 30spf sunblock. You can moisturize at night if you have naturally dry skin, but if your skin is oily, try just moisturizing around your eyes. There are lots of moisturizers on the market for different types of skin, so figure out what works for you.
Don't Exfoliate Every Day!
Again, this is about keeping your skin hydrated and avoiding flaky skin. Exfoliating can become a vicious cycle for some women. You exfoliate to get rid of flaky skin, but that dries out your skin and causes flakes. You shouldn't be exfoliating more than a few times a week. This is a big mistake and can actually make you appear older!
Sunblock
You should be wearing sunblock or moisturizer with at least 30SPF every day. Even if you spend most of your day inside, the exposure you get driving or walking your dog can really add up. Sun damage is the number one cause of skin damage and premature aging, and should be put on areas that are prone to showing age such as your face, neck, and chest. Don't forget the back of your hands, especially if you will be driving! If you are planning on spending time in the sun, wear higher SPF and a hat.
Superheroine Costume Controversy
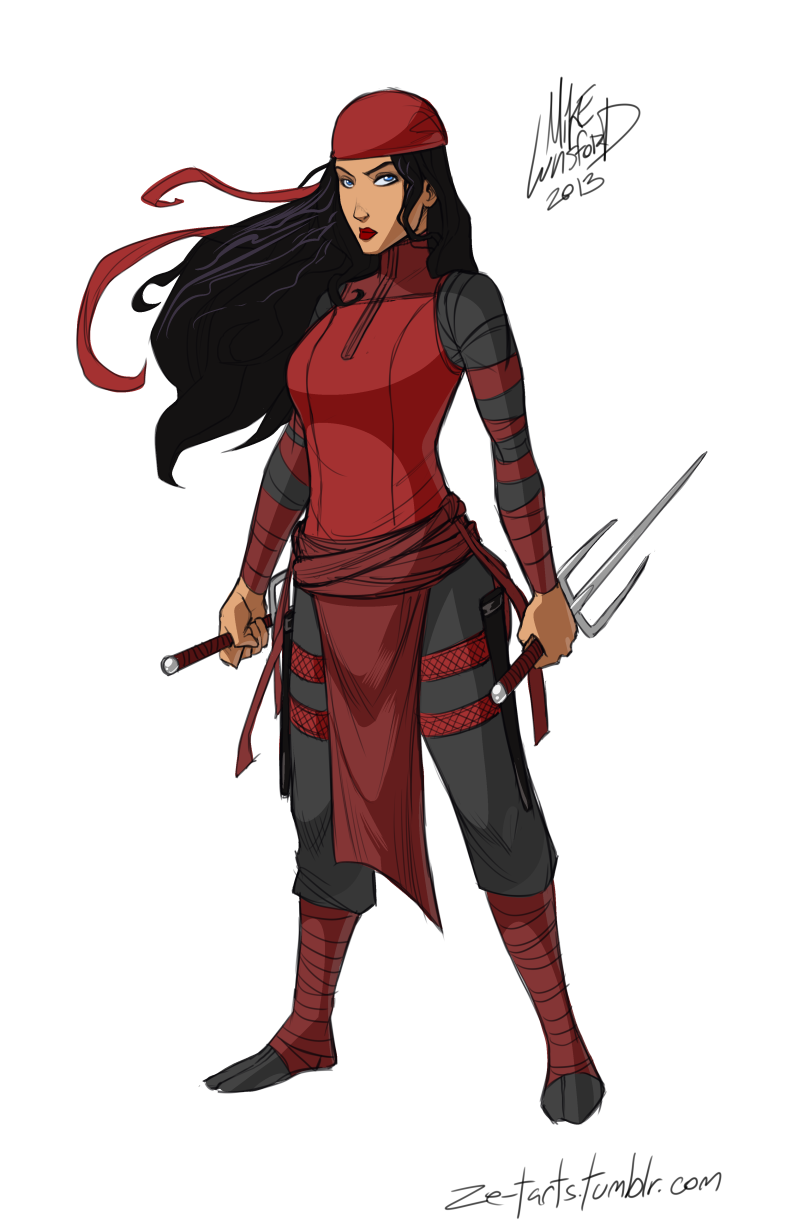
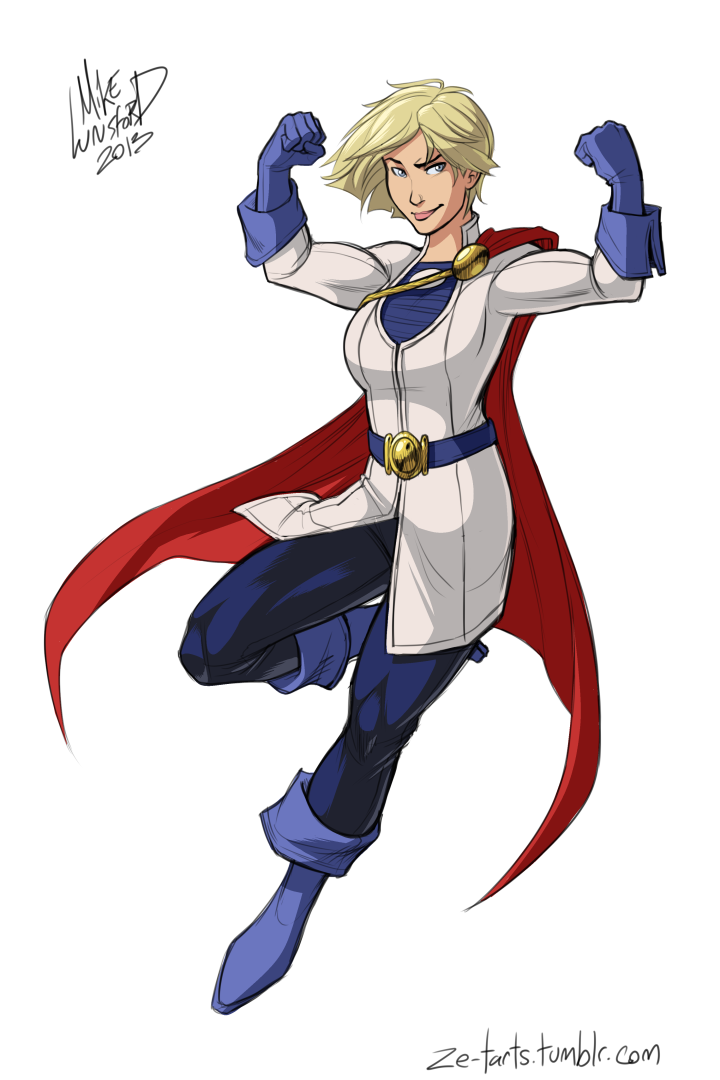 An adorable collection of illustrations have had the cosplay and comic community in a tizzy this week! They are by Michael Lee Lunsford and show female comic characters with redesigned outfits that are much more modest. The skimpy clothes that female characters wear in comics have long been a controversial topic, especially among female fans. Some fans feel that the skimpy clothes are a way to pander to the young male demographic. Others feel that a woman should be free to wear whatever she likes and that there is nothing wrong with skimpy clothes. These pictures have rekindled the debate on how females are depicted in comics, and in turn, how cosplayers represent those characters in the real world. As an avid comic reader and cosplayer, I also had a very strong reaction to them.
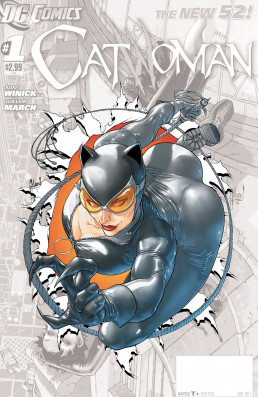
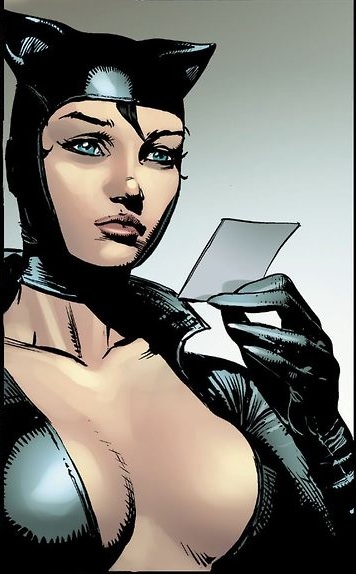 I agree that women have the right to wear whatever they want, but most comic book characters are being designed and drawn by men. There is no women's choice involved. The lithe female character poses and convenient camera angles of many panels only serve to further objectify the female characters in a way that simply doesn't happen with male characters. The impracticality of the designs is what annoys me the most. Yes, it's easier to do gymnastics in a leotard, but is it the most practical thing to wear when you are being shot at? It's really the last straw when you see a design as ridiculously exaggerated as Catwoman's unzipped suit. Is it really that important that her breasts are exposed as she's trying to sneak through Gotham unseen? WHY THE HELL WOULDN'T SHE JUST ZIP IT UP? In an era where many male characters are moving from spandex to body armor, it's hard to continue to excuse the amounts of skin showing on many female characters.
 Cosplayers are a completely different situation because they are REAL PEOPLE and who can make their own choices. If someone makes a woman wear a skimpy outfit without any choice, she becomes objectified and loses power. If a woman chooses to wear that same outfit because it makes her feel good, she has the power. The freedom of choice makes all the difference! The element of choice is why I have a problem with male artists designing skimpy female outfits, but do not have an issue with cosplayers creating and wearing those outfits. I often see cosplayers of both genders tweak character designs to be more flattering or comfortable for them to wear in public. Sometimes their self-expression means adding fabric to make it more modest, sometimes it involves showing more skin. Neither choice is "better" because it all depends on the individual cosplayer. Original designs are just as valid a form of cosplay as exact replicas of character outfits.
 These pictures are a great artistic exercise, and I love the conversation they have started on this topic. That said, I'm not a huge fan of all the designs. I think Electra is amazing and easily my favorite, with Psylocke coming in a close second. Many of the designs are very interesting, but I'm not a fan of the baggy look that many of them are sporting. The khaki pants on Wonder Woman don't seem to match the rest of her design, but I really like how he altered the upper half of her outfit. Michael has a great artistic style that shows the unique personalities and beauty of each character, without focusing on their ass-ets.
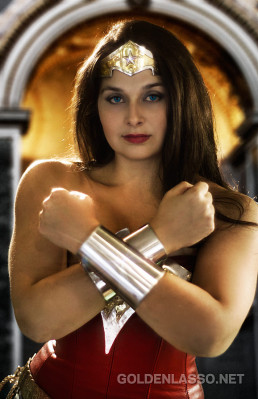
WonderCon!
I made it safely back from Scotland! I had an amazing time, saw beautiful places, drank too much, and lost a few pounds (haha... get it... they use the UK pound.... sorry). I have several great posts in the works and am ready to catch up, but first...
 WONDERCON!

I will be attending Wondercon on Friday only, due to Renaissance Faire obligations. I'll be dressed as Wonder Woman at a convention for the first time since 2011! My armor is all polished and my golden lasso is ready!
For those of you who haven't attended WonderCon, it's a wonderful event and I highly recommend it to old-school convention lovers. It's growing fast, but is usually compared to SDCC before it became the pop-sensation that it is today. It's much smaller than SDCC and that leads to really great interactions between fans, creators, artists, cosplayers, and staff. The parking can still be difficult, but it's do-able and there are probably even hotels still available in the area if you decide you want to head down there this weekend. It's also right down the street from Disneyland, so it's a great weekend destination for the whole family or Disney-lovers. The convention even arranged discounted Disney tickets for convention attendees!
For all my panel-loving friends, I highly suggest attending The Psychology of Star Trek vs. Star Wars, Friday at 1:30pm. Dr. Andrea Letamendi, you may know her as the Huntress from my Steampunk DC group, is an amazing panelist and is sure to make a great case for Star Wars! Brian Ward, the steampunk Green Arrow and copper-working genus, is going to be refereeing... er... moderating the discussion.
I hope to see you there! Follow me @GoldenLassoGirl to find me or to get in touch!
Do-It-Yourself: Steampunk Weapon
Prop making is one of the most challenging aspects of cosplay and costume making. For this tutorial, I will be showing you how to modify a plastic toy gun into a Steampunk grapple gun. I wanted to do something very specific for my Steampunk Batgirl costume, but you can use many of these techniques to modify other plastic weapons. It also happens to be my favorite part of any costume, and something that I don't get to do nearly enough. The details of a prop can really push a costume to the next level, especially when it comes to Steampunk!
Step one: Choose your Weapon
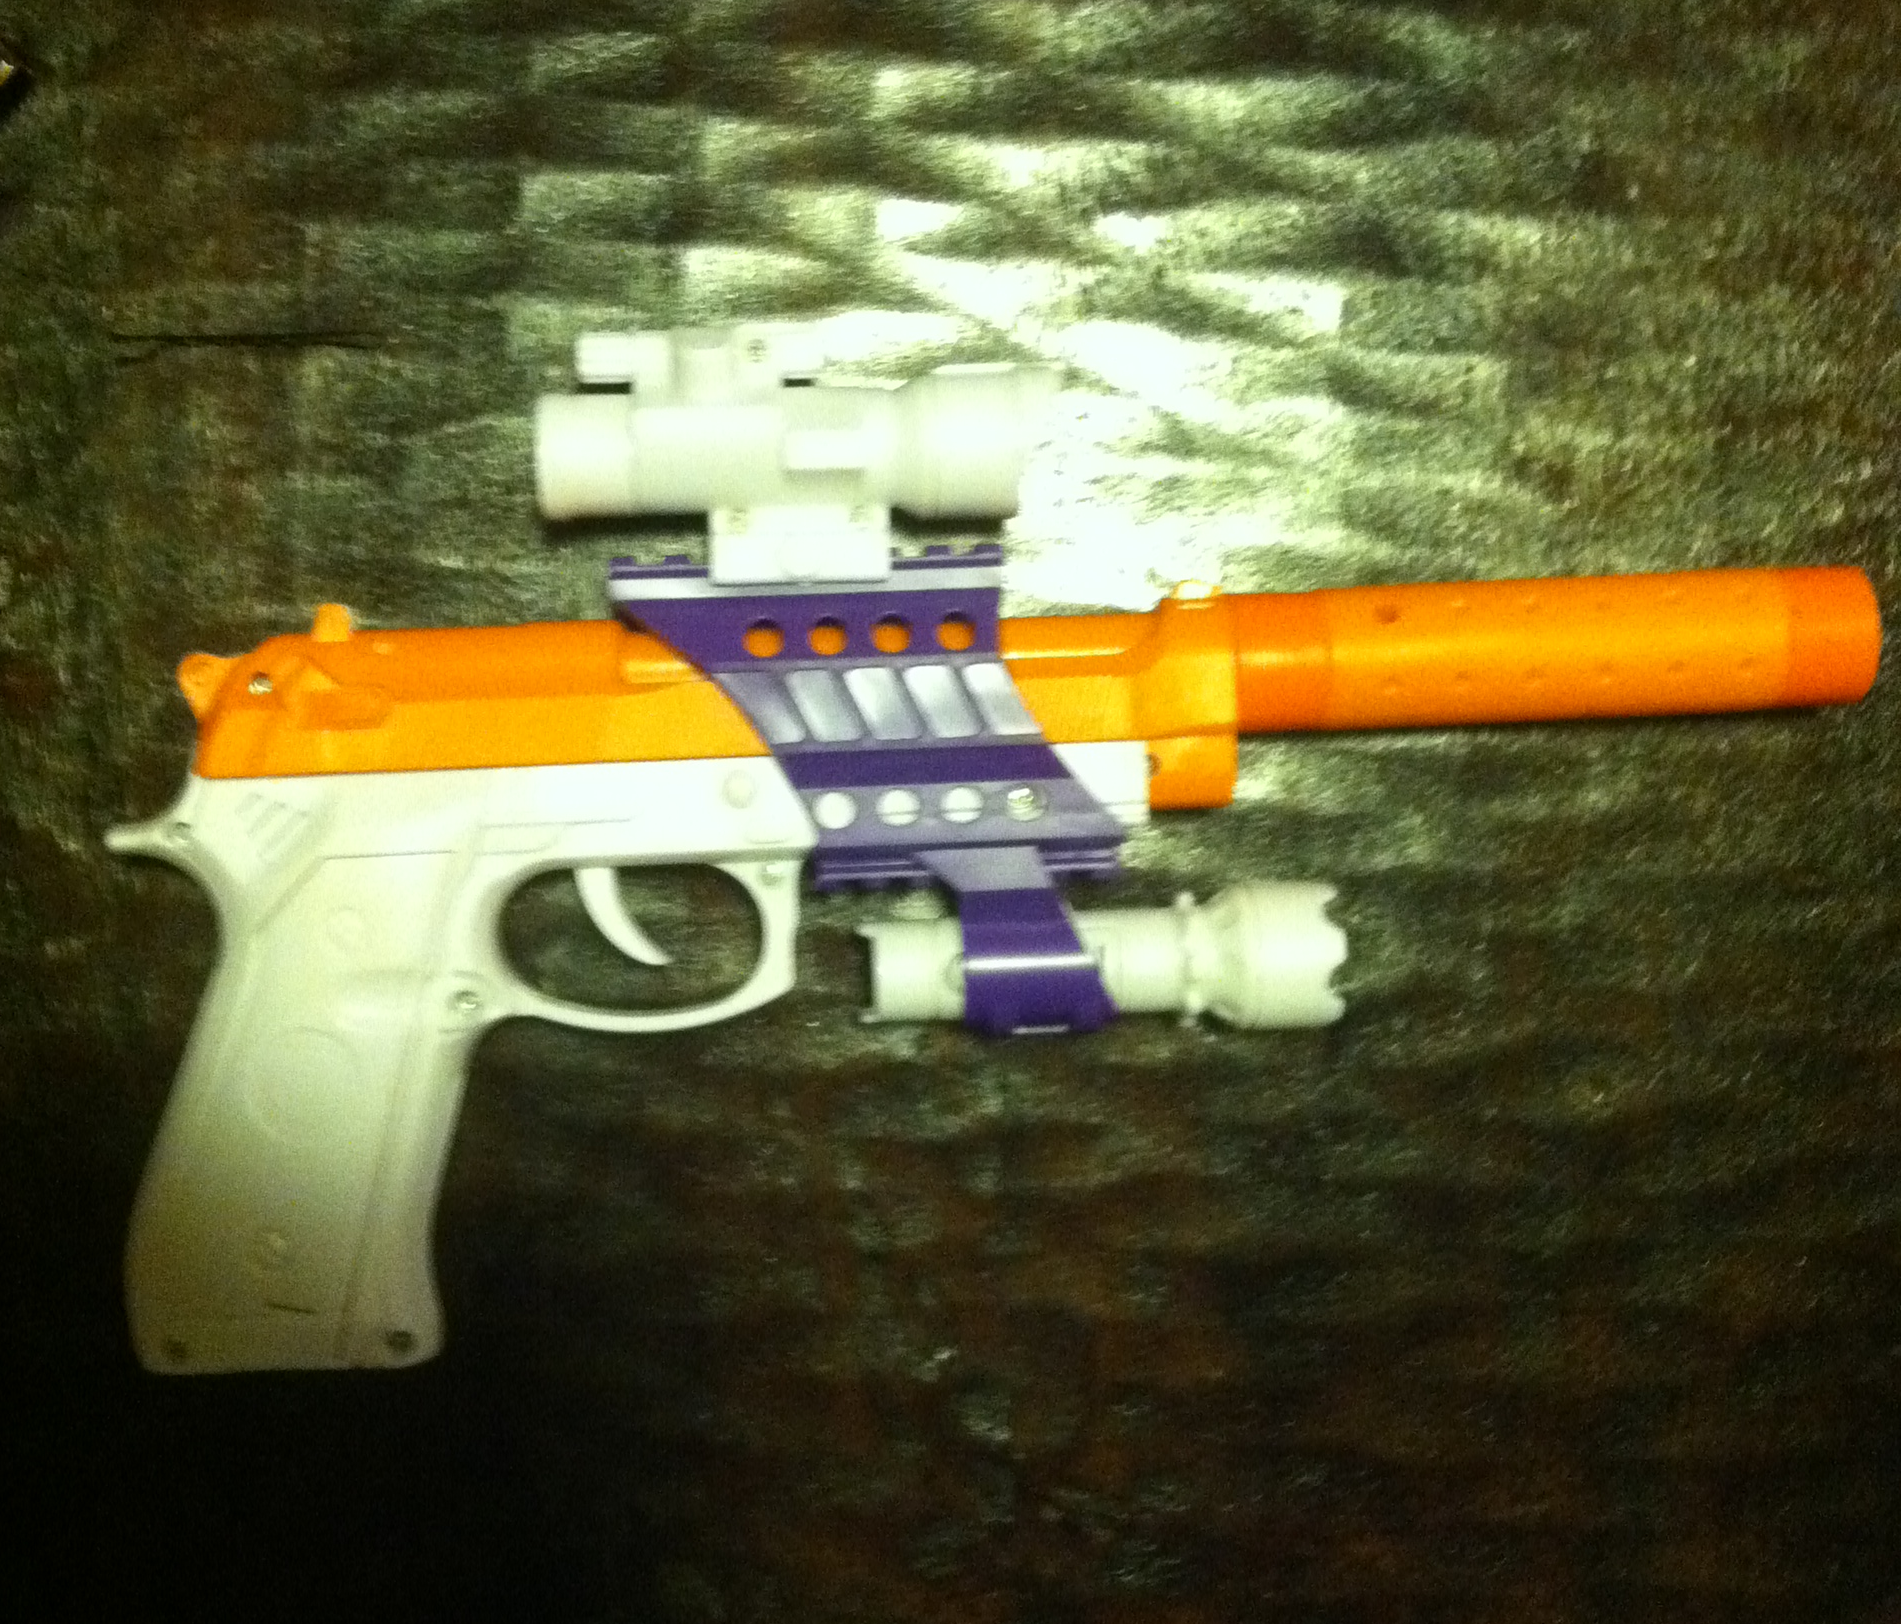 The first, and most important step of making a steampunk weapon is choosing the toy weapon you are going to modify. Take your time. Plan out exactly what you want and don't give up until you find it! Walk around the toy isles, shop online, and check out local Goodwill stores until you find the perfect toy. Don't worry about the color, focus on the shape and how it's built. Avoid guns that are easily recognizable as a specific model, unless that's the look you want (Oops). Make sure the toy is sturdy, that it's made of all plastic (rubber and metal will change how you have to modify it), and if it will be easy to disassemble or mask with tape for the painting process.
The gun pictured is the one I chose. I ended up not using the sights or the silencer that came with it, but the purple details ended up looking pretty cool by the end. Again, color doesn't matter at all.
Step Two: Prep for Paint
This is the most boring step, but it's vital if you want a good looking product by the end of this process. You will need fine grain sandpaper and dish soap. Carefully sand away any imperfections on the gun, without taking away too much or leaving scratches in the plastic. The goal is to make the gun as smooth and realistic as possible. Again, don't worry about the color of the gun, just focus on the texture of its surface.
When you have finished sanding the gun, wash it in normal water and dish washing liquid. You will have to wash your gun with damp rags if it has electronic parts and can't get totally wet. Be sure to rinse the gun thoroughly so soap residue doesn't mess up your painting later. Dry it with a rag and wait a few hours to insure it's completely dry before moving on to Step Three.
Step Three: Primer
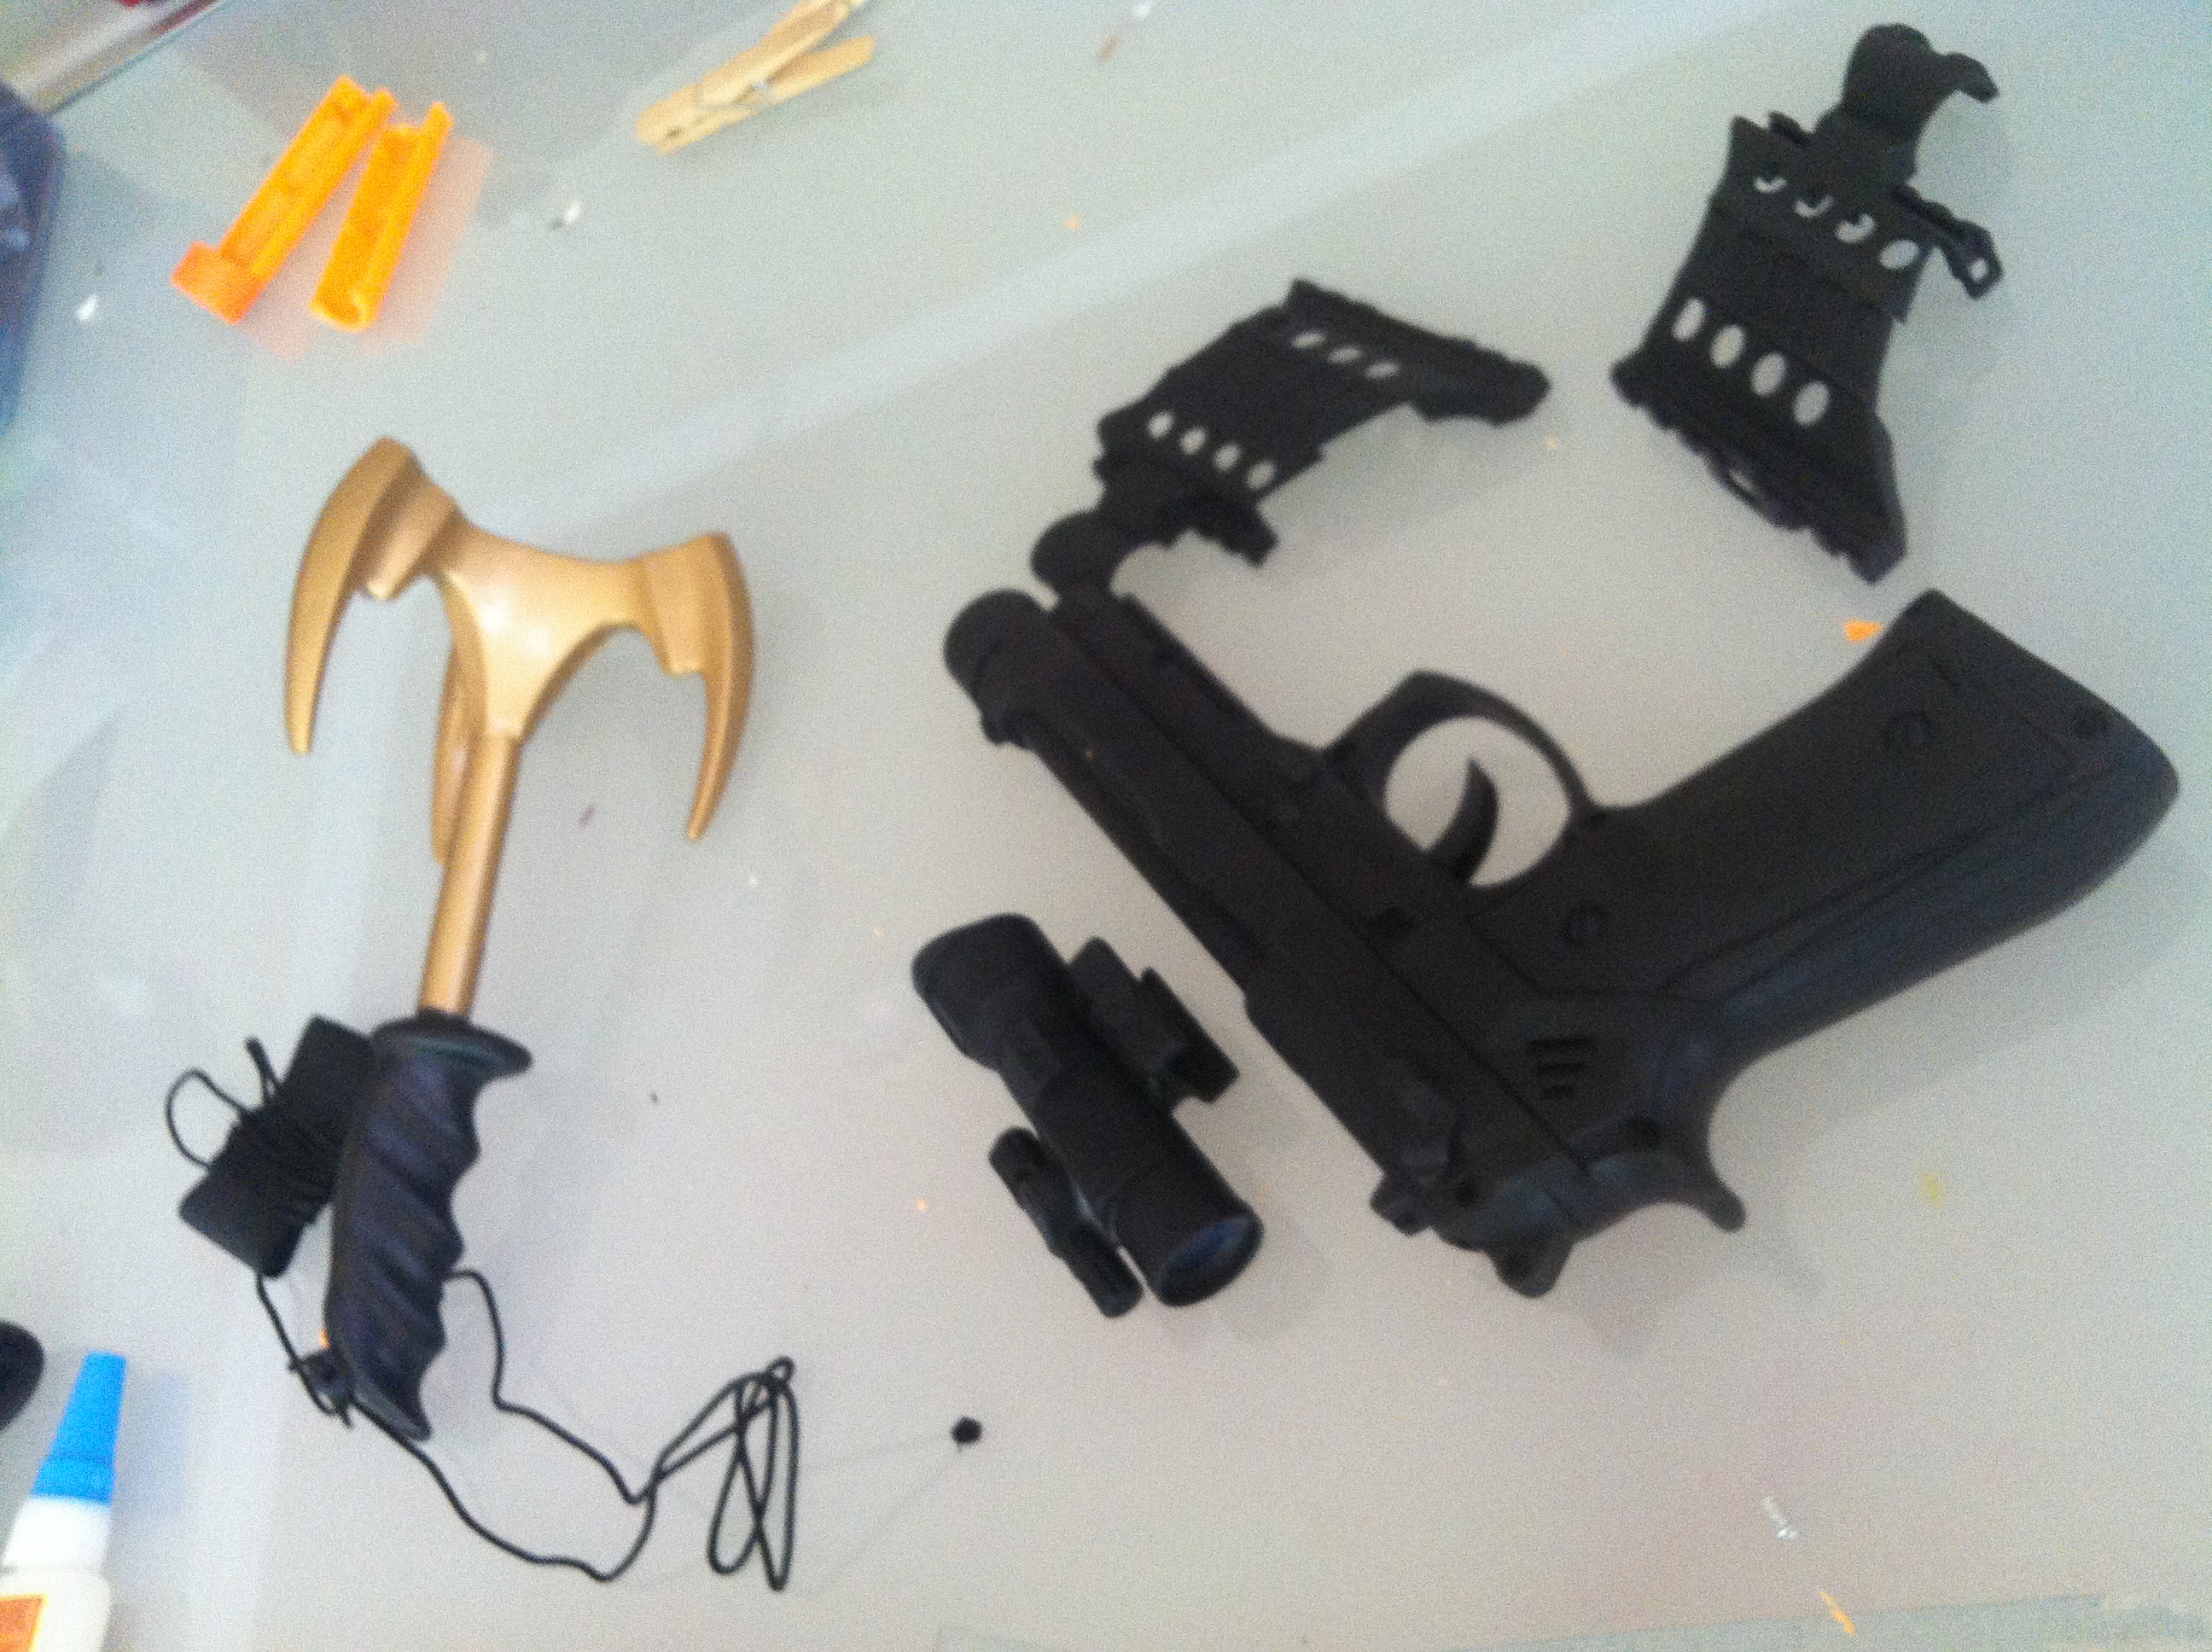 Be careful not to handle the gun too much before you paint it. Oils from your hands can impact the paint. I always use Krylon Fusion spray paint for plastics. For this project, I used black paint with a satin finish.
Take care to keep the spray can at least a foot from the gun and spray a thin layer of the paint, don't worry if you still see the original color through this first layer. Let the layer dry completely, and then add another. Keep adding thin layers until the gun is completely covered. MAKE SURE that each layer dries completely before adding the next, and that the layers stay thin, or you will get drips that ruin the look of your gun.
My gun ended up looking VERY modern and recognizable with the black primer on it. I was really worried by this point, but kept on going. Notice I painted all the parts just in case I decided to use them later. (The grappling hook is part of Step 5.)
Step Four: Metalize
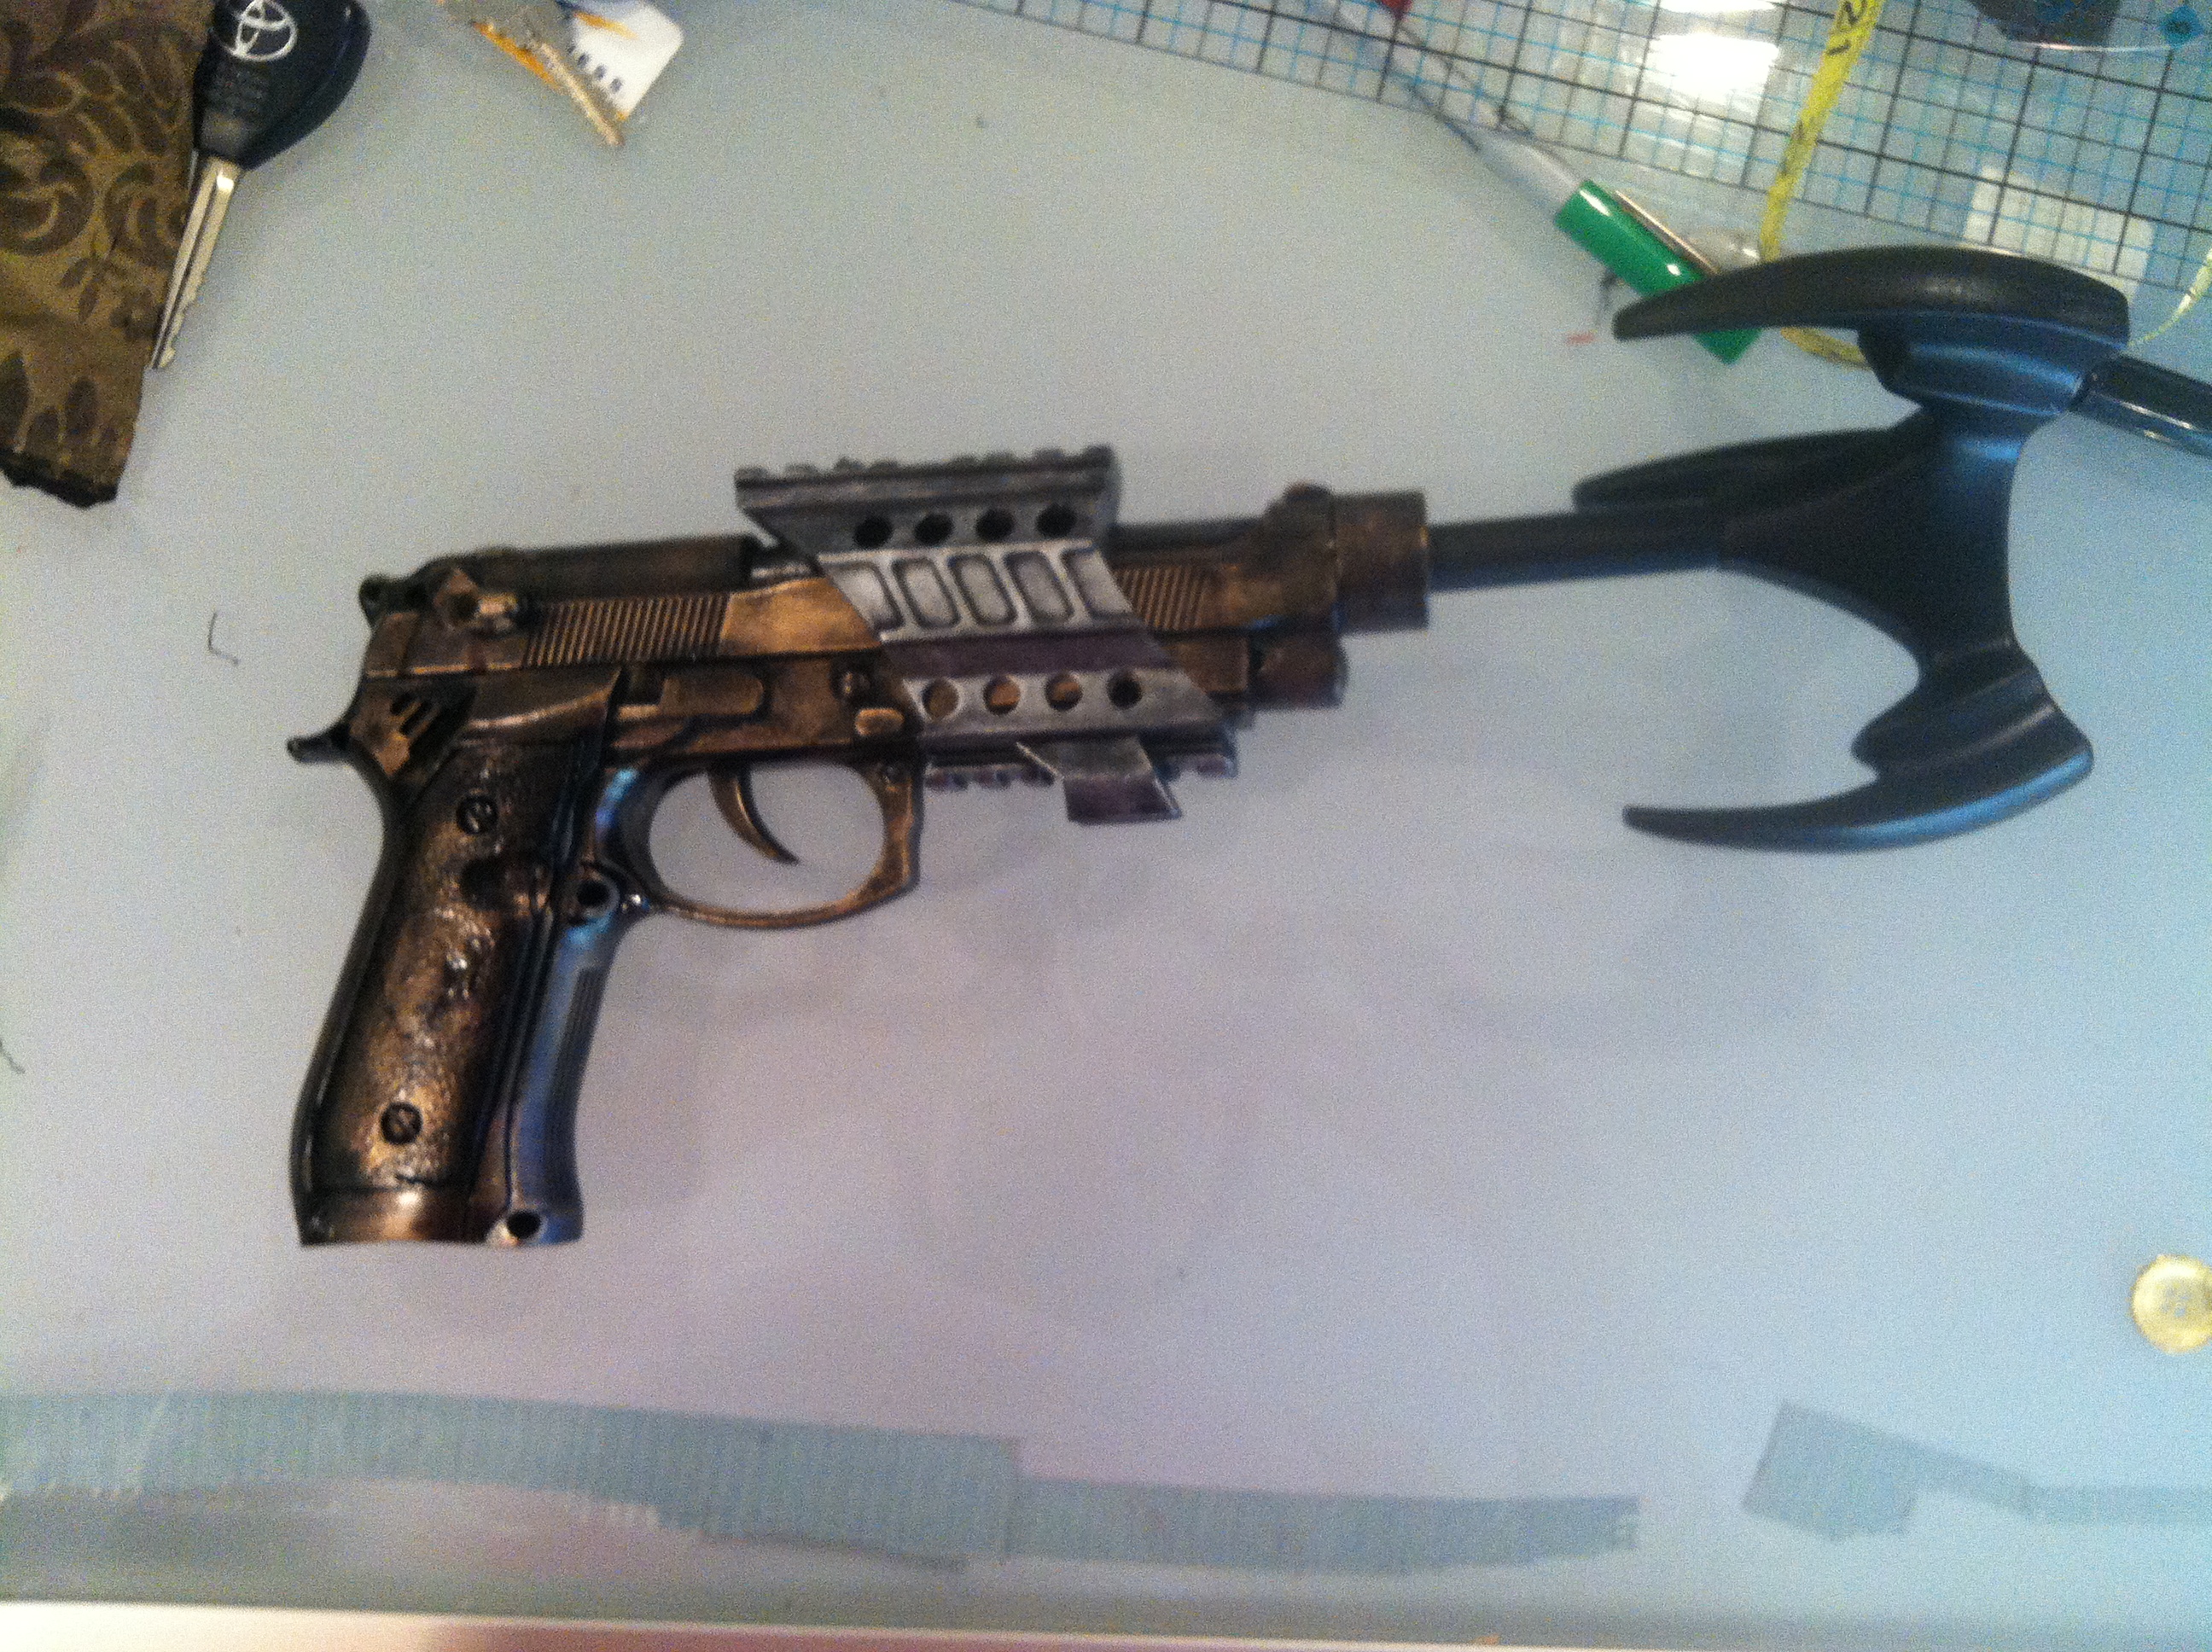 You will need an amazing substance called Rub-n-Buff to make the gun look metallic. It comes in small tubes, but don't let that fool you, a little goes a LONG way. It comes in tons of colors, I used the silver shade and the antique gold for my gun. Different metal looks all put together in one weapon really make something look steampunk, so don't hesitate to use two or three different colors on the different parts of your gun.
You are going to use the Rub-n-Buff to highlight the metal areas of your gun by hand. This of it more as a polish than a paint. Put a small dot of it on a smooth cloth, then carefully start applying it to your weapon. I HIGHLY suggest you practice on something else first to get a feel for it. Remember how you slowly added more and more primer paint to your gun in step three? Start with a tiny bit and then add more. I left a lot of black showing in the crevices of my gun to make it look grimy and old. As you "buff" your weapon, think about what parts of the gun's surface would get touched or rubbed against things the most. Those areas should be the brightest and the crevices should stay darker.
Let the Rub-n-Buff dry for a few hours. It is wax-based and rubs off on everything while wet, so be careful!
Step Five: Customize
This is where you get to let your creativity run wild! My steampunk weapon is a grapple gun, so I will tell you what I did to stylize my weapon in that manner, but don't limit yourself! Do a Google image search and get inspired.
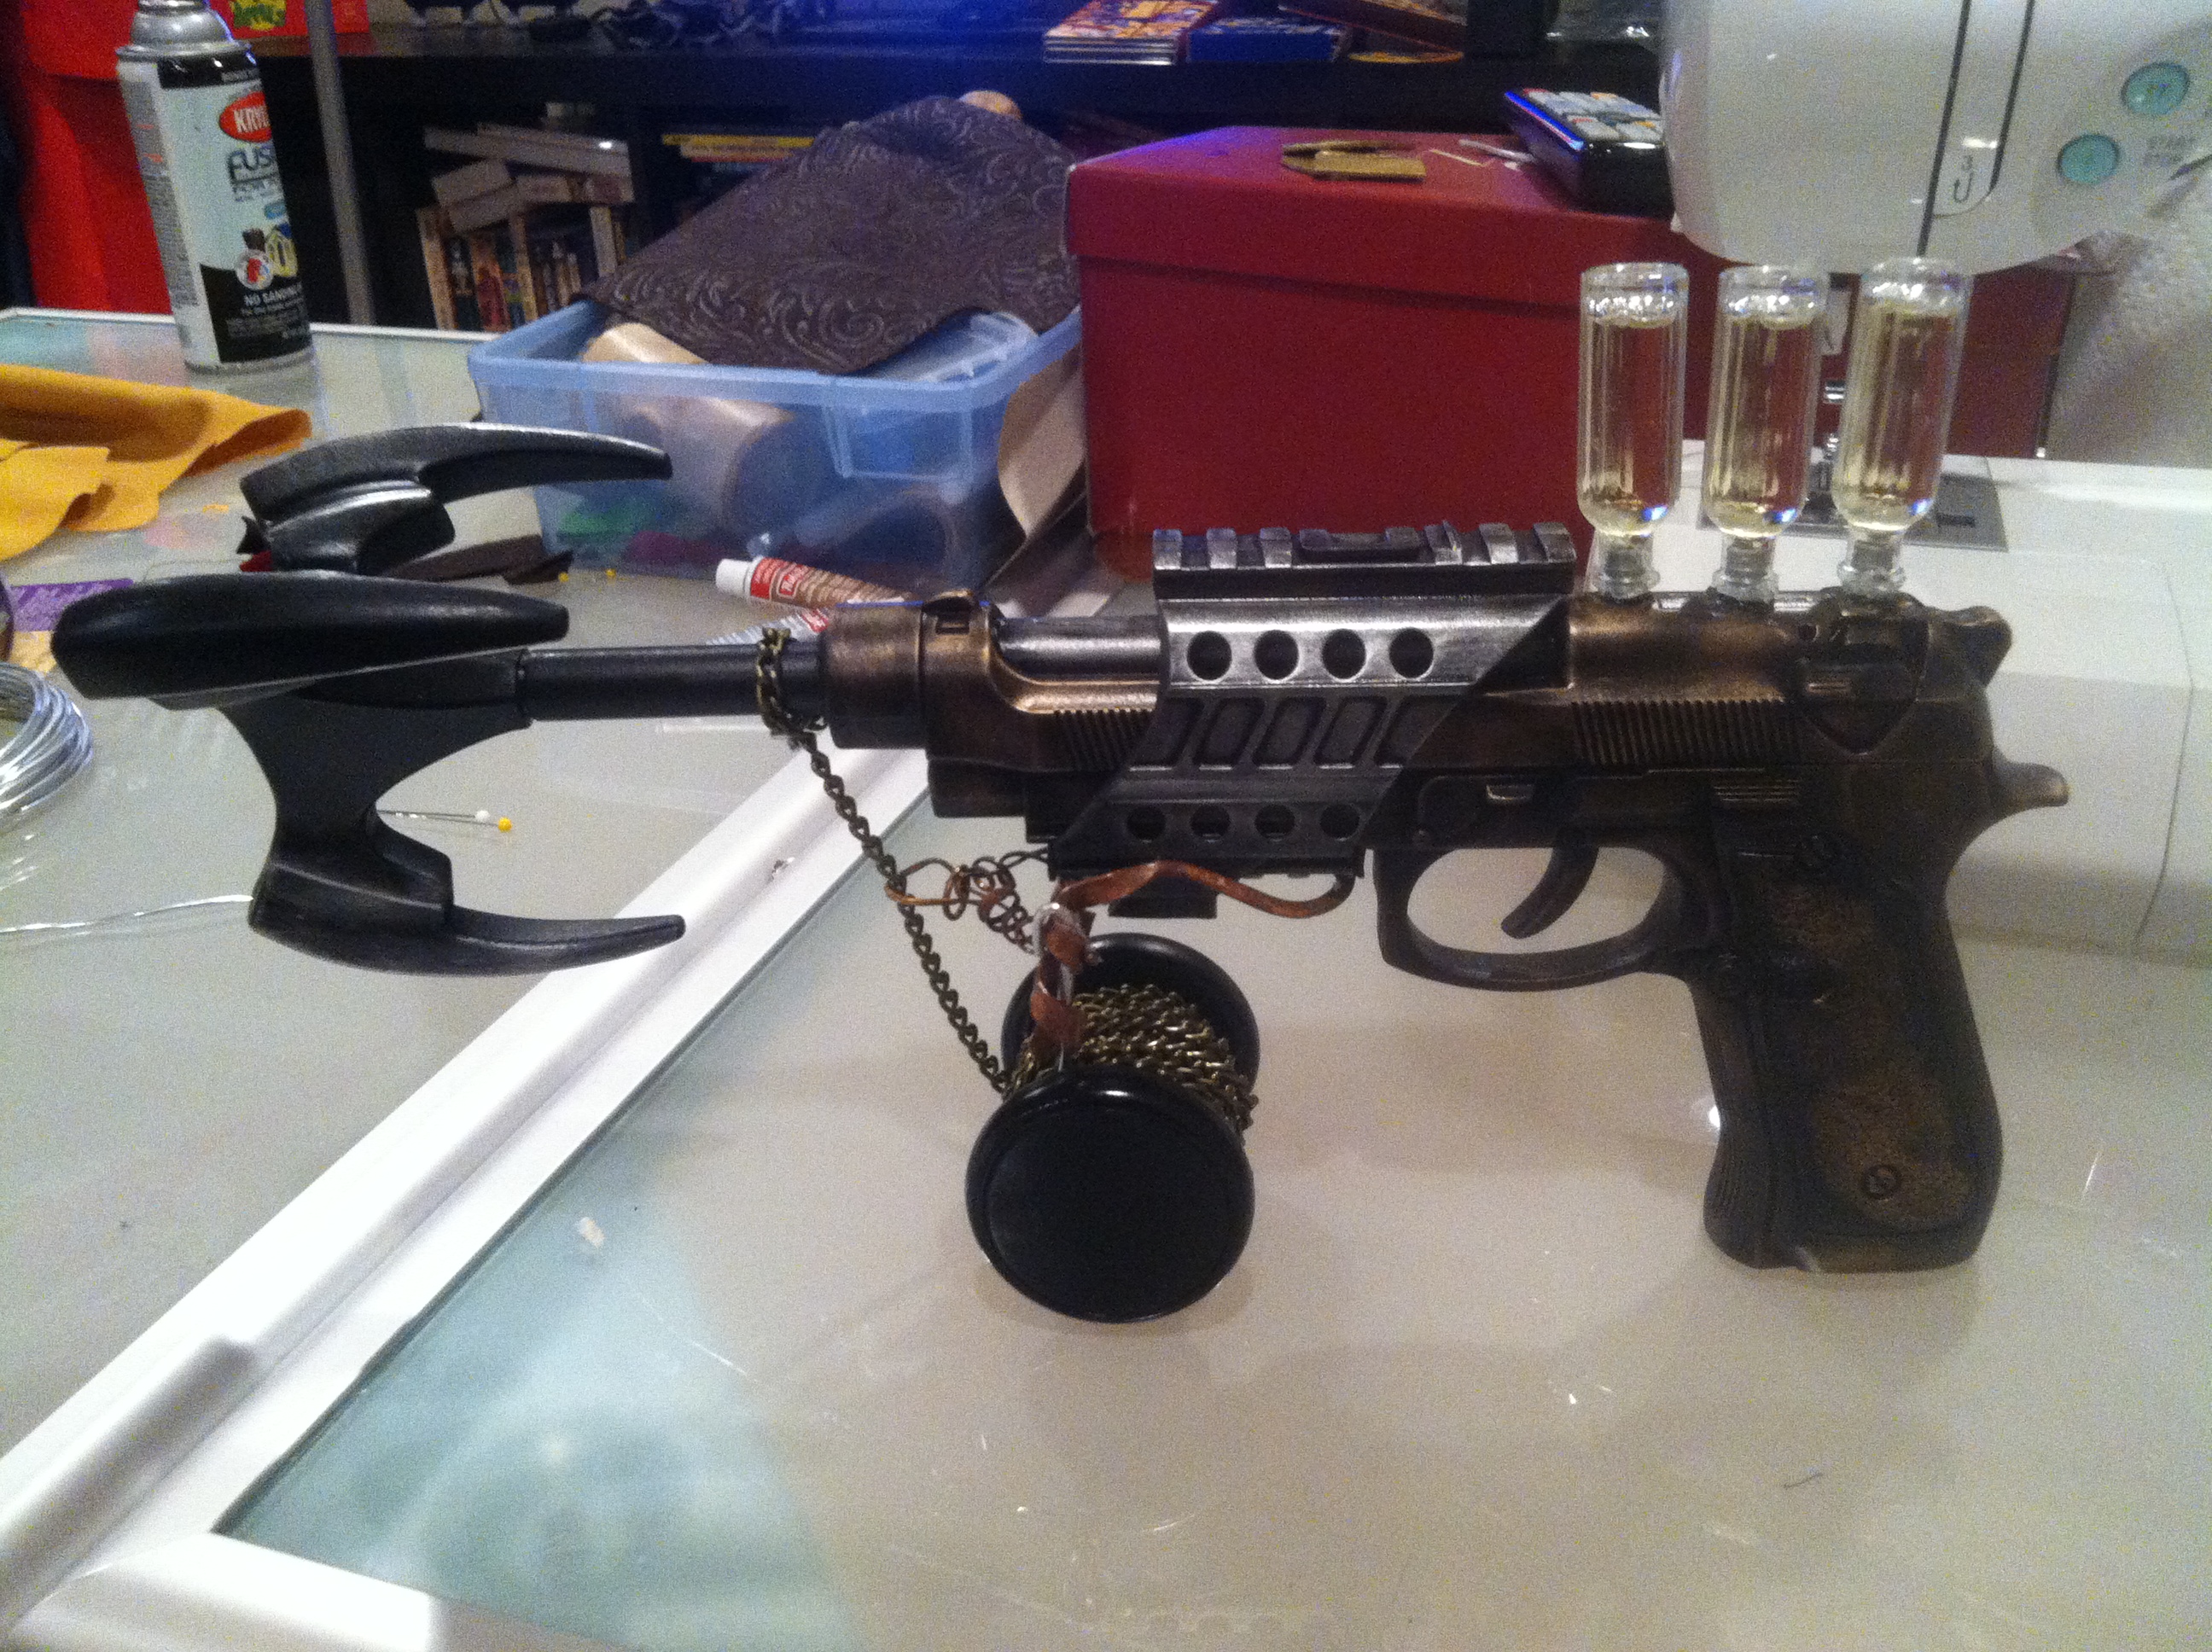 I bought a toy Batman grappling hook to go with my gun. I painted it black, using the same method described above, and then used a slight brush of Rub-n-Buff to give it a little bit of a metallic reflection. I cut off the handle of the grappling hook and glued it into the barrel of my gun. I lucked out and it fit perfectly. I attached very thin black chain (I think it was supposed to be used in jewelry making) to a Yo-Yo and wrapped it around until it looked like a convincing spool for a grapple gun. And finally I used thick copper wire to make a rigging to attach the yo-yo to the bottom of the gun.
I wanted my gun to have cool chemical chambers on it, so I started testing the cleaning liquids around my house in small bottles I bought at Micheal's. I ended up settling with Murphy's Oil (the kind you use to clean wood) because of its cool amber color and thick consistency. I filled three little perfume bottles with it, drilled three appropriately-sized holes in the top of my gun, and glued them into place. I was careful to glue them in such a way as to permanently seal the bottles as well. Sadly, there was a mishap in my workshop and one of the bottles ended up breaking. I still haven't found a matching bottle to replace it, so my grapple gun only has two canisters of super sticking liquid/super propellent on it.
Seriously, have fun with this last step. Wander around your local craft store or browse the internet and you will find some amazing things to work with! Lights, gears, piping, wood detailing, chemical chambers, moving parts, sound effects, and many other amazing things are possible, but you have to be brave enough to experiment a little.


Kimi's Cosplay Interview for Examiner.com
 I was interviewed by Examiner.com about cosplay, gaming, and how the two are linked. Read up to get the inside scoop on my upcoming cosplays, my dream cosplay, cosplay advice, my favorite alcoholic beverages, and more!
Special thanks to Claire Broderick, the gaming writer for Examiner.com who came up with such great questions!