Do-it-Yourself: The Perfect Cutting Table
The perfect cutting table is a dream for many crafters and DIYers, but sadly, professional cutting tables are expensive! However, you can adapt your existing tables to be the next best thing by adding a top to them for only about $50! These table tops are made of material that pins can be put directly into to hold your fabric and crafting materials securely in place.
Step 1: Measure your table space!
My tables were 4ft x 8ft. Pushed together they were almost exactly 8ft x 8ft.
Step 2: Visit your local home improvement store!
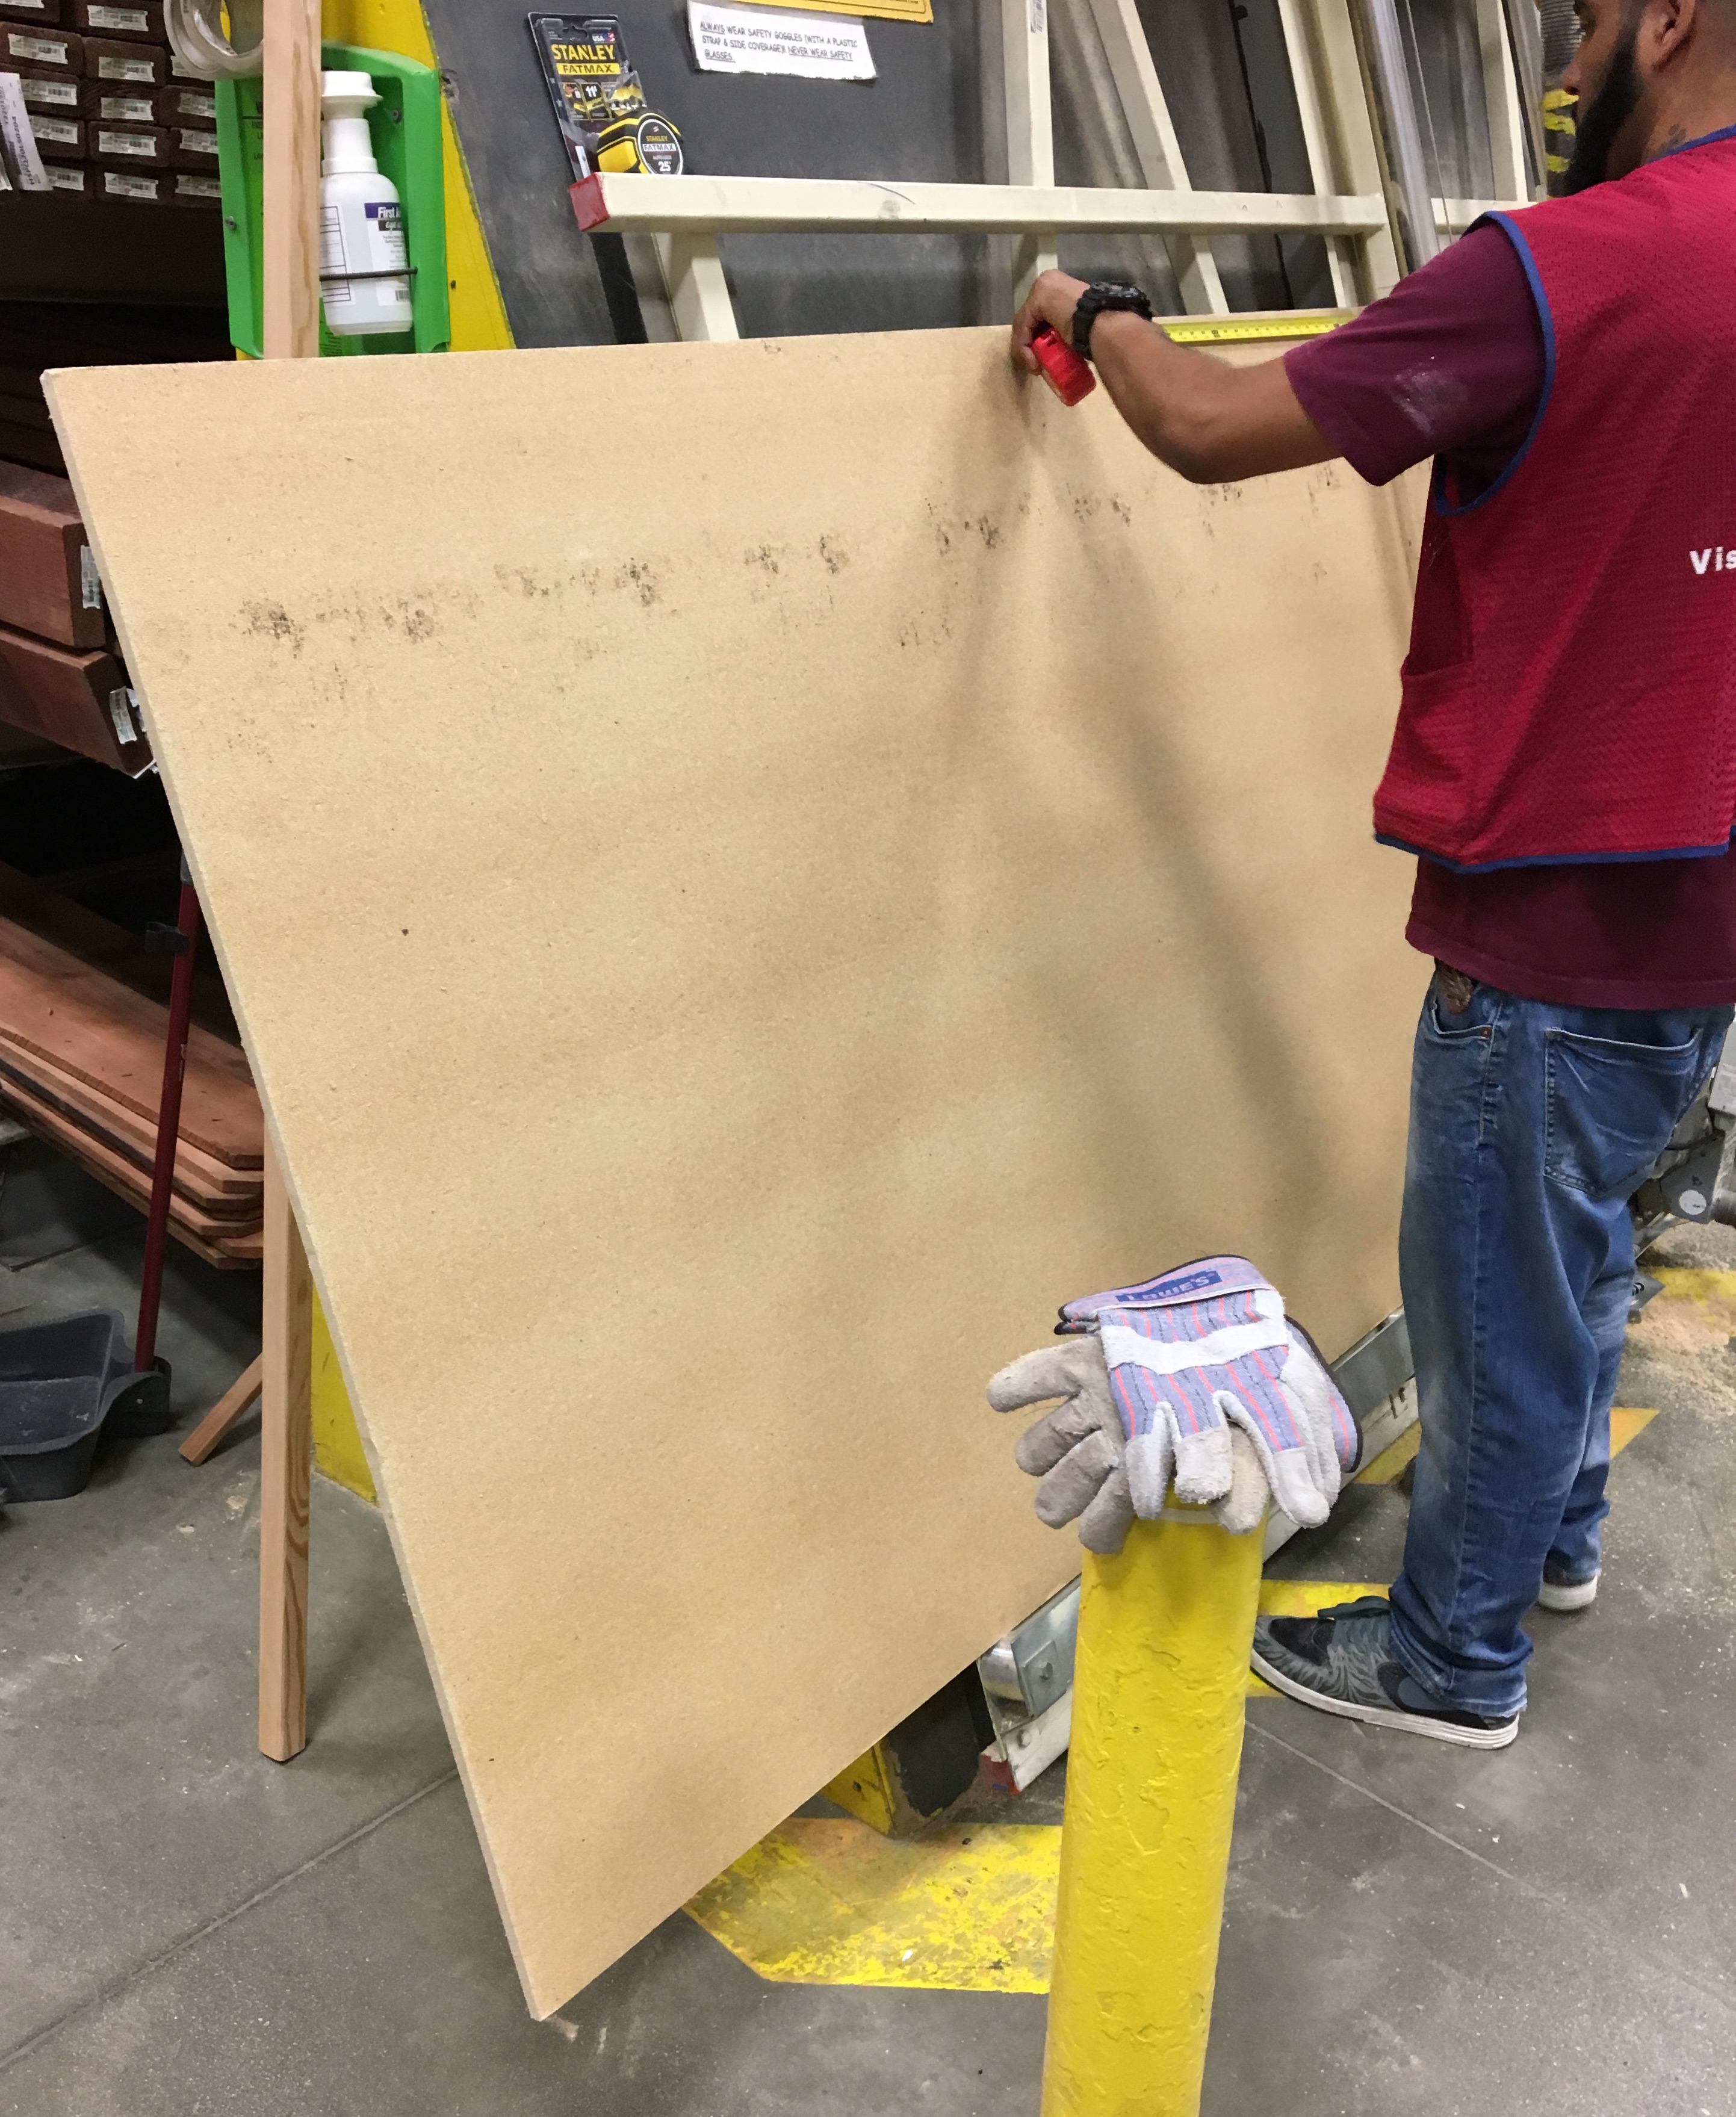
You are looking for large boards of insulation called homasote. (That is the brand name and the store employees should be able to direct you to the same material under a generic name. Think Kleenex vs. facial tissue.) This material is a fiber composite, and has a consistency and weight similar to cork board, but more heavy duty. It's generally tan in color but one side might be painted.
It costs around $20 for a 4x8 piece. Make sure you buy enough to cover your desired space, and have the store cut it into the right shapes to fit on your table AND fit in your car. (Trust me on that last part... doh!)
Step 3: Get the board in place!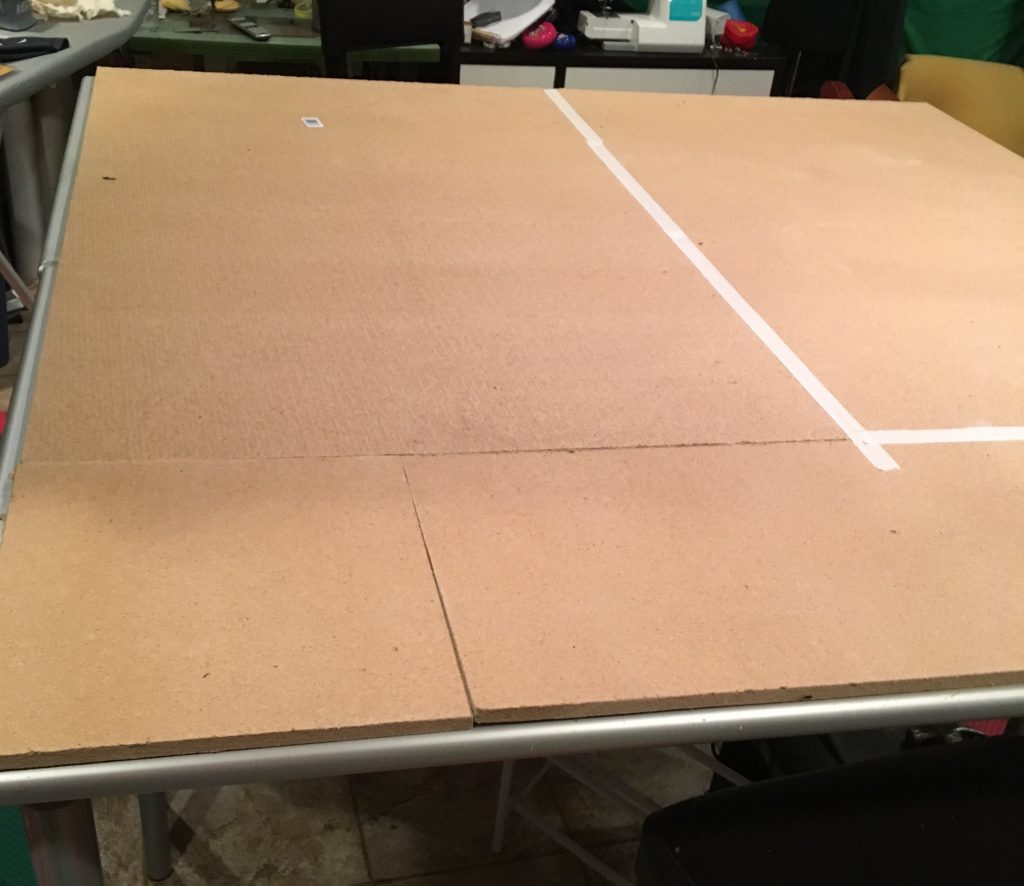

Lay the pieces out to cover the table, then use heavy duty masking tape to cover the seams and keep the boards together. Use the tape to seal the edges of the board to the edges of the table to keep it from slipping around. (DON'T GLUE IT DOWN! You want to be able to easily replace it if something happens!)
 Step 4: Cover it!
The best material to use is tag paper. It's easy to get and cheap to replace if you want a clean work surface. Butcher paper can work as well but won't hold up as well. Use the masking tape along the seams of the paper to finish off the table and give yourself a smooth work surface.
YOU'RE DONE! :)
Have fun with your awesome new cutting table!
Do-it-Yourself: Easy Metal Etching
A simple, safe way to etch designs into metal costume and cosplay pieces. This will also work for metal knives and tools!
Materials:
1 9 volt battery
2 low voltage wires
4 alligator clips
1 cup salt water
Many Q-tips
Electrical tape/nail polish/vinyl sticker
Metal object
Post any questions in the comments below or reach out on social networks! Thank You for Watching! Subscribe if you want more Golden Lasso Girl videos!
Watch More GoldenLassoGirl Videos: http://tinyurl.com/glgvideos
Subscribe to GoldenLassoGirl: http://tinyurl.com/glgsubscribe
Twitter: https://twitter.com/goldenlassogirl
Instagram: https://instagram.com/goldenlassogirl
Facebook: http://fb.me/goldenlassocosplay
Do-it-Yourself: Crafting Safety
Safety is something that many of us slack on when we are crafting! Check out this short video to learn the 5 things you should have to keep yourself safe while creating your cosplay or other craft project.
Post any questions in the comments or reach out on social networks! Thank You for Watching! Subscribe if you want more Golden Lasso Girl videos!
Watch More GoldenLassoGirl Videos: http://tinyurl.com/glgvideos
Subscribe to GoldenLassoGirl: http://tinyurl.com/glgsubscribe
Twitter: https://twitter.com/goldenlassogirl
Instagram: https://instagram.com/goldenlassogirl
Facebook: http://fb.me/goldenlassocosplay

Do-it-Yourself: Metal Armor & Accessories
My first YouTube cosplay tutorial is up! I often am asked about my metal Wonder Woman armor, so I decide it would be a great topic! Check out the video to see how I make metal armor and accessories without power tools and on a small budget!
This tutorial does have some sharp edges! Please use the proper safety gear. Crafters under the age of 18 should only attempt this tutorial with parental permission and supervision.
Materials:
Craft Foam
Scissors/Exacto Knife
Pencil & Sharpie
Aluminum Kick Plate
Aviation Snips (min.18-gage)
Block Sanders
Hammer & Nail
Dremel (optional)
If making Wonder Woman tiara you will also need:
Metal Star
Stain Glass Window Paint
6 inches of 1/4 inch elastic
Adhesive Putty or Double Sided Foam Adhesive Strip
TO ADD THE ETCHED LINES INTO THE METAL USE THIS TUTORIAL: https://www.youtube.com/watch?v=XOQM9kBG2JA
Post any questions in the comments or reach out on social networks! Thank You for Watching! Subscribe if you want more Golden Lasso Girl videos!
Watch More GoldenLassoGirl Videos: http://tinyurl.com/glgvideos
Subscribe to GoldenLassoGirl: http://tinyurl.com/glgsubscribe
Twitter: https://twitter.com/goldenlassogirl
Instagram: https://instagram.com/goldenlassogirl
Facebook: http://fb.me/goldenlassocosplay

Volumizing Your Hair for Cosplay

I struggled for years with styling my long hair. When I started cosplaying, I tried everything to get great "comic book" hair consistently, but completely failed. Some days I looked great and other days I was left with a stringy mess! Finally, I had a hair stylist teach me this trick for getting the perfect sexy hair style every time!
You will need:
- Hair dryer
- Mousse
- Rubber Hair band
- Hair Spray
- Curling Iron
- Aluminum Hair Clips
- Scissors (NOT for your hair)
Step 1: Hair Prep
Start by washing your hair and hand drying it with a towel. It should be damp but not dripping wet. Measure an egg sized amount of mousse in the palm of your hand and work it though your damp hair. Spread it out evenly starting at the roots and moving towards the ends, if you have long hair you may need to use a little extra mousse. Once this is done, blow dry your hair in sections until it is completely dry. Now your blank canvas is ready to begin!
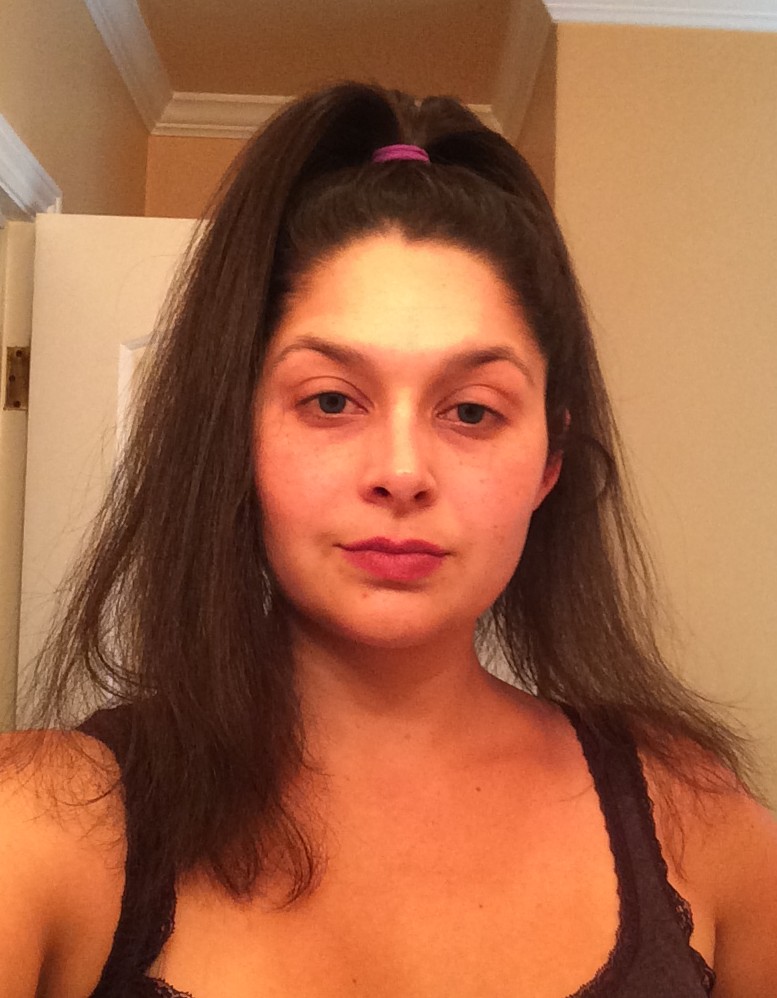
Step 2: High Ponytail
For step 2, be sure to select a low cost rubber hair band. It will get cut later in the process, so don't pick one that you aren't comfortable destroying.
Think 90s ponytail for this step. Bring all your hair up into a tight ponytail on the very top of your head and secure it with the rubber hair band. The tighter you can get it, the better! Give your head a light spritz of hairspray when it's done. (Please ignore the complete lack of makeup in this picture! I was taking pictures for a makeup tutorial that same morning!)
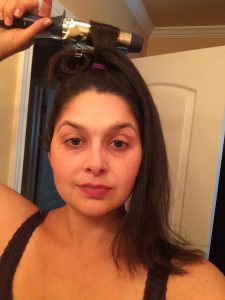 Step 3: Curling

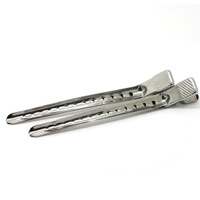 Start taking small sections of the ponytail that you made and curling those sections with a curling iron. The smaller and tighter the curls, the smaller and tighter the waves in your final style will be. Start at the end of the section of hair and curl up to the base of the ponytail. Hold the curling iron there for a moment and then CAREFULLY slide the curling iron out from the center of the curl without unraveling your hair. Don't burn yourself! Keep the hair curled up at the base of the ponytail and hold it in place with an aluminum hair clip (right). Spray each curl lightly with hair spray after it is pinned.
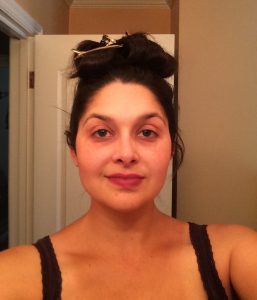 Step 4: Wait

The hard part is done and this is by far the easiest step in the process. Once all of your hair has been curled and clipped around the base of your pony tail, give your whole head one more light dusting with hair spray and then do nothing to it for a while. The longer that your hair is in these curls the longer your style will hold later.
I usually start my beauty prep with steps 1 - 4, then I finish getting ready by getting dressed and applying my makeup while I'm giving my hair more time to set.
 Step 5: Take it Down

Carefully pull the hair clips out of your ponytail and let each curl fall. You can straighten them a bit with your fingers, but don't run your fingers through them or brush them out. Handling them is the deal of the curls!
Once all your hair is down use the scissors to cut the rubber band and let your hair fall. Again, avoid running a brush or fingers all the way through it, but you can shake your head or use your hands to shake your hair until it loosens up a bit. You can also use your fingers or a comb to create a part, if needed. Lock it in with hairspray when you're done! (Woohoo! I have makeup on in these pics!)
 Step 6: Enjoy!

Enjoy your sexy look! Rest easy knowing that you can look this good whenever you want and without spending all morning on your hair!

Working with Photographers
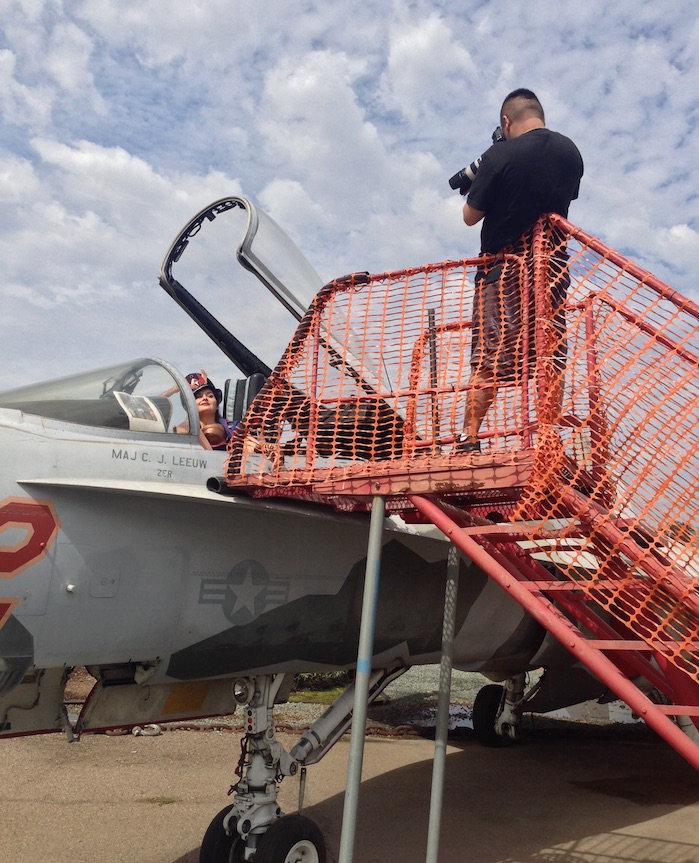
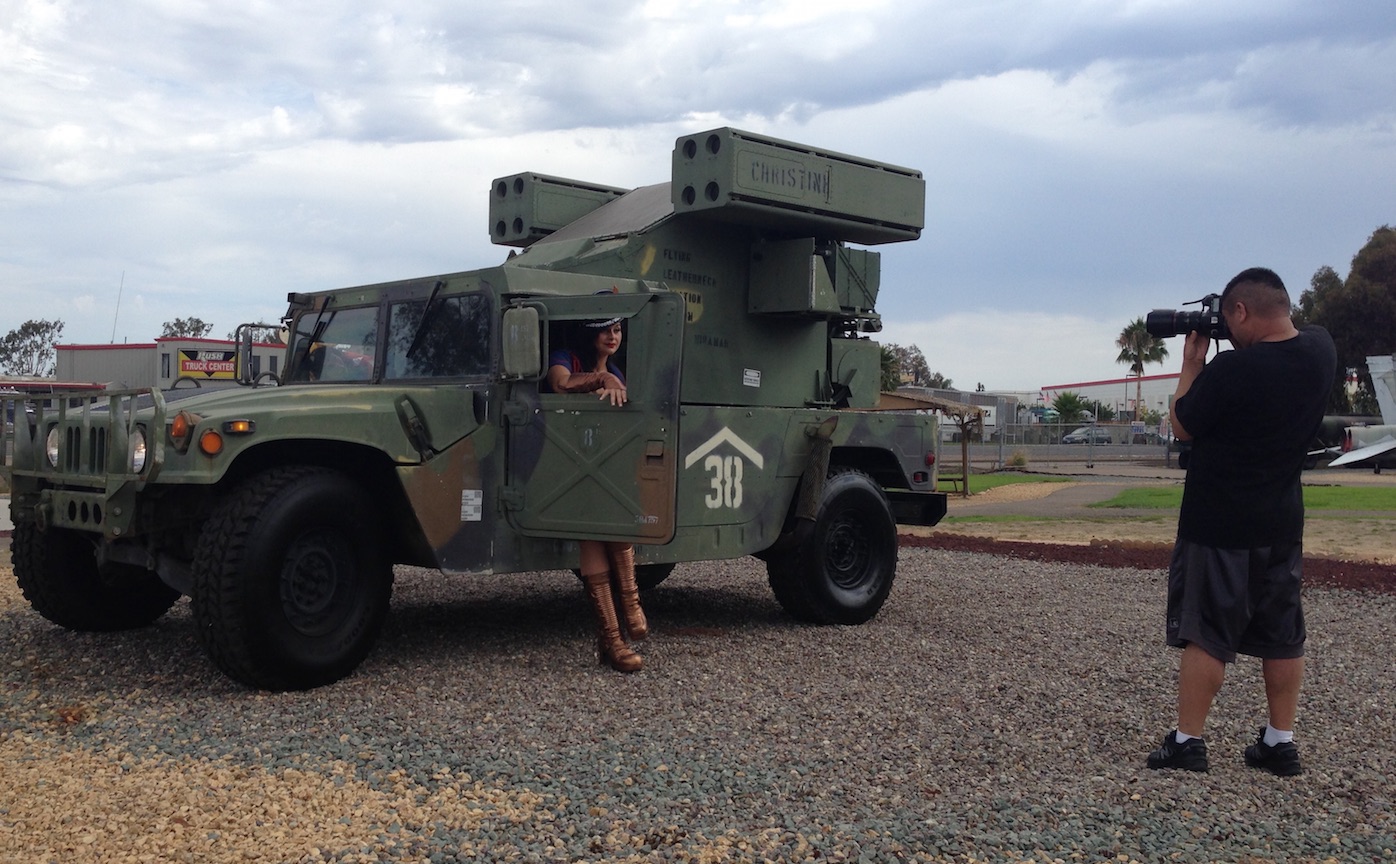
 Photographers are an important part of the convention experience for most cosplayers. Whether it is a prearranged photo shoot or a photog wandering the lobby of a convention, it's important that cosplayers realize that the photographers are artists too. There are rules of etiquette that should be followed while working with photographers if you want to get the most out of your shoots.
Do's:
Label Yourself
Photographers will shoot dozens of cosplayers throughout the day. Unless it's a planned shoot and they know you well, it helps to have a label to remind them of 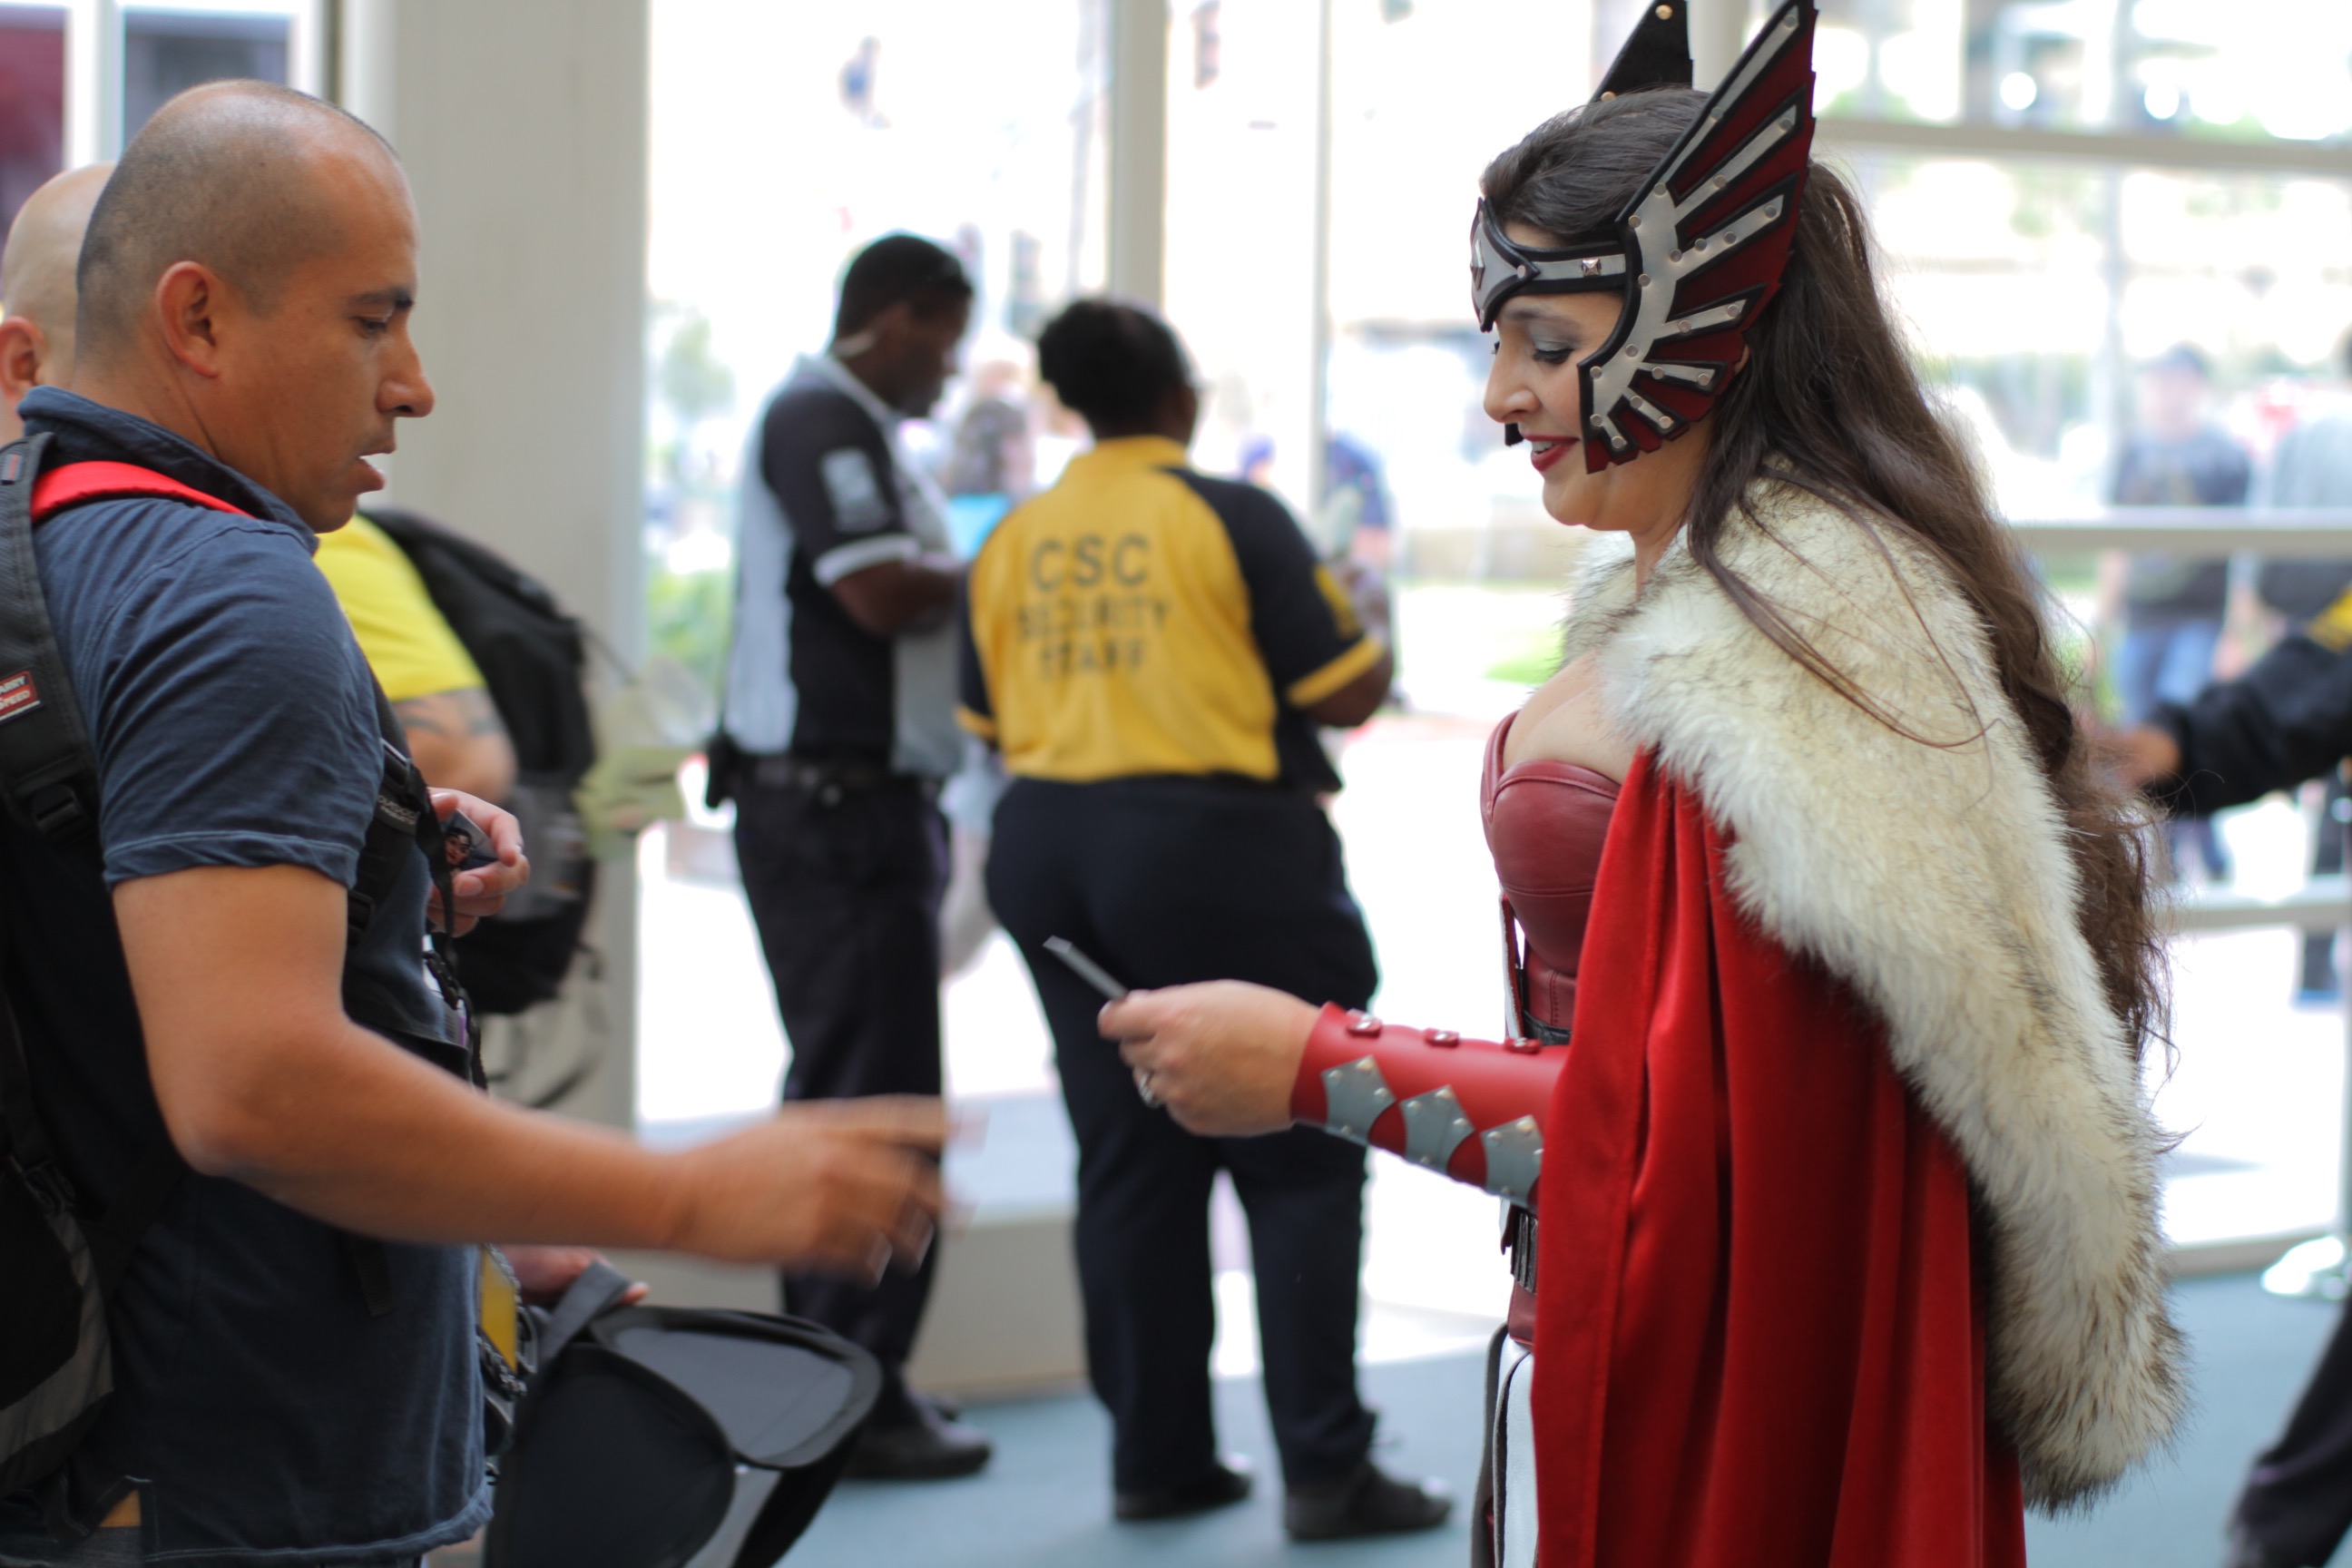 who you are. Asking them to take an extra shot with you holding up your badge or a small sign with your contact info can help them identify you later. Business cards help too, but photographers can have a hard time identifying you when they are sifting through a stack of cards a few days later, especially if your photographed costume does not appear on your card.
Know your Character
Photographers cannot be experts in every character that appears at a convention. It's up to you to know your character and have some appropriate poses ready for photographers in the hall and on private shoots. If a private shoot is happening, tell the photographer a little about the character so they can capture the mood correctly. Pro Tip: Never shame a photographer for not knowing your character. Duh.
Be Patient & Relax
Photo shoots take time and a lot of adjustments. The photographer will probably change the settings on their equipment, move around to different angles, and may even ask you to move or adjust your pose. These things do not mean that you are doing a bad job! Most often, they are working to optimize the lighting or the background of a shot. Let them know upfront if you have a strict timeline, but otherwise, be patient while they practice their art. You wouldn't like it if someone sat next to your sewing machine looking annoyed that you weren't going faster!
Have some Ideas Prepared
 If you've hired or asked for a shoot with a photographer, be sure that you have an idea of what you want from the pictures. Have some locations in mind and schedule it for a time with good lighting. You don't want to waste time wandering around looking for a spot to shoot, or waiting for the light to be right.
Communicate
You are the photographer's partner during the photo shoot. Be respectful, but contribute to the process. If there is a side that you don't want them to shoot, if you'd rather they only get full body shots, if your costume is damaged somewhere and you don't want it in the shot, or if you are running late, let the photographer know! Most of them are really amazing people and will do their best to make you happy.
Know your Rights
In most cases, the photographer owns all the images that they take. Unless you hired the photographer and have a contract saying that you own the images, you will need to get the photographer's permission before using the picture for 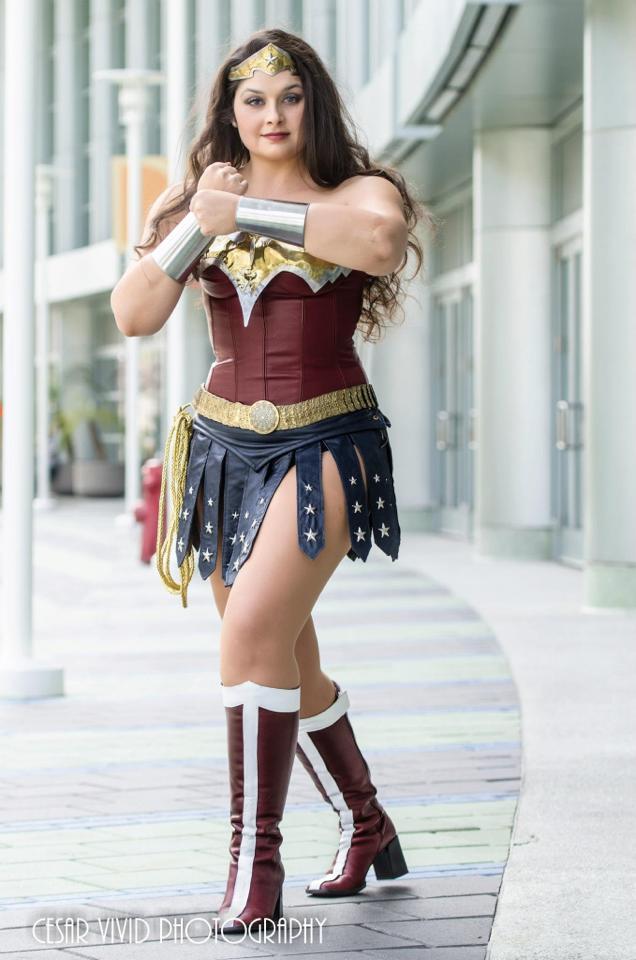 prints, using the pictures to sell products, or for use by third parties like magazines or TV shows. Most photographers don't care if you put the images on personal blogs or social networks, but you should check with them first. (Read this great article by BGZ Studios for a full breakdown of the laws and how they impact photographers and cosplayers.)
Credit the Photographer
No matter where you post or share an image, you should make sure that the photographer is credited with either a watermark on the image or with a caption of some type attached to the picture. There is no excuse for not giving credit to the artist who made the image possible. Be especially careful of this when you share images on Instagram since watermarks sometimes are not able to be fit in the square limit of the pictures! Add a tag and credit in your text!
Don'ts:
Alter Pictures
 The picture is the property of the photographer. Just like you wouldn't want someone repainting your car without asking, it's not right to Photoshop or alter images without the permission of the photographer. This includes cutting out watermarks, changing backgrounds, tweaking the colors, or adding your own watermark. Talk to the photographer before you do any of these things. BEWARE OF INSTAGRAM! The filters and picture proportions there can significantly alter an image.
Change a Planned Shoot without Asking
There is a lot of prep work involved in setting up and planning for a photo shoot and changing details without talking to the photographer can really mess up the final product. Changing a location can completely alter the lighting that a photographer sets up and changing your planned outfit or the number of models in a shot can change what lens a photog needs to use. Don't make changes without giving your photographer some notice.
Leave them Hanging
Life happens. Make sure that you have a way to contact your photographer in case something happens and you will be late or miss a shoot. Wasting their time during a busy convention is one of the fastest ways to insure that a photographer will never shoot with you again.
Ask for Raw Photographs
 The photographer has made the pictures look a specific way because that was their vision. It is their art and you should respect their vision. Don't ask for the raw pictures so that you can edit them a different way. If you're not a fan of their style, then be polite but don't shoot with that photographer again. Note: This is not the same as asking for larger file sizes for prints, etc.
Crash a Shoot
A photographer with a nice setup draws cosplayers like moths to a flame. However, it is very rude to interrupt a shoot to see if you can "be next," or to stand right next to the shoot talking loudly or tapping your foot. Move a little way off and wait patiently. When you see the shoot finishing up, politely ask if the photographer has any openings to shoot that day. Be understanding if the answer is no.
Go off Alone with a Stranger
Most convention photographers are totally legitimate professionals and hobbyists, but an impressive camera does not always mean that the person has good intentions. Never go to an off-site or secluded location alone with a photographer that you don't know well. No professional photographer will object to you having friends tag along to make you comfortable and help insure your safety. TRUST YOUR GUT FEELINGS ON THIS! If something feels off or if a photographer is trying hard to get you alone, STAY AWAY!
Do Anything that makes You Uncomfortable
If you feel uncomfortable with the actions or attitude of a photographer, stop the shoot. Pictures are not worth your pride, or the humiliation that might come later if the photographer is taking advantage of the situation. You are partners with the photographer and respect goes both ways.
Thank you to Photographers Sonny Meas, Deborah Kountz, Dwain Linden, Mike Rollerson, Eddric Lee for their input and contributions to this article. Special thanks to Sam Balcomb for the uncredited images in this article, and to Andrew Ho and Cesar Vivid Photography for appearing in those pictures.
Comic Creators vs. Cosplayers
 Last Thursday, Pat Broderick, a comic artist best known for his work in the 1980s and who recently returned to DC comics, posted this on his personal Facebook page:
todays heads up. If you're a Cosplay personality, please don't send me a friend request. If you're a convention promoter and you're building your show around cosplay events and mega multiple media guest don't invite me....You bring nothing of value to the shows, and if you're a promoter pushing cosplay as your main attraction you're not helping the industry or comics market..Thank you..
He is only the most recent example of comic creators blaming cosplayers for the changes in modern comic book conventions. (See the idiotic comments by Tony Harris and artist Dave Dorman's wife.) I get it. They are frustrated with the convention scene and cosplayers are easy targets. We put ourselves out there, are a little "different", and hold very little real power at conventions so there is really no risk to them when they bash us. But it really hurts when the people whose work we idolize blame us for everything they dislike about conventions, especially when their accusations are unfounded and inaccurate.
I'd like to break down some of the claims that were made by Mr. Broderick. (Please note that I have copied and pasted his statements directly from his Facebook page, errors included. There are too many errors to [sic] every one.)
Statement #1: "You bring nothing of value to the shows"
What about my money? Is that not good enough? When going to a show, 99% of cosplayers pay their own way like any other fan. We pay for tickets to get into the event, we pay for travel and lodging, and we buy stuff like prints, signatures, and face-time with our favorite artists and celebrities. Raymond Lui, a vendor at conventions added a comment to the Facebook thread:
I sell Japanese toys & collectibles at shows, but I've noticed that cosplayers, who one would assume are my target audience, buy the least amount of stuff from me. The regular attendees not in costume are much more reasonable and willing to support the industry...
This is a ridiculous claim. Does he think that cosplayers wear their costumes 24/7? It is difficult to wear a costume in crowds, and carrying bags of merchandise makes it even harder. Most cosplayers take off their costumes at some point and walk the convention floor in comfortable clothes to do their shopping. I can be seen walking the floor in jeans and a tee-shirt at every convention I attend. Unless you are taking a cosplay poll of every customer who walks in your booth, there is no way to tell if someone is a cosplayer or not.
We love this industry. We buy comics, autographs, prints, pictures, clothing, and everything else you can think of when we attend conventions. How is that "nothing of value"?
Statement #2: " cosplay are just selfies in costume, and doing multiple selfies is about the highest expression of narcissium,,,,,"
Mr. Broderick posted this as a comment later in his Facebook thread. Frankly, it's just mean. Is there showmanship and narcissism (notice the correct spelling of that word) involved in cosplay? Of course, but we also cosplay out of love for the characters and to have fun. Most of us will never make any money on it, and we just enjoy bringing the characters to life as best we can. Many of us make appearances at charity events in costume for free! Why is it necessary to attack a group of people for enjoying a hobby? Especially a hobby that celebrates the creative work of comic, anime, and other artists?
Statement #3: "The problem as I see it is the combination of both cosplay and multiple media guest at show. "
![]() This was another comment Mr. Broderick made in the comment thread. What I think Mr. Broderick and many other artists fail to realize is that MANY modern fans were introduced to comic books through other media! I am in my 30s, and I first became a fan of a comic book character through Batman the Animated Series. It's what made me curious about comic books in the first place, and most people my age have a very similar story. We are fans of comics, but we are also fans of other media, and the TWO THINGS ARE LINKED! Why do you think that comic book movies are the highest grossing films in theatres now? Because we love EVERYTHING related to the characters and we have money to spend! We want to go to events where we can see our favorite Batman artists, Batman voice actors, and Archam Asylum video game designers. Having a variety of media increases the appeal of an event.
This was another comment Mr. Broderick made in the comment thread. What I think Mr. Broderick and many other artists fail to realize is that MANY modern fans were introduced to comic books through other media! I am in my 30s, and I first became a fan of a comic book character through Batman the Animated Series. It's what made me curious about comic books in the first place, and most people my age have a very similar story. We are fans of comics, but we are also fans of other media, and the TWO THINGS ARE LINKED! Why do you think that comic book movies are the highest grossing films in theatres now? Because we love EVERYTHING related to the characters and we have money to spend! We want to go to events where we can see our favorite Batman artists, Batman voice actors, and Archam Asylum video game designers. Having a variety of media increases the appeal of an event.
Professional cosplay guests are just a smart move on the part of conventions because they cost the convention very little money (if any money at all) and they make fans happy. What fan isn't excited to see their favorite character come to life? Disneyland figured that out long ago! What's important to realize is that less than 1% of cosplayers are professionals who get any support or help from the convention. Most of us are just dorky fans paying our own way just like everyone else.
I will say that I agree that comic books are getting less and less space on convention floors, and I don't like it. There needs to be a balance of media, and while I know that the big studios can afford more space than any individual artist, I hope that conventions will start spreading out the space a little more evenly in the future.
 Statement #4: "To those offended cosplay characters participating in these events, while I admire the efforts and time spent in producing your costumes, well done, but keep in mind that these shows started and continue to be GP rated family friendly events so consider the children who attend with their parents and the uncomfortable position you're putting the parents in with your designs. " - This comment was part of a larger response that Mr. Broderick posted on Saturday.
OUR DESIGNS?? The last time I checked, most cosplayers were bringing the designs of comic/anime artists to life! If the designs are not family appropriate, than how can a comic convention be "family friendly" in the first place? While I do think that cosplayers have a big responsibility to younger fans when they are at a convention, you cannot blame the DESIGNS on us.
 Statement #5: "To those who antiquate their time and investment as an equaled effort to the years artist and writers have put into their trade, that's just wrong and untrue."
Art is art. I have been sewing and creating costumes for over a decade. If I wanted to, I could sell commissioned work. How is that any different than an artist who is drawing for a living? What you do with pencils, we do with sewing machines. It takes lots and lots of practice. I can't wait to see what I am capable of making after practicing for 40 years like Mr. Broderick. Is my time and effort equal to his? Not YET, but I'm working on it.
I think the comic industry is undergoing a major transformation. Is it for the better? There is no way to tell, but I understand that it can be scary for people who depend on comics to make their living. Some creators, such as Gail Simone and George Perez, have embraced their cosplaying fans, and their careers are stronger for it. Part of staying relevant in the industry is learning to adapt to the changing convention culture. In an era where most comic collectors are turning to Ebay to completed their collections, conventions are becoming driven by the personalities that are attending and who can draw fans to an event.
You will catch more convention flies with honey than with vinegar, Mr. Broderick.
- - - - - - - -
UPDATE: A few hours after this article was posted, Pat Broderick posted this as part of a longer announcement on his personal Facebook page:
I am now officially announcing that next year I will be sponsoring the first of what I hope to develop into a 4 show convention circuit. And I can assure you that it will be a con devoted to the industry of comics, I will bring creators and collectors together and promote it to fill the halls.
Now I was planning to make this announcement the first of the year, But anyone who has ever worked in advertising knows that with this I can ride the tide of conversation going on right now... Watch the boards starting in January for more announcements and web site direction. It will truly be family friendly and of course I intend to have a spectacular cosplay event.
Pat Broderick...... Game is on...
Sarcasm? A sudden change of mind? I guess we will have to wait and see.
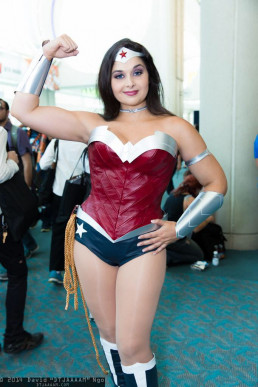
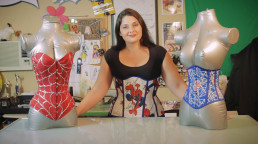
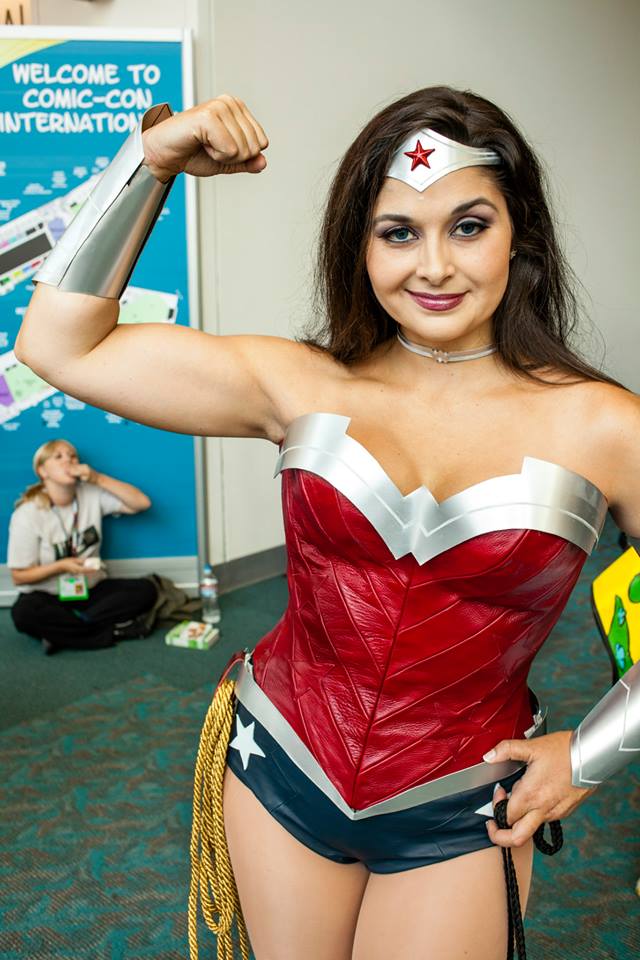
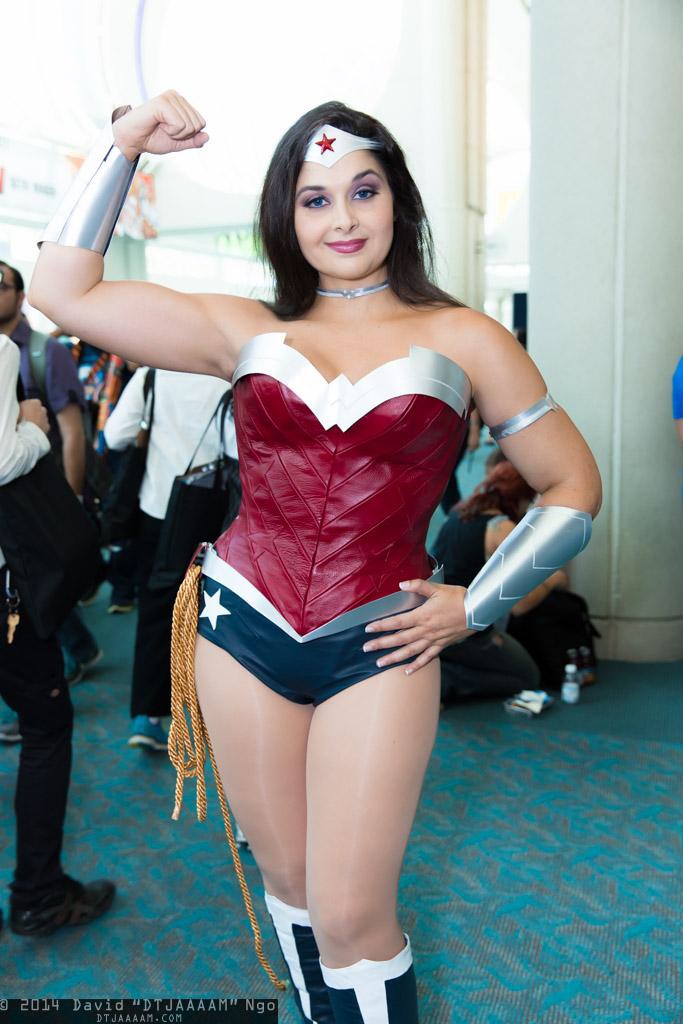
Do-it-Yourself: New52 Wonder Woman Corset
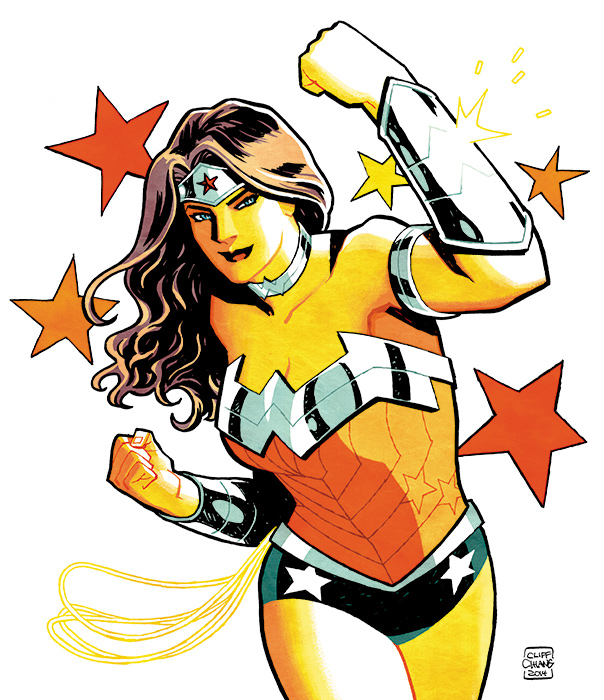 Wonder Woman's corset in the New52 is stunning. The complex chevron pattern combined with stars is intricate and eye-catching. As difficult as it is to draw, it's even more difficult to sew. Chevrons are quite a challenge and are also very time consuming.
Now there are two ways to make this corset, the easier way (still not super easy) and the hard way. The easy way would be to buy/make a corset, then make the straight lined chevrons out of a stretch fabric to cover that corset. I was hesitant to use this method because it can result in the chevrons looking warped as the fabric stretches to match the curves of the body, and because I wanted my corset to look like it was made out of leather.
Thus, the hard way.
Please Note: This is a difficult project that requires pretty advanced sewing skills. You will need to be familiar with making corsets and have a corset pattern that works for you as a base for this tutorial. You will also need a walking foot for your sewing machine if you are using leather.
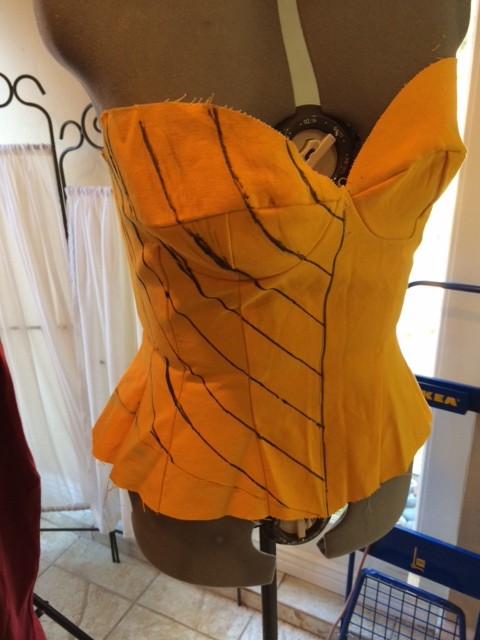
Step 1: Use your corset pattern to make a mock-up. Make sure you use the same type of fabric that you will eventually use for the base of your final corset, I recommend something heavy like duck cloth.
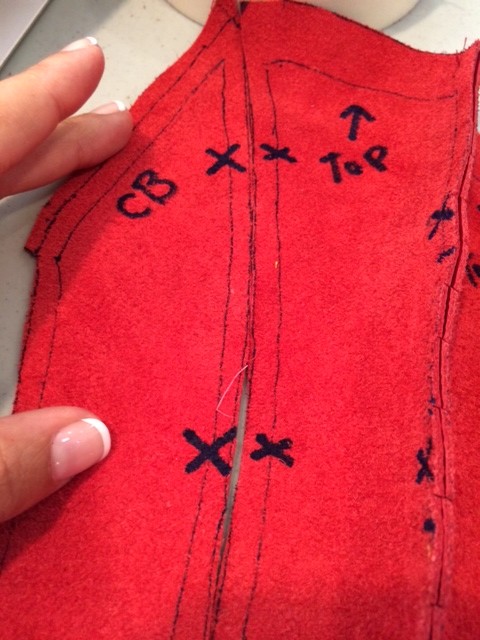
Step 2: Put this mock-up on a dress form, a volunteer, or yourself if you have a friend to help. Then draw chevrons on half of the mock-up. Measure equidistant meeting points on the center front of the corset as a base, then draw out from there. The trick is that these cannot be straight lines drawn with a ruler. You will get a tube shape if you tried to make a corset out of straight lines that would not form to the contours of your body correctly. You have to draw chevrons that form to the body's curves and appear to make straight chevrons. YOU WILL GET LOTS OF FREAKY SHAPED STRIPS. THAT IS OK!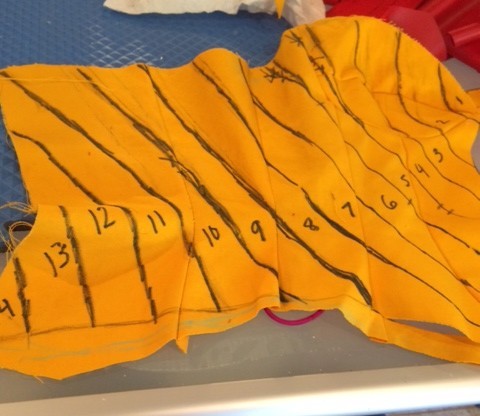
Step 3: Mark the lines on your mock-up with notches and numbers so you can keep track of which order the pieces go in, and where they meet. Cut the mock-up along the lines you drew to create the pattern for your final corset cover. DON'T FREAK OUT AT THE STRANGE SHAPES YOU GET!
 Step 5: Trace your pattern pieces onto your final fabric and add a 1/2 inch seam allowance around each piece. Make sure you have two complete sides for your corset and the pieces for each side should be a reflection of each other. Make sure you copy over the notches and identifying marks onto the BACK side of these pieces. I used leather but other pleathers will work as well. Stretch fabrics will not work and will warp the final product, try the previous method listed above if you want to use a stretch fabric.
 Step 6: Carefully, starting from the top center piece, sew one side of the corset together. Make sure to line up the notches, they are your guide! Now sew the refection side of it together. You should now have two complete halves of a corset cover that are reflections of one another.
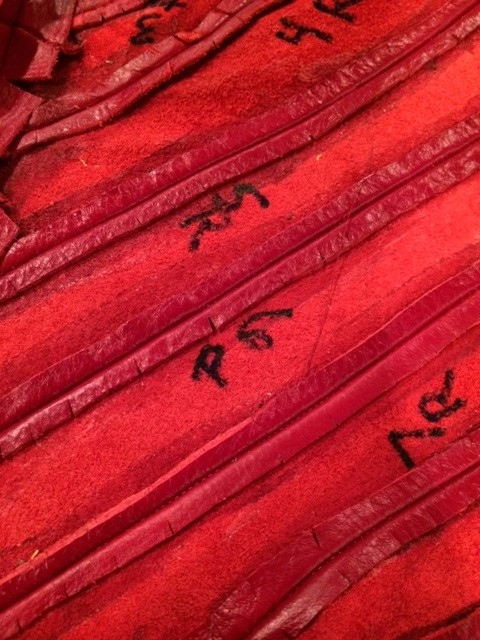
Step 7: Using rubber cement, glue all of your seam allowances flat against the back of your corset cover. Make them all as flat as possible. Flat seam allowances will make your life easier later and make your final product look better! Make sure the glue is dry before moving on to step #8.
 Step 8: Now it's time to make the chevrons happen! Meeting the right sides of the corset center fronts (those are two edges) use pins or tape if you are using a leather-like material to insure that the seams of your chevrons meet up. You might have to do a little manipulating and stretching to make the pieces line up perfectly in the front, but this is a VERY important step. You don't want your chevrons to not line up. Sew them together on the wrong side down what now is the center front of your corset cover.
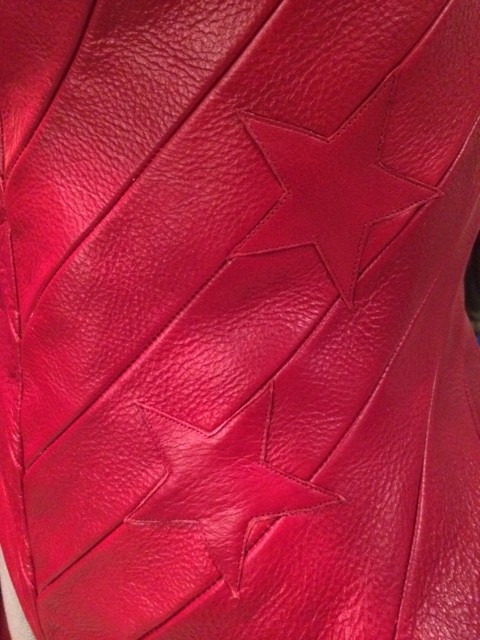 Step 9: The hardest part of your project is over!! Congrats!! Now cut out the stars from the same material as your chevrons, making sure they have the correct proportions to your chevrons. Put a small amount of rubber cement on the back of each star and place it where you'd like it on the corset. The glue will help hold the star in place while you top-stitch it down.
Step 10: Using your corset pattern, make the base corset with metal boning.
Step 11: Again using your dress form, a volunteer, or yourself if you have a friend to help you, put your 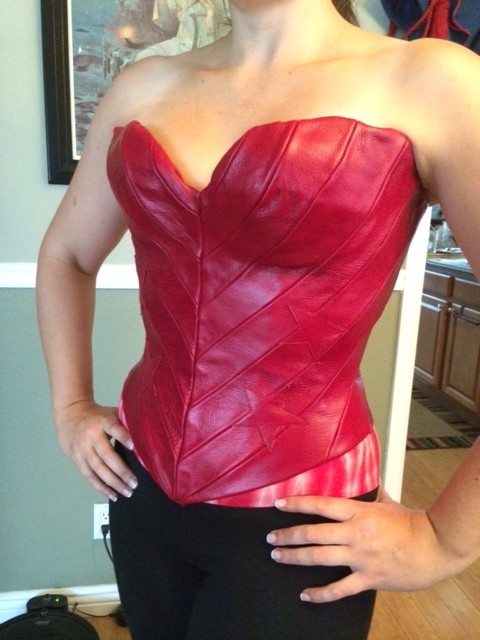 base corset in place. Then, finding the exact center, use bardge cement to glue the center seam of your chevroned corset cover to your base corset. This will keep the center front from moving around. You can also glue around the cups of the corset and along the sides and center back once the front has dried.
Step 12: Hand stitch the edges of your corset cover down on the inside of your base corset. This takes a while and you will definitely need a thimble if you are using leather. Make sure you stitch down all the edges!
Step 13: Grommet the corset.
CONGRATS!! YOU ARE DONE!! Hopefully you have an amazing piece of cosplay art to enjoy!

Ending Convention Rape Culture
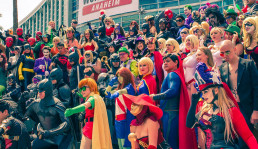
 As the popularity of cosplay has risen, so have the number of assaults and insults that cosplayers suffer at large events. San Diego Comic-Con 2014 just passed, and some of the biggest stories to come out of the event were about an underage cosplayer who was found bloodied and unconscious in costume, and a famous cosplayer chasing down a man who groped her friend.
Unfortunately, many cosplayers unwittingly contribute to the very convention culture that endangers them. They contribute, not with the costumes they wear, but by trying to be polite or by not knowing what to do when incidents happen. It can be a very distressing and embarrassing to be objectified or assaulted at a convention, and knowing exactly what to do can be hard. So here are three basic rules of how to react in these horrible situations:
1. Don't be Polite!
Every convention has huge numbers of bloggers, vloggers, press, internet personalities, and regular patrons who are combing the floor for cosplayers to put on the spot. Many of these jerks ask inappropriate sexual questions or try to touch you in ways that make you uneasy (hugs, leering at specific body parts, filming/photographing specific body parts, etc). If you are uncomfortable DO NOT FEEL OBLIGATED TO PLAY ALONG! Regardless of how witty your response is, questions and behavior of this nature is disrespectful to you and contributes to the convention culture that objectifies cosplayers. Tell them that they are being inappropriate, and end the interview. Tell them that you are not comfortable with them putting their arm around your waist, and step away. Tell them that your "eyes are up here" and walk away. No amount of Facebook likes or Twitter followers are worth encouraging these disgusting convention parasites.
2. Be Loud!
If something inappropriate happens, BE LOUD ABOUT IT! I know this can be hard because it is an embarrassing situation, but acting fast and getting people to notice what is happening is the best way to insure that predators are caught. Shout at the person to STOP and state what they are doing. For example, "STOP TOUCHING MY BREASTS! THAT IS NOT OK! THIS GUY/GIRL IS TOUCHING ME INAPPROPRIATELY!" and POINT THEM OUT! The more people who see the person, the better the chance of them being held responsible for their behavior. Hopefully someone will even snap a picture of the asswipe.
(Although I agree that they deserve it, I do NOT recommend physically striking the person since that can get you into legal trouble down the line.)
3. REPORT!
 Do NOT just move on with your day after an incident happens. Report it to the convention staff (and make sure they really take note of it!) or the police if the incident is serious enough. We want predators removed from the convention, so we need those in charge to know that they are there! Even if you didn't get a great look at the person, TELL AN OFFICIAL and let them know what you do remember. Often, these creeps bother/assault multiple people in a day. DON'T HELP THEM GET AWAY WITH IT! The truth is that we really don't have dependable statistics on convention harassment, because so many victims don't report their assaults. We need to start making officials take notice of this problem, and the only way to do that is to inform them EVERY time it happens
4. BE A WITNESS!
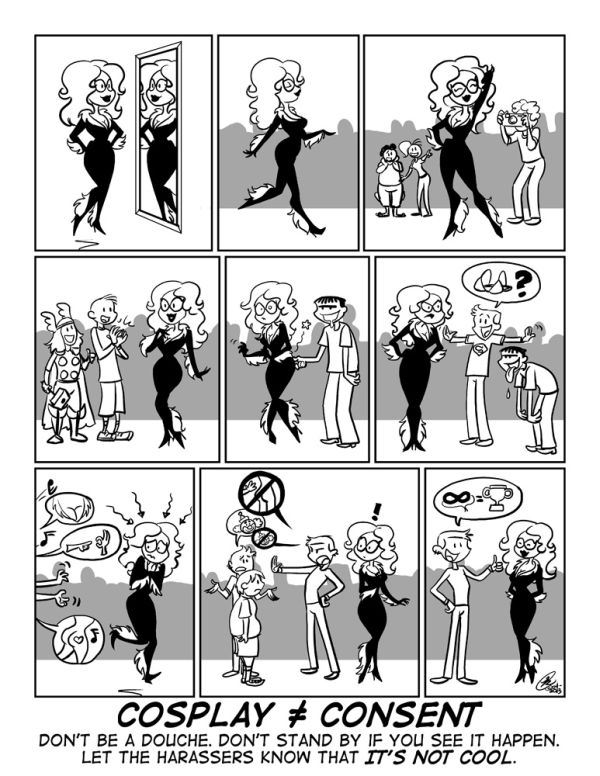
Help yourself and other cosplayers by being aware of your surroundings and looking out for trouble. I realize that we shouldn't HAVE to do this, but unfortunately, the reality is that this is a necessary precaution to help protect ourselves. If you see something happen BE LOUD and REPORT! Stick around to tell officials what happened, or take the initiative if nobody else has the guts to report what happened. We can't wait for white knights to save us. Cosplayers have to stand up for ourselves.
Assholes and predators are in geek culture, just like every other community. It is NOT your fault if someone is insulting or assaulting you. It doesn't matter what you wear to a convention, EVERYONE deserves respect. If we are going to change this culture we need to band together and send the message loud and clear that we are NOT going to put up with this. We cannot wait around for other people to step up, we have to start stepping up and speaking up for ourselves!
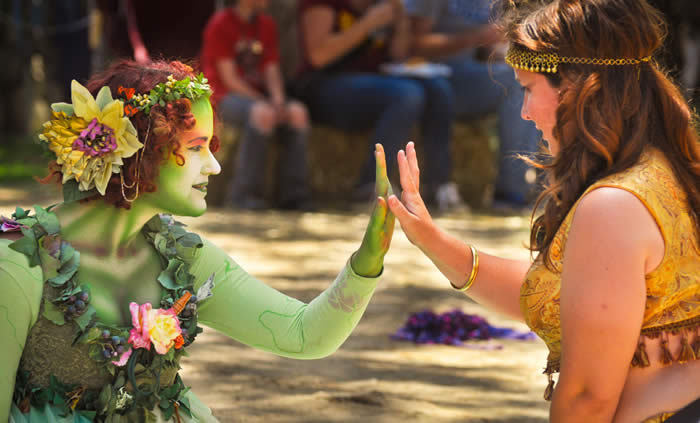
Renaissance Faire Survival Guide
I have been working at renaissance faires all over the Western United States for over a decade, and attending them as a customer since long before that! They are strange, but wonderful events that capture the imaginations of all kinds of people. There is really something for everyone, but a few simple tips will help you get more enjoyment from your time at a faire.
1. Water
Alcoholic beverages are the drink that ren faires are known for serving. Imbibing can be a fun part of your day, but most renaissance faires take place in the hotter months of the year. Try to match your alcohol intake with equal amounts of water. Dehydration and overheating are the most common reasons for First Aid treatment of faire customers, especially those in costume.
2. Shoes
The average renaissance faire visitor will walk over four miles at a large faire. Most of that will be on uneven dirt paths, which make the mileage even harder on your feet. Wear comfortable, supportive shoes to maximize your fun and enjoyment. I also suggest wearing closed toed shoes because of all the dirt (sweaty feet + dirt = toe mud... eww). Sexy spike heeled boots may seem like a wonderful idea when you leave the house, but you may regret wearing them by the end of the day as you're hobbling to the exit.
 3. Map
It's vital that you know where to find different shows, food vendors, and most importantly, the ale stands and restrooms. This will save you lots of time if you want to be on a schedule, or let you know which direction to wander if you don't have a specific destination in mind. Most faires hand out maps as you enter the front gate.
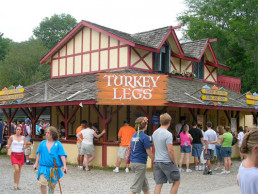
4. Privies
Commonly known as Port-a-Potties, these are one of the drawbacks of visiting most renaissance faires. They are not pleasant, but there are ways to make the experience less miserable. First, go to the units farthest from the entrance to the port-a-potty area. These are usually the least used and the cleanest. Leave most of your stuff with your friends when you go in, because you want to limit the contamination and avoid dropping things into the Privy abyss.
 5. Cash
Faires are a wonderful place to buy jewelry, costumes, art, and so much more directly from the artists. It's a great opportunity, however, the methods of payment that you can use may vary from booth to booth. Most merchants can accept credit card payments thanks to the magic of smart phones, but there are still a few who can't. Ale stands are usually cash-only as well, and it's good form to leave tips for servers and performers. Be ready for that and bring cash with you to avoid the crazy ATM fees and lines that happen at most faires.
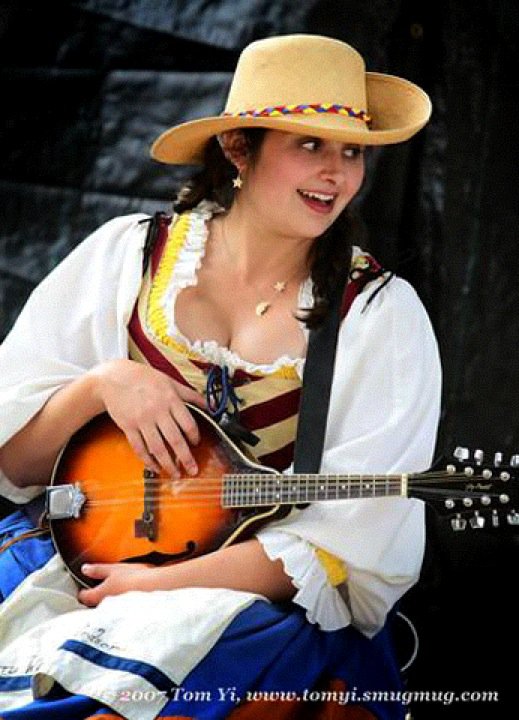
6. Costumes
Costumes are one of the best things about visiting renaissance faires. You will see a huge variety of outfits, including stunning historically accurate recreations, pirates, fairies and fantasy creatures, vikings, Stormtroopers, and SO MUCH MORE! Feel free to dress up and join in the fun, but remember tip #2 from above. Costumes made from natural fibers are the best because they breath in the heat. Avoid large amounts of leather because it can get really hot, and avoid rubber at all costs!!!

7. Shows
I'll admit, I'm a little biased here. I love performing and faire crowds are wonderful! Renaissance faire shows will have a unique feel to them and are usually very interactive. Be sure you read signs or program descriptions before you sit down to watch something, especially if you have kids with you. Some shows contain some naughty content, but usually they are clearly marked. Be sure to buy something or leave a tip at the end of the show if you enjoyed it. Renaissance faire performers work hard for their art, and are usually paid MUCH less than minimum wage, IF they are paid at all. Show your appreciation for their hard work by helping fill their gas tanks and their tankards!
8. Safety
Renaissance faires are a melting pot of different 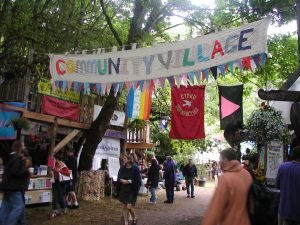 types of people, with some alcohol and costumes tossed in for fun. They are safe, but as with any public situation (conventions, amusement parks, county fairs, concerts, etc) you need to be aware of your surroundings. Inevitably, there are those few people who will get drunk and inappropriate. They may be inappropriate with you, or with each other. PLEASE REPORT THEM TO SECURITY! You can do this by finding a security person, or by telling the nearest ale stand or booth. We work very hard to create a fun place, and we don't want our hard work to be in vain because of a few jerks.
**IMPORTANT: Remember that not everyone wearing a costume is a faire employee!!! Many people dress up and pretend that they are part of the show, but they paid for their ticket just like you. These "playtrons" are usually at the root of most behavior complaints since they are not trained to interact with the costumers. If someone in a costume is making you feel uncomfortable, be direct! Tell them to stop, then report them to security so it doesn't happen to someone else!
9. Parking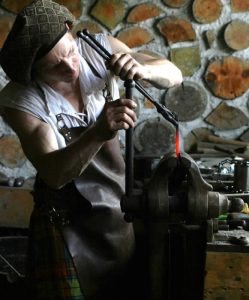
Most faire parking is a big dirt field. If you're lucky, there might be some flags or lines to help show you where to go. If you are VERY lucky, there might be some people pointing for you. By the end of the day it will ALL LOOK THE SAME!! A sea of dust covered cars is hard to navigate. Use a handy Car-Finding App if you have one, or at very least, take a picture with some stuff in the background to reference later. Trust me.
10. Open Mind
Renaissance faires are AMAZING. They are such an eclectic mixing of different aspects of the human experience. A mix of history, art vendors, concert, carnivals, reenactments, conventions, food festival, and costume party! I love it! Come to faire with an open mind, ready to experience something truly unique.
To find a renaissance faire near you, visit Renaissance Magazine's Renaissance Faire List!
EDIT: I've received some great comments on this article! Here are a few more tips!
- Wear sunscreen and reapply it during the day! Hats are your friends!
- Pack well so that your things are easy to carry. Keep an eye on your stuff!
Huzzah!