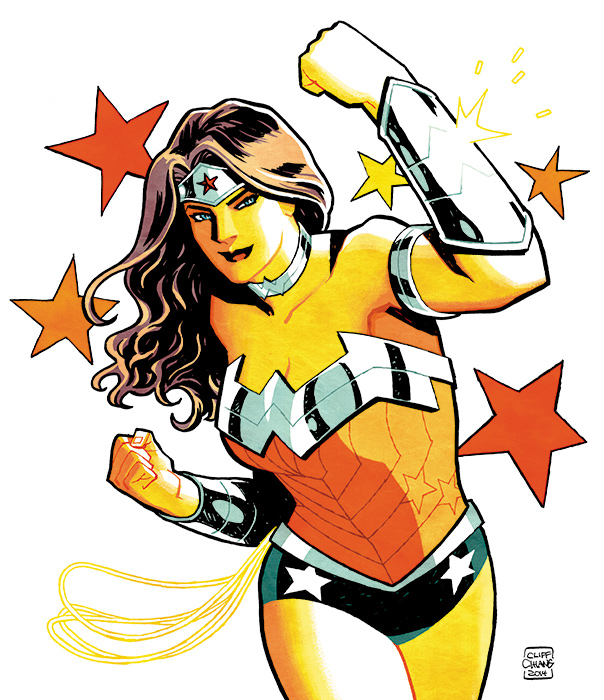
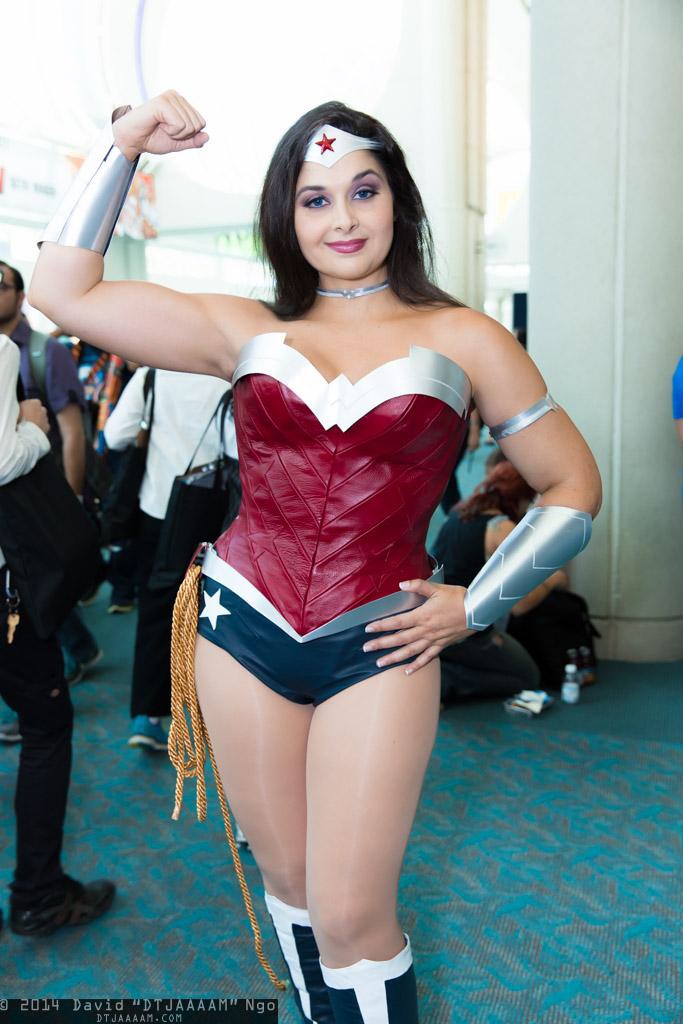
 Wonder Woman’s corset in the New52 is stunning. The complex chevron pattern combined with stars is intricate and eye-catching. As difficult as it is to draw, it’s even more difficult to sew. Chevrons are quite a challenge and are also very time consuming.
Now there are two ways to make this corset, the easier way (still not super easy) and the hard way. The easy way would be to buy/make a corset, then make the straight lined chevrons out of a stretch fabric to cover that corset. I was hesitant to use this method because it can result in the chevrons looking warped as the fabric stretches to match the curves of the body, and because I wanted my corset to look like it was made out of leather.
Thus, the hard way.
Please Note: This is a difficult project that requires pretty advanced sewing skills. You will need to be familiar with making corsets and have a corset pattern that works for you as a base for this tutorial. You will also need a walking foot for your sewing machine if you are using leather.
Step 1: Use your corset pattern to make a mock-up. Make sure you use the same type of fabric that you will eventually use for the base of your final corset, I recommend something heavy like duck cloth.
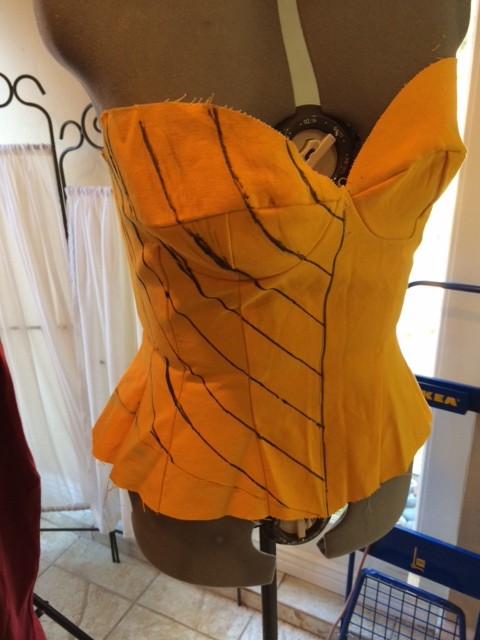
Step 2: Put this mock-up on a dress form, a volunteer, or yourself if you have a friend to help. Then draw chevrons on half of the mock-up. Measure equidistant meeting points on the center front of the corset as a base, then draw out from there. The trick is that these cannot be straight lines drawn with a ruler. You will get a tube shape if you tried to make a corset out of straight lines that would not form to the contours of your body correctly. You have to draw chevrons that form to the body’s curves and appear to make straight chevrons. YOU WILL GET LOTS OF FREAKY SHAPED STRIPS. THAT IS OK!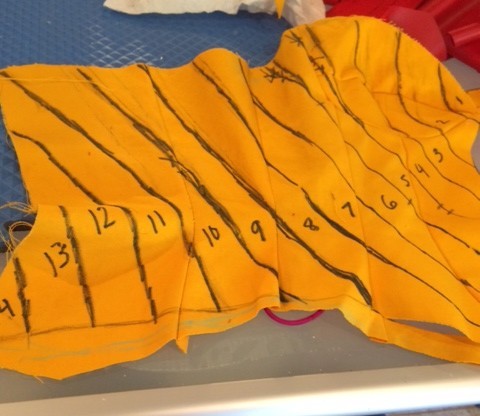
Step 3: Mark the lines on your mock-up with notches and numbers so you can keep track of which order the pieces go in, and where they meet. Cut the mock-up along the lines you drew to create the pattern for your final corset cover. DON’T FREAK OUT AT THE STRANGE SHAPES YOU GET!
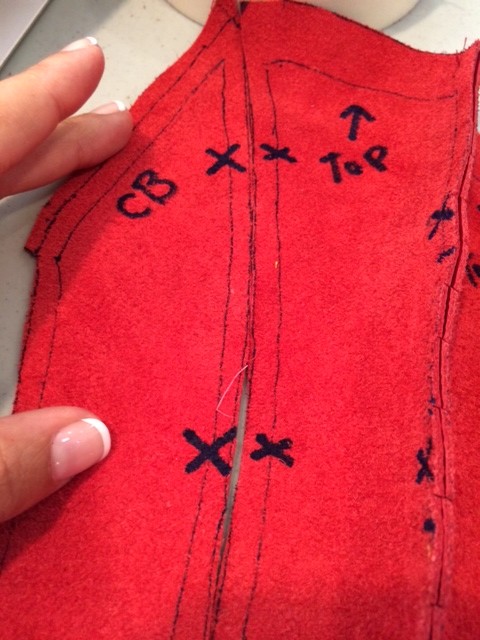
 Step 5: Trace your pattern pieces onto your final fabric and add a 1/2 inch seam allowance around each piece. Make sure you have two complete sides for your corset and the pieces for each side should be a reflection of each other. Make sure you copy over the notches and identifying marks onto the BACK side of these pieces. I used leather but other pleathers will work as well. Stretch fabrics will not work and will warp the final product, try the previous method listed above if you want to use a stretch fabric.
 Step 6: Carefully, starting from the top center piece, sew one side of the corset together. Make sure to line up the notches, they are your guide! Now sew the refection side of it together. You should now have two complete halves of a corset cover that are reflections of one another.
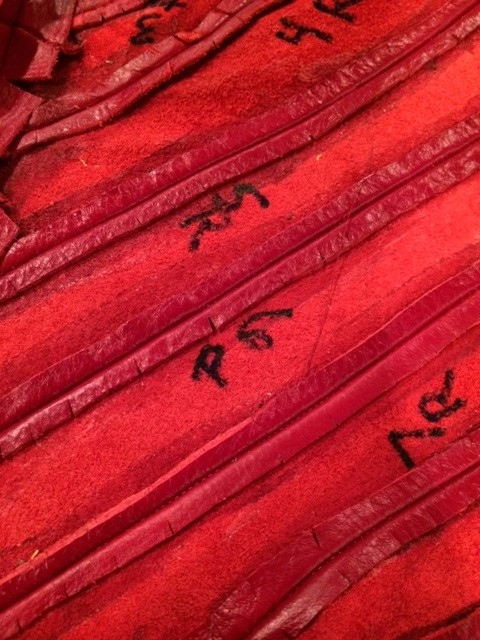
Step 7: Using rubber cement, glue all of your seam allowances flat against the back of your corset cover. Make them all as flat as possible. Flat seam allowances will make your life easier later and make your final product look better! Make sure the glue is dry before moving on to step #8.
 Step 8: Now it’s time to make the chevrons happen! Meeting the right sides of the corset center fronts (those are two edges) use pins or tape if you are using a leather-like material to insure that the seams of your chevrons meet up. You might have to do a little manipulating and stretching to make the pieces line up perfectly in the front, but this is a VERY important step. You don’t want your chevrons to not line up. Sew them together on the wrong side down what now is the center front of your corset cover.
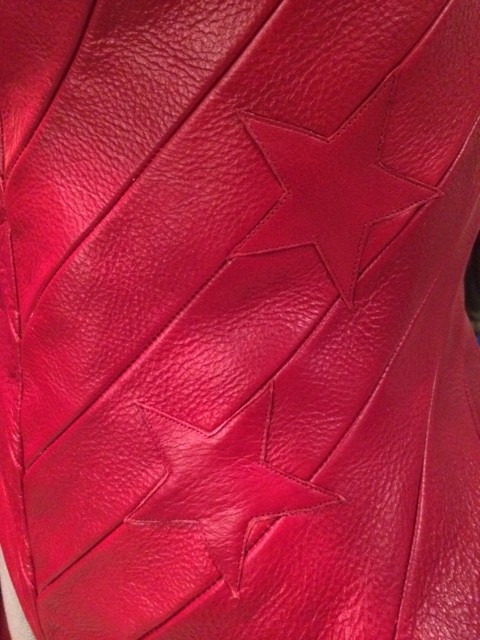 Step 9: The hardest part of your project is over!! Congrats!! Now cut out the stars from the same material as your chevrons, making sure they have the correct proportions to your chevrons. Put a small amount of rubber cement on the back of each star and place it where you’d like it on the corset. The glue will help hold the star in place while you top-stitch it down.
Step 10: Using your corset pattern, make the base corset with metal boning.
Step 11: Again using your dress form, a volunteer, or yourself if you have a friend to help you, put your 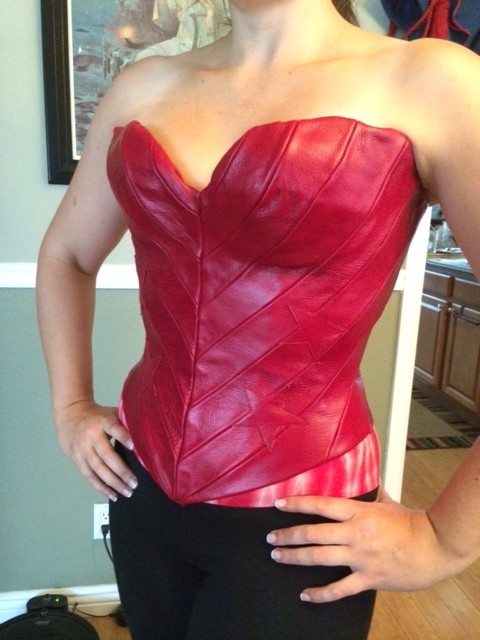 base corset in place. Then, finding the exact center, use bardge cement to glue the center seam of your chevroned corset cover to your base corset. This will keep the center front from moving around. You can also glue around the cups of the corset and along the sides and center back once the front has dried.
Step 12: Hand stitch the edges of your corset cover down on the inside of your base corset. This takes a while and you will definitely need a thimble if you are using leather. Make sure you stitch down all the edges!
Step 13: Grommet the corset.
CONGRATS!! YOU ARE DONE!! Hopefully you have an amazing piece of cosplay art to enjoy!

Hello 🙂
How did you do the chest section? Does it automatically take the shape of the breast or do you have a way to shape it yourself? I hope that question makes sense..
Hello! That is part of the corset construction, which I don’t really get into with this post because it is pretty complicated. I usually sew extra padding into my corsets. If you have never sewn a corset, you can buy one or use a pattern from the store. I might do a corset tutorial in the future, but there are so many amazing experts that I hesitate to speak on that topic.
Amazing!! do you have a pattern for the breast plate and belt :)..please
Hopefully coming soon!
Hey, great tutorial! I’m actually working on making this costume for halloween this year and I was wondering if you could show me the back? I’m not quite sure how to do it. Any other helpful hints concerning this would be fabulous too (: Thank you!
Could you talk about how you did the silver banding? It looks fantastic!
Thanks! That’s actually not part of the corset. I’ll try to do a tutorial on the armor soon!
[…] Golden Lasso has dressed as Wonder Woman before, but this year she decided to tackle the New 52 version of the […]
Fantastic!