Renaissance Faire Survival Guide
I have been working at renaissance faires all over the Western United States for over a decade, and attending them as a customer since long before that! They are strange, but wonderful events that capture the imaginations of all kinds of people. There is really something for everyone, but a few simple tips will help you get more enjoyment from your time at a faire.
1. Water
Alcoholic beverages are the drink that ren faires are known for serving. Imbibing can be a fun part of your day, but most renaissance faires take place in the hotter months of the year. Try to match your alcohol intake with equal amounts of water. Dehydration and overheating are the most common reasons for First Aid treatment of faire customers, especially those in costume.
2. Shoes
The average renaissance faire visitor will walk over four miles at a large faire. Most of that will be on uneven dirt paths, which make the mileage even harder on your feet. Wear comfortable, supportive shoes to maximize your fun and enjoyment. I also suggest wearing closed toed shoes because of all the dirt (sweaty feet + dirt = toe mud... eww). Sexy spike heeled boots may seem like a wonderful idea when you leave the house, but you may regret wearing them by the end of the day as you're hobbling to the exit.
 3. Map
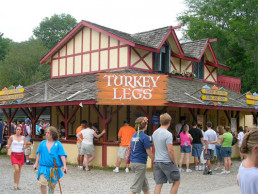
It's vital that you know where to find different shows, food vendors, and most importantly, the ale stands and restrooms. This will save you lots of time if you want to be on a schedule, or let you know which direction to wander if you don't have a specific destination in mind. Most faires hand out maps as you enter the front gate.
4. Privies
Commonly known as Port-a-Potties, these are one of the drawbacks of visiting most renaissance faires. They are not pleasant, but there are ways to make the experience less miserable. First, go to the units farthest from the entrance to the port-a-potty area. These are usually the least used and the cleanest. Leave most of your stuff with your friends when you go in, because you want to limit the contamination and avoid dropping things into the Privy abyss.
 5. Cash
Faires are a wonderful place to buy jewelry, costumes, art, and so much more directly from the artists. It's a great opportunity, however, the methods of payment that you can use may vary from booth to booth. Most merchants can accept credit card payments thanks to the magic of smart phones, but there are still a few who can't. Ale stands are usually cash-only as well, and it's good form to leave tips for servers and performers. Be ready for that and bring cash with you to avoid the crazy ATM fees and lines that happen at most faires.
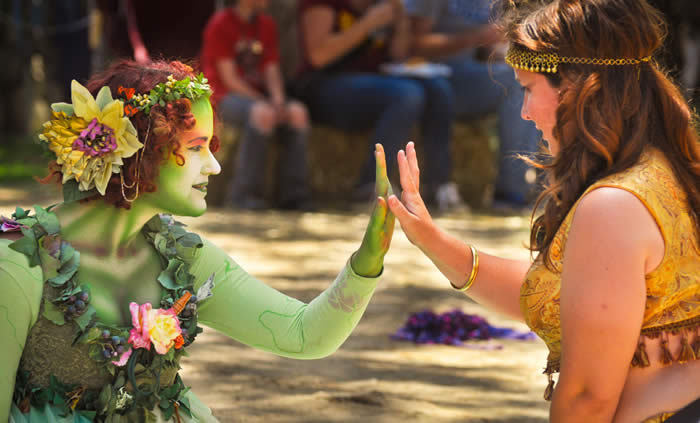
6. Costumes
Costumes are one of the best things about visiting renaissance faires. You will see a huge variety of outfits, including stunning historically accurate recreations, pirates, fairies and fantasy creatures, vikings, Stormtroopers, and SO MUCH MORE! Feel free to dress up and join in the fun, but remember tip #2 from above. Costumes made from natural fibers are the best because they breath in the heat. Avoid large amounts of leather because it can get really hot, and avoid rubber at all costs!!!

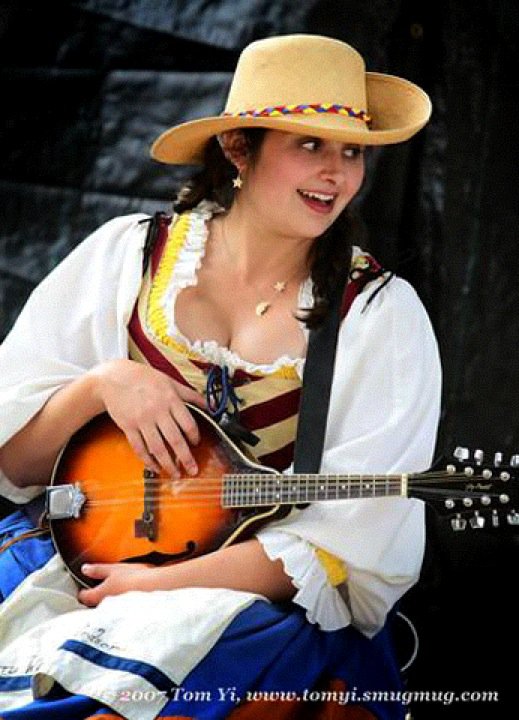
7. Shows
I'll admit, I'm a little biased here. I love performing and faire crowds are wonderful! Renaissance faire shows will have a unique feel to them and are usually very interactive. Be sure you read signs or program descriptions before you sit down to watch something, especially if you have kids with you. Some shows contain some naughty content, but usually they are clearly marked. Be sure to buy something or leave a tip at the end of the show if you enjoyed it. Renaissance faire performers work hard for their art, and are usually paid MUCH less than minimum wage, IF they are paid at all. Show your appreciation for their hard work by helping fill their gas tanks and their tankards!
8. Safety
Renaissance faires are a melting pot of different 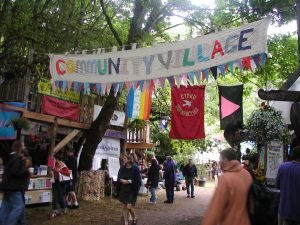 types of people, with some alcohol and costumes tossed in for fun. They are safe, but as with any public situation (conventions, amusement parks, county fairs, concerts, etc) you need to be aware of your surroundings. Inevitably, there are those few people who will get drunk and inappropriate. They may be inappropriate with you, or with each other. PLEASE REPORT THEM TO SECURITY! You can do this by finding a security person, or by telling the nearest ale stand or booth. We work very hard to create a fun place, and we don't want our hard work to be in vain because of a few jerks.
**IMPORTANT: Remember that not everyone wearing a costume is a faire employee!!! Many people dress up and pretend that they are part of the show, but they paid for their ticket just like you. These "playtrons" are usually at the root of most behavior complaints since they are not trained to interact with the costumers. If someone in a costume is making you feel uncomfortable, be direct! Tell them to stop, then report them to security so it doesn't happen to someone else!
9. Parking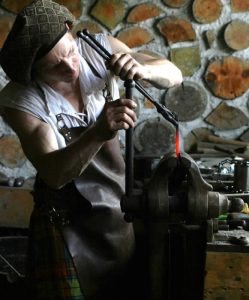
Most faire parking is a big dirt field. If you're lucky, there might be some flags or lines to help show you where to go. If you are VERY lucky, there might be some people pointing for you. By the end of the day it will ALL LOOK THE SAME!! A sea of dust covered cars is hard to navigate. Use a handy Car-Finding App if you have one, or at very least, take a picture with some stuff in the background to reference later. Trust me.
10. Open Mind
Renaissance faires are AMAZING. They are such an eclectic mixing of different aspects of the human experience. A mix of history, art vendors, concert, carnivals, reenactments, conventions, food festival, and costume party! I love it! Come to faire with an open mind, ready to experience something truly unique.
To find a renaissance faire near you, visit Renaissance Magazine's Renaissance Faire List!
EDIT: I've received some great comments on this article! Here are a few more tips!
- Wear sunscreen and reapply it during the day! Hats are your friends!
- Pack well so that your things are easy to carry. Keep an eye on your stuff!
Huzzah!

Batgirl's Doctor is In: Dr. Andrea Letamendi
 Andrea Letamendi is one of the most interesting figures on the convention scene. She holds a Ph.D. in Clinical Psychology, and puts her knowledge to geeky use by speaking about the psychology of Superheroes, Science Fiction, and Cosplay. When she isn't speaking on panels, Andrea works as a researcher at UCLA, does work for Marvel and DC, and creates amazing cosplays of her own.
Kimi: You’re known as @ArkhamAsylumDoc on twitter, do you have a favorite Arkham inmate in the Bat-verse?
Andrea Letamendi: Oh yes, I have many favorite Arkham Baddies. I can’t deny the power that the Joker has psychologically–he is such a mesmerizing and puzzling character because his acts of villainy and destruction do not always seem rationale or explainable. My favorite villain from Gotham’s Rogue Gallery is the Penguin, because of his tragic story. He seems to frequently try to reach out and connect with others, perhaps just looking to be understood, and that is incredibly relatable.
 K: You were recently depicted in Batgirl #16 as Barbara Gordon’s clinical psychologist. Why did Gail Simone immortalize you as part of DC cannon?
AL: Last year, before the Batgirl annual, Mrs. Simone reached out to me to ask some questions about trauma recovery. Essentially she was writing about an important time in Barbara’s life during which she was recovering–both physically and psychologically– from the severe injury from a gunshot wound when the Joker attacked her (See: The Killing Joke). As a Batgirl reader and DC fan, I was more than thrilled to answer anything she wanted to know. My background in treating soldiers who have returned from Iraq and Afghanistan with psychological and physical injuries best prepped me to give anecdotes and explain the relationship between the therapist and the healing client. Little did I know that Mrs. Simone would not only write some of my suggestions into her comic, but also include me as a character! It was truly a surprise– and I feel the honorary gesture was not just toward me but for the psychology community as a whole.
K: In addition to being an adviser for Marvel and DC, you are also well known as a cosplayer. What pushed you to start cosplaying?
AL: I have essentially been cosplaying since I was a teenager, if you count “dressing up as a Jedi character that you made up” cosplay. I’ve always felt drawn to dressing up as characters I love, but it truly wasn’t until I started attending conventions in 2006 that I initially became involved with cosplay and the cosplay community.
 K: Which costume is your favorite to wear to conventions?
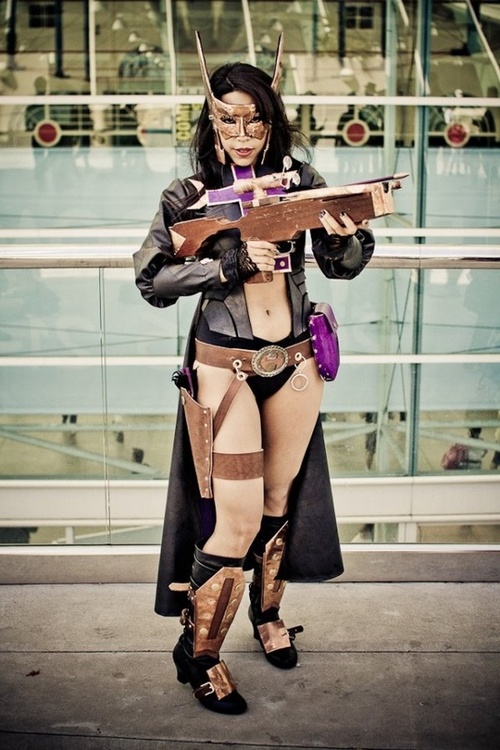
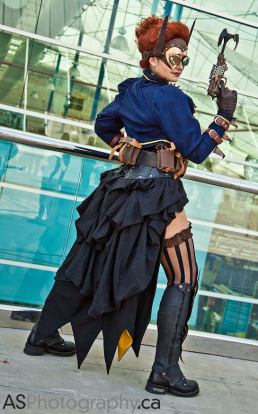
AL: My favorite costume is probably my Steampunk Huntress costume, although I have a Battlestar Galactica costume in the works and it may quickly become one of my favorites!
K: You’ve found a way to bridge the gap between your love of psychology and your love of comics, are you trying to do the same with psychology and cosplay?
AL: I’ve found that my love of cosplay has led me to ask questions like “what draws us to certain characters?” and “why do we feel fulfilled or content when we’re wearing someone else’s clothes?” I also believe there’s something empowering and psychologically inspiring when we dress up as a superhero that we look up to, even if they are fictional. In my mind, it was inevitable that these two universe’s collide, which is why me and my colleague created a Cosplay Survey and plan to continue exploring the motivations, expressions, and backgrounds of cosplayers. I also believe that we can use real-world data to debunk or disconfirm myths about cosplayers. I feel as though psychological science can tell a story that allows people to see how adaptive, healthy, resourceful, and social cosplayers really are.
K: What conflicts have you faced between your geeky hobbies and your career?
AL: Actually, even though I initially felt distanced and a bit misunderstood in my field, I’ve recently discovered that people are generally interested–and even quite inspired–by some of the work I’m doing in the comics and cosplay community. I have to say that I was surprised by this and it reminds me that people just want to get to know you and that the field of Psychology can be particularly open and supportive of these other hobbies. I’d like to think that goes with other social sciences disciplines.
 K: Briefly, what have you learned about the Cosplay community through your surveys and your Psychology of Cosplay panels?
AL: We have learned that cosplayers represent a very diverse and social group. I think the single most important thing we have learned is that we simply do not have any evidence that cosplayers share any one feature or characteristic beyond their passion for costuming and performing. Stereotypes about cosplayers, therefore, are not currently supported by anything other than bullies on the internet.
You can visit Andrea's blog at Underthemaskonline.com or follow her on Twitter @ArkhamAsylumDoc.
WonderCon!
I made it safely back from Scotland! I had an amazing time, saw beautiful places, drank too much, and lost a few pounds (haha... get it... they use the UK pound.... sorry). I have several great posts in the works and am ready to catch up, but first...
 WONDERCON!

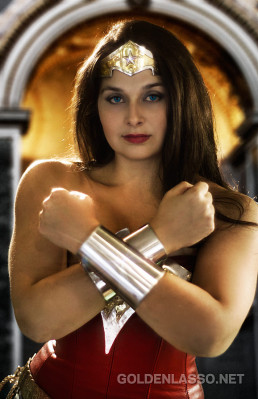
I will be attending Wondercon on Friday only, due to Renaissance Faire obligations. I'll be dressed as Wonder Woman at a convention for the first time since 2011! My armor is all polished and my golden lasso is ready!
For those of you who haven't attended WonderCon, it's a wonderful event and I highly recommend it to old-school convention lovers. It's growing fast, but is usually compared to SDCC before it became the pop-sensation that it is today. It's much smaller than SDCC and that leads to really great interactions between fans, creators, artists, cosplayers, and staff. The parking can still be difficult, but it's do-able and there are probably even hotels still available in the area if you decide you want to head down there this weekend. It's also right down the street from Disneyland, so it's a great weekend destination for the whole family or Disney-lovers. The convention even arranged discounted Disney tickets for convention attendees!
For all my panel-loving friends, I highly suggest attending The Psychology of Star Trek vs. Star Wars, Friday at 1:30pm. Dr. Andrea Letamendi, you may know her as the Huntress from my Steampunk DC group, is an amazing panelist and is sure to make a great case for Star Wars! Brian Ward, the steampunk Green Arrow and copper-working genus, is going to be refereeing... er... moderating the discussion.
I hope to see you there! Follow me @GoldenLassoGirl to find me or to get in touch!
Do-It-Yourself: Steampunk Weapon
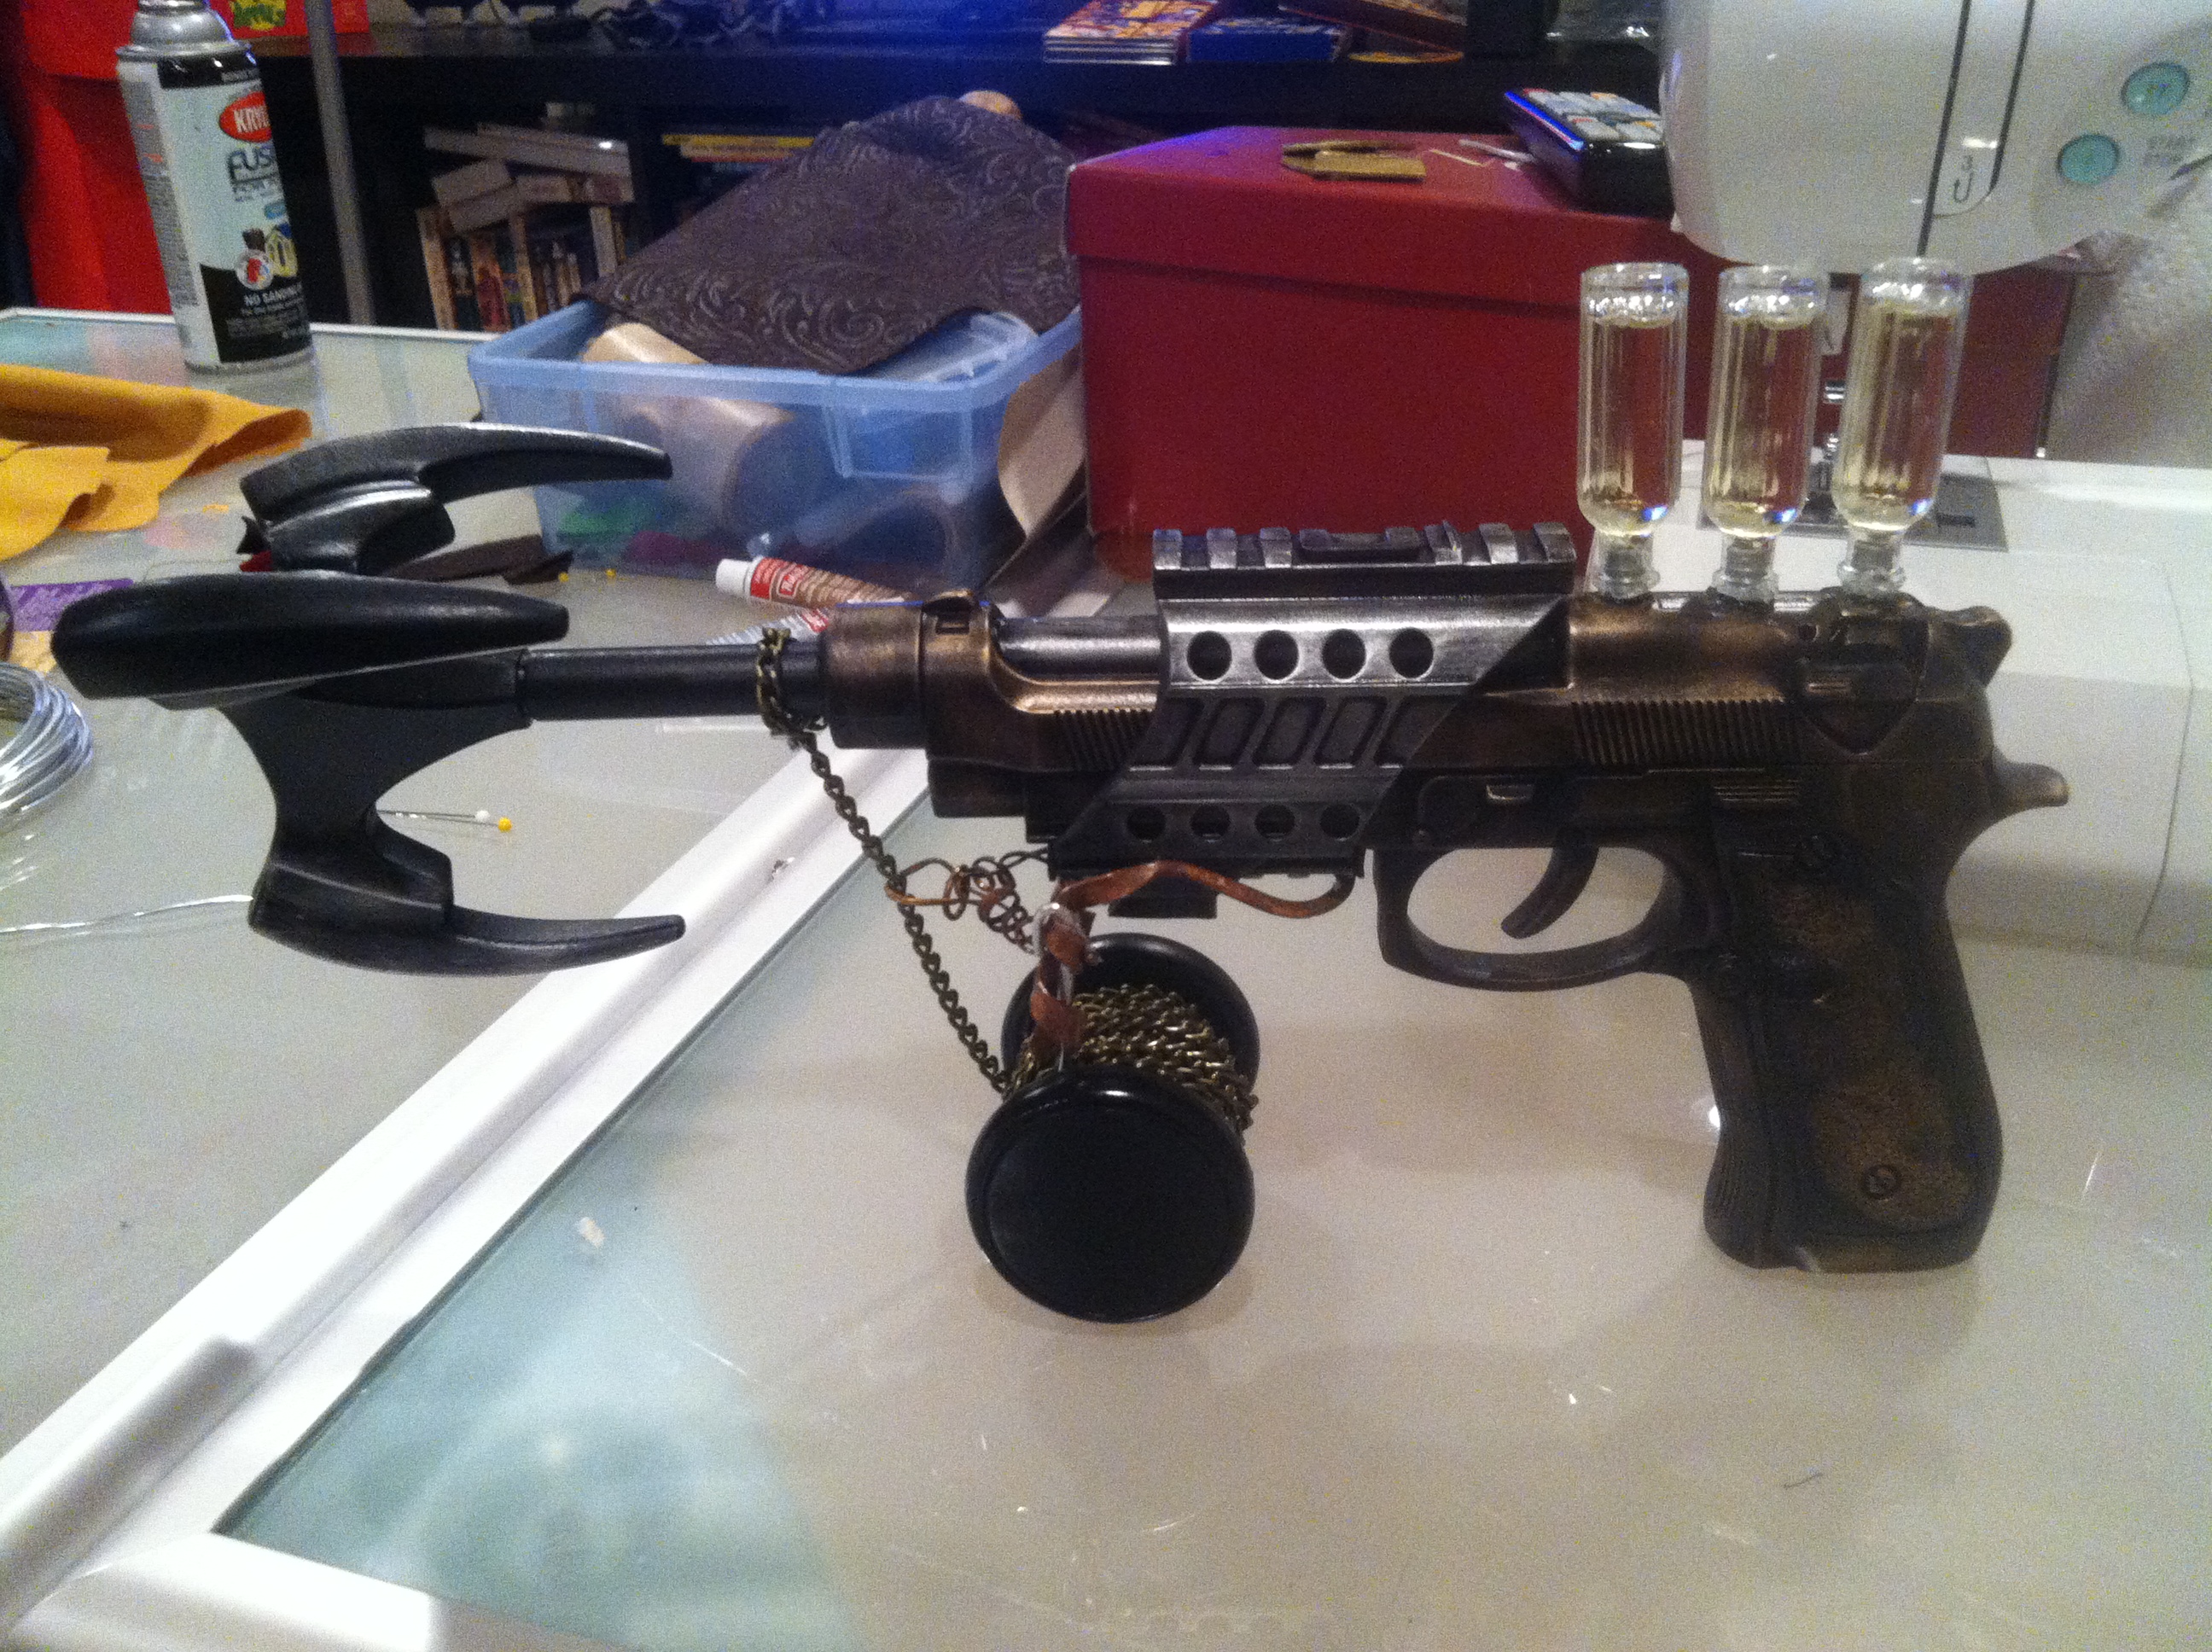
Prop making is one of the most challenging aspects of cosplay and costume making. For this tutorial, I will be showing you how to modify a plastic toy gun into a Steampunk grapple gun. I wanted to do something very specific for my Steampunk Batgirl costume, but you can use many of these techniques to modify other plastic weapons. It also happens to be my favorite part of any costume, and something that I don't get to do nearly enough. The details of a prop can really push a costume to the next level, especially when it comes to Steampunk!
Step one: Choose your Weapon
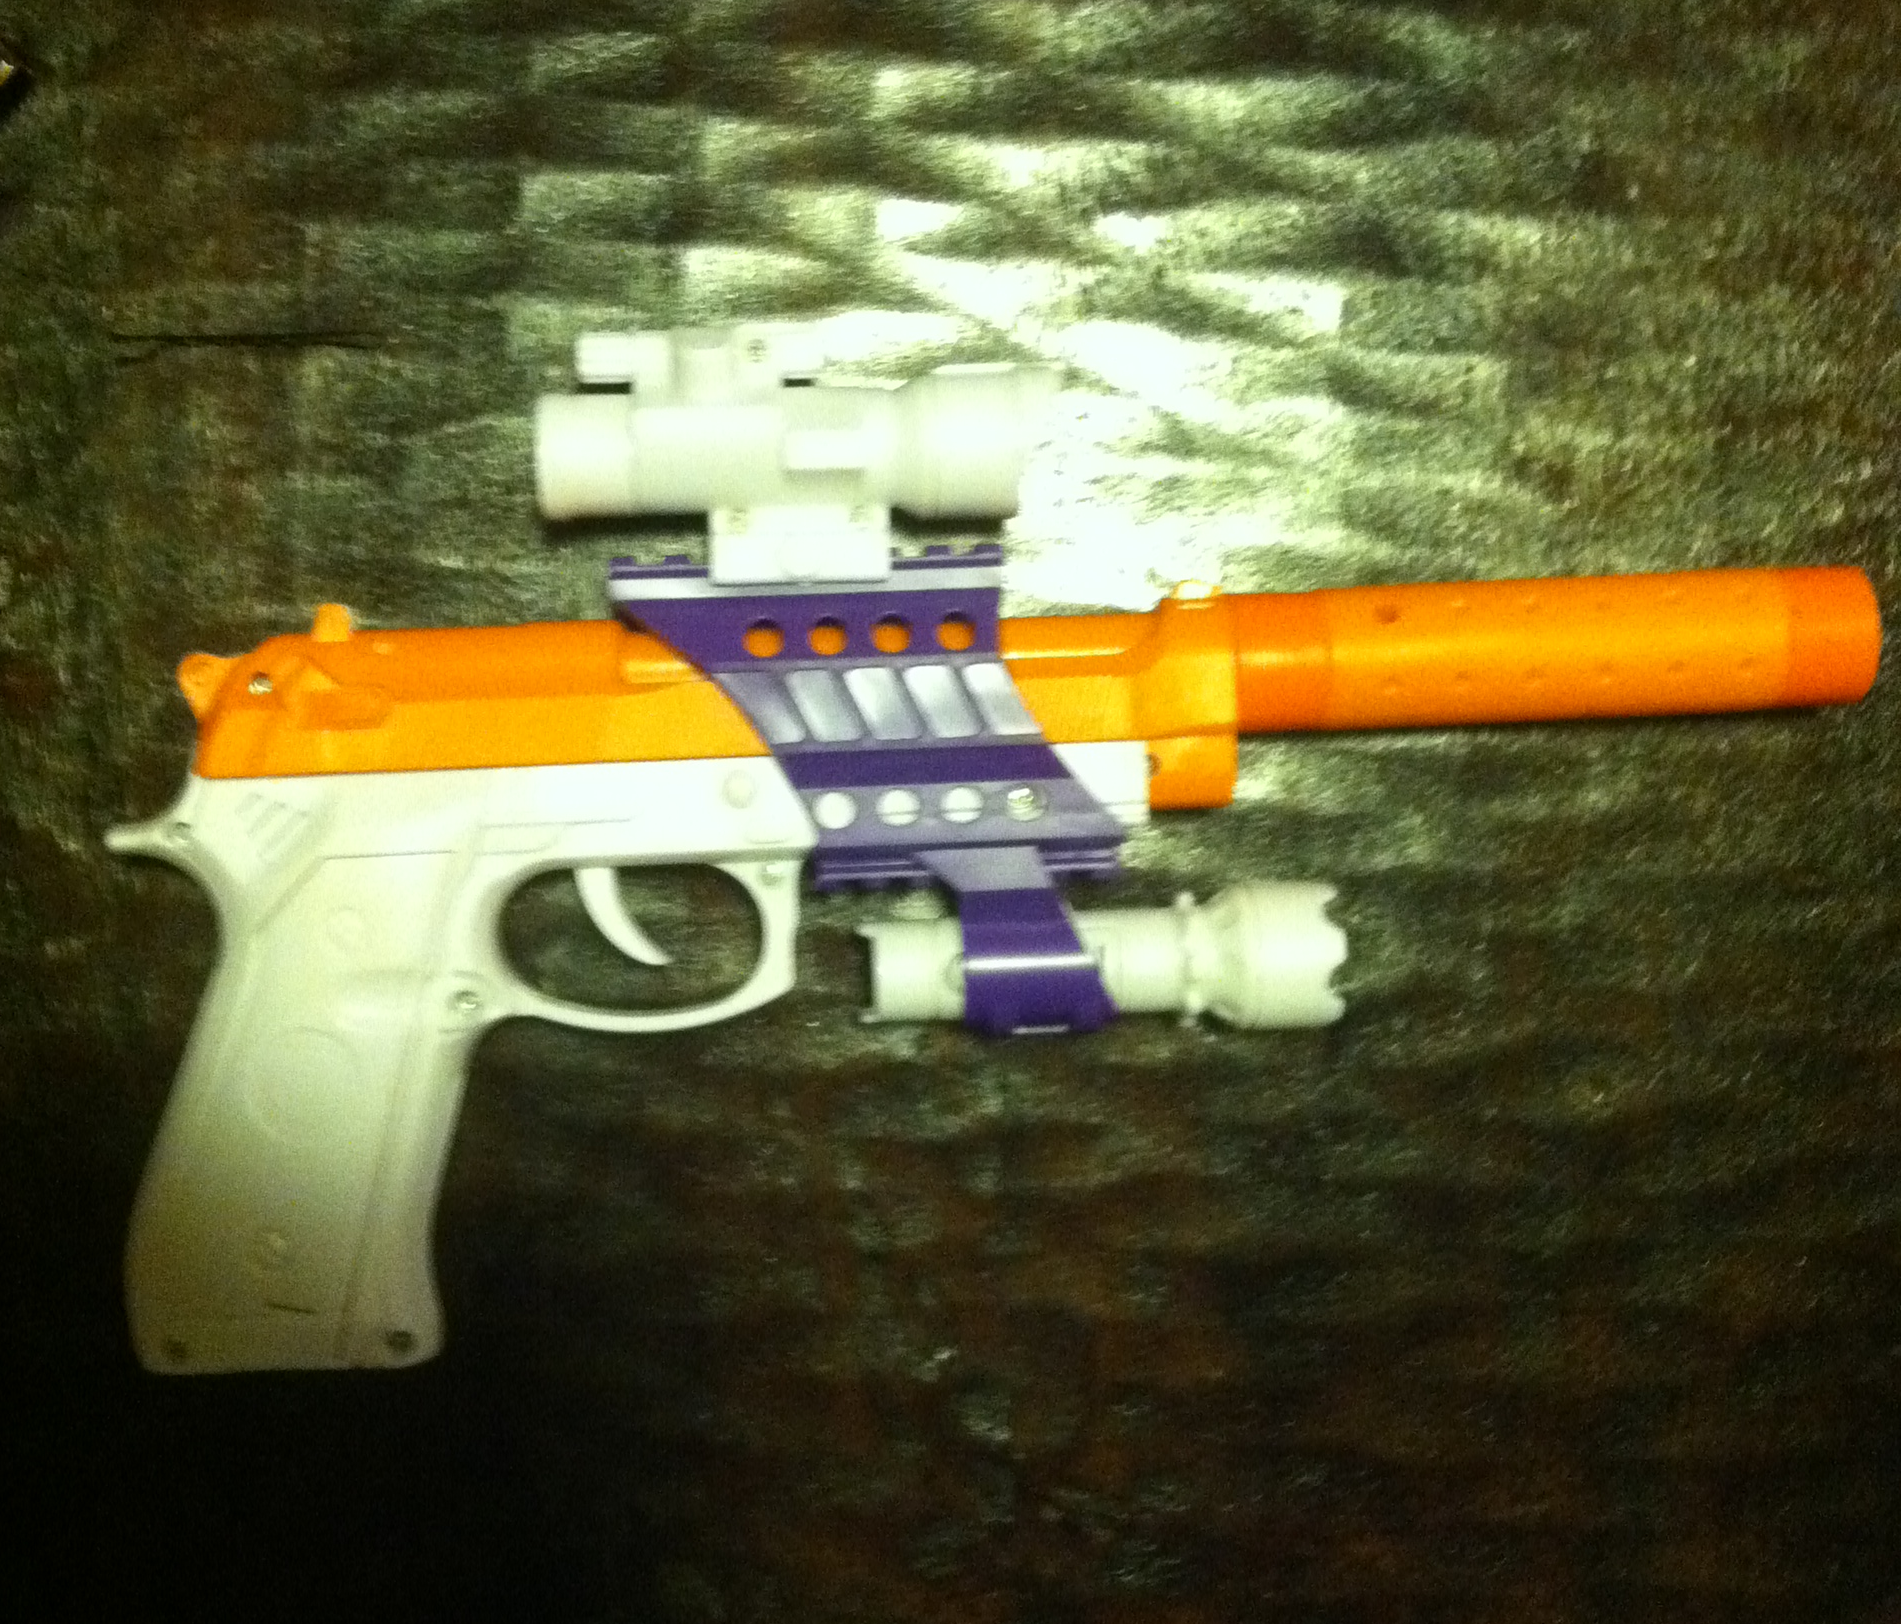 The first, and most important step of making a steampunk weapon is choosing the toy weapon you are going to modify. Take your time. Plan out exactly what you want and don't give up until you find it! Walk around the toy isles, shop online, and check out local Goodwill stores until you find the perfect toy. Don't worry about the color, focus on the shape and how it's built. Avoid guns that are easily recognizable as a specific model, unless that's the look you want (Oops). Make sure the toy is sturdy, that it's made of all plastic (rubber and metal will change how you have to modify it), and if it will be easy to disassemble or mask with tape for the painting process.
The gun pictured is the one I chose. I ended up not using the sights or the silencer that came with it, but the purple details ended up looking pretty cool by the end. Again, color doesn't matter at all.
Step Two: Prep for Paint
This is the most boring step, but it's vital if you want a good looking product by the end of this process. You will need fine grain sandpaper and dish soap. Carefully sand away any imperfections on the gun, without taking away too much or leaving scratches in the plastic. The goal is to make the gun as smooth and realistic as possible. Again, don't worry about the color of the gun, just focus on the texture of its surface.
When you have finished sanding the gun, wash it in normal water and dish washing liquid. You will have to wash your gun with damp rags if it has electronic parts and can't get totally wet. Be sure to rinse the gun thoroughly so soap residue doesn't mess up your painting later. Dry it with a rag and wait a few hours to insure it's completely dry before moving on to Step Three.
Step Three: Primer
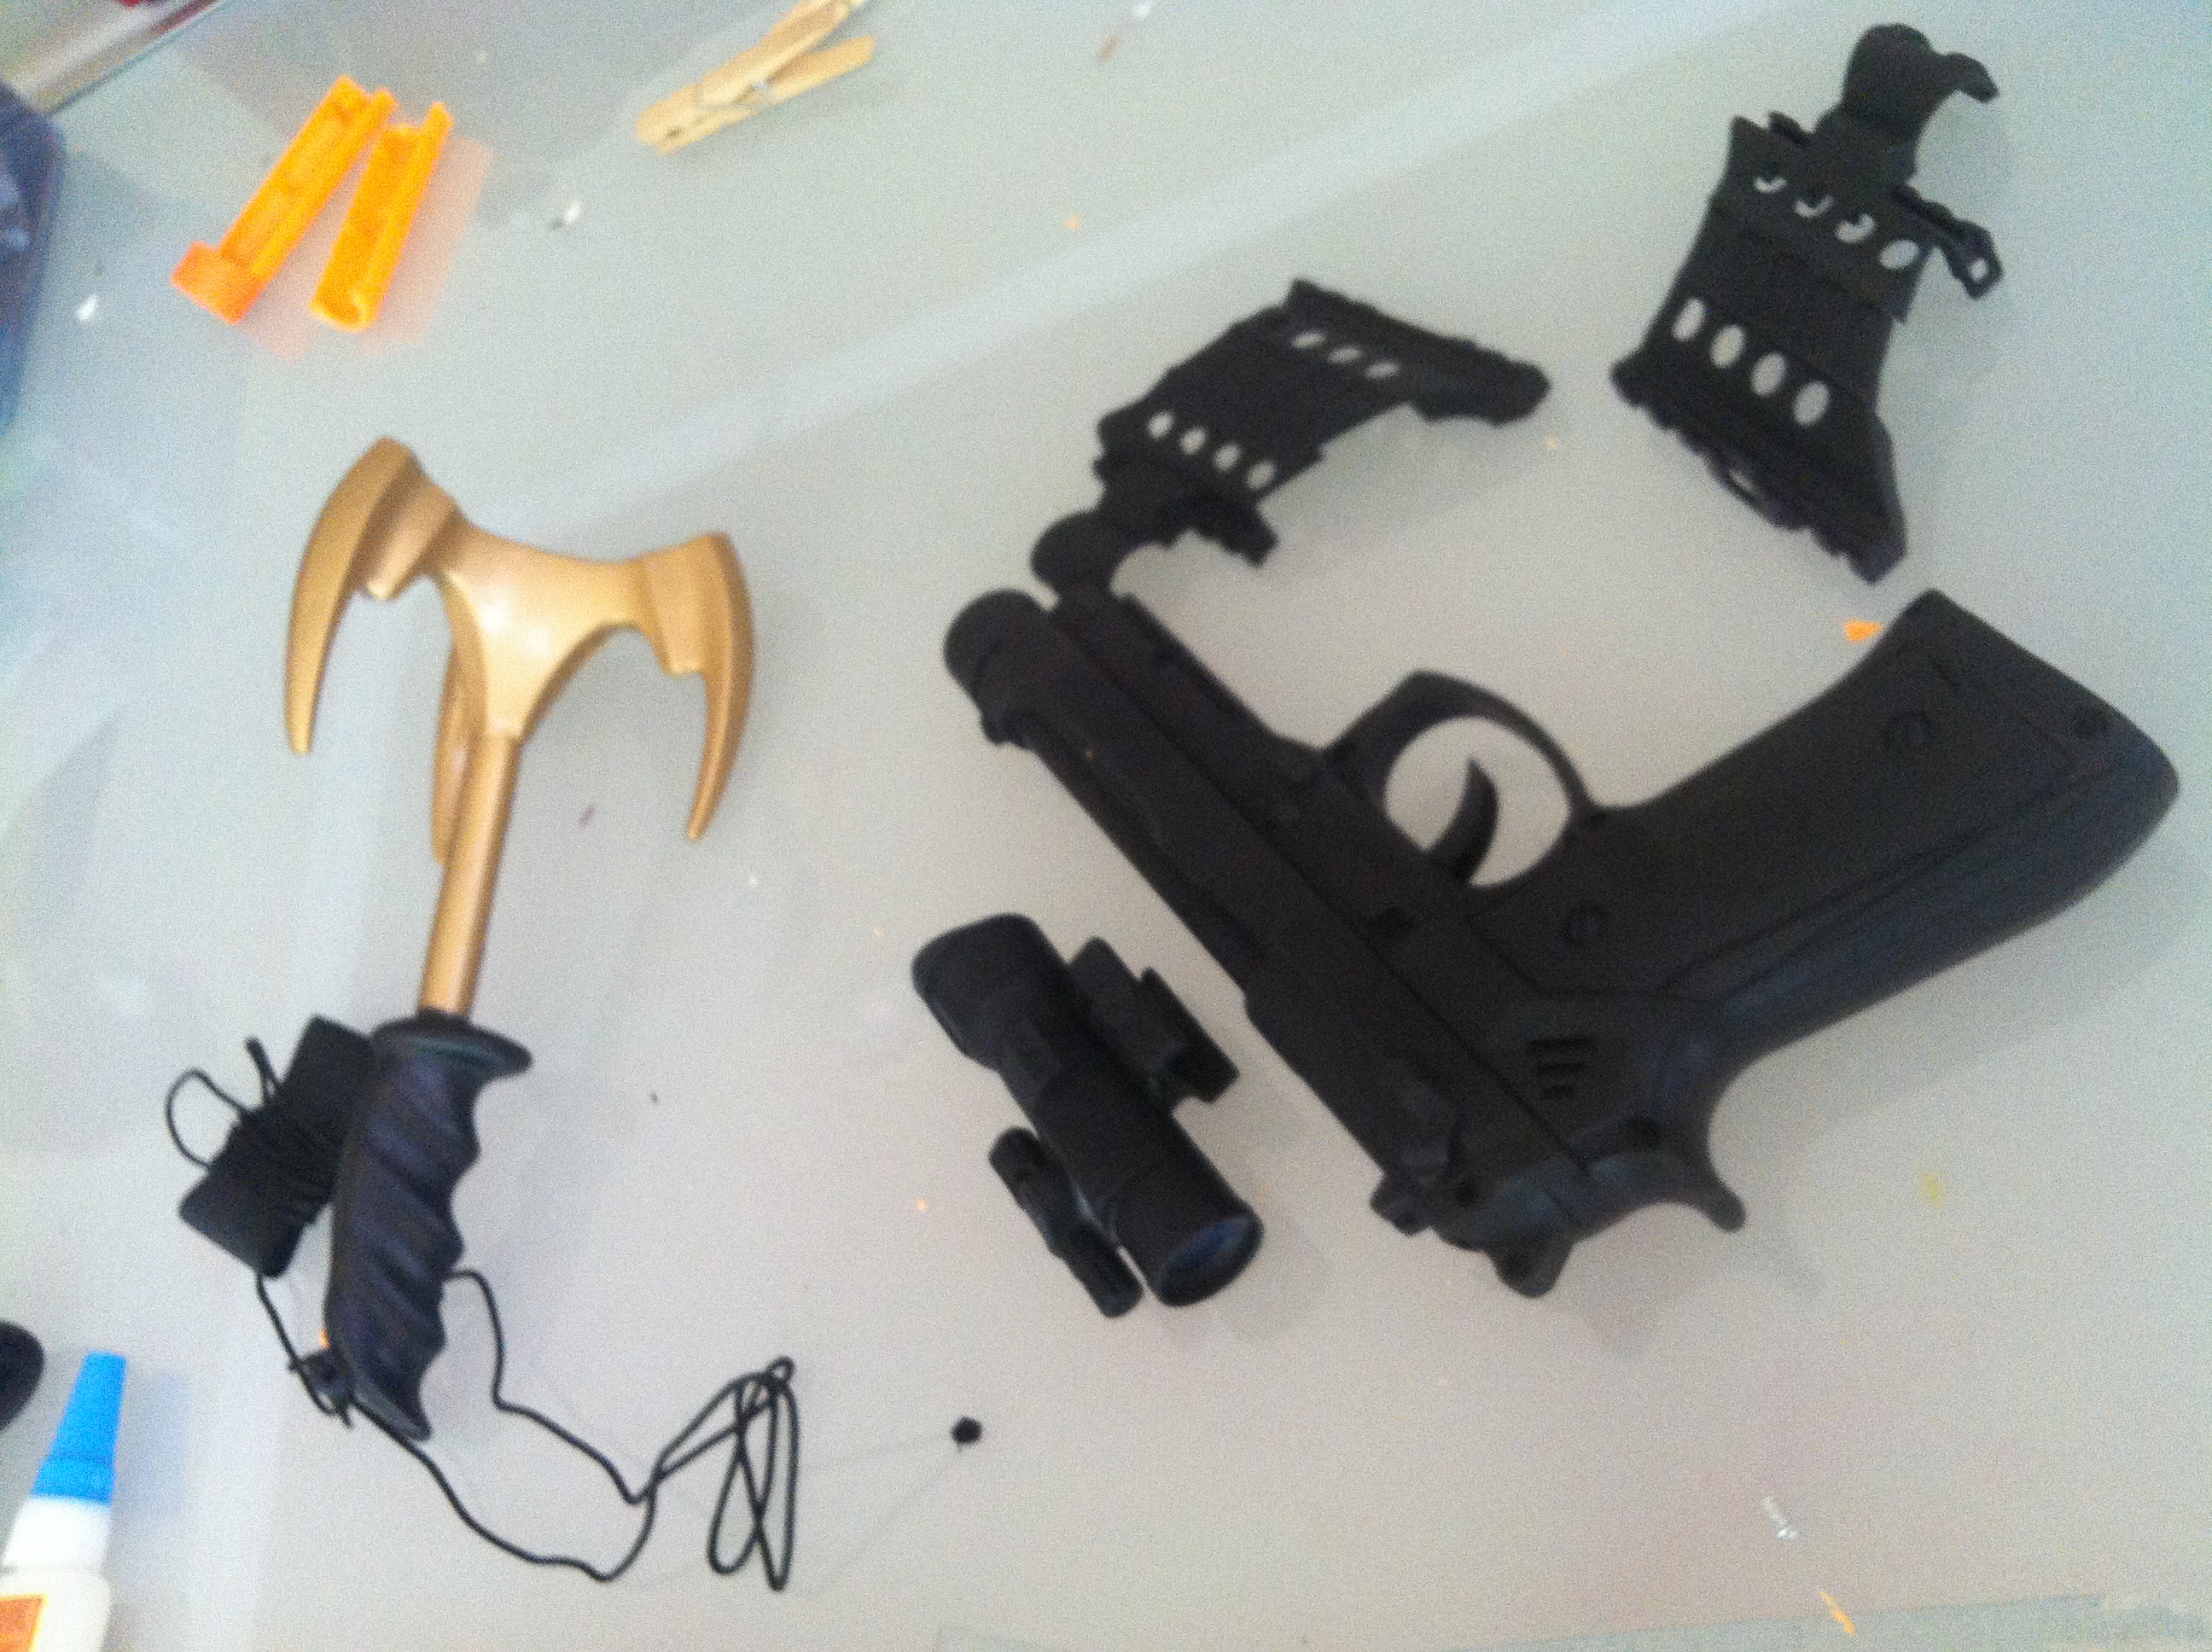 Be careful not to handle the gun too much before you paint it. Oils from your hands can impact the paint. I always use Krylon Fusion spray paint for plastics. For this project, I used black paint with a satin finish.
Take care to keep the spray can at least a foot from the gun and spray a thin layer of the paint, don't worry if you still see the original color through this first layer. Let the layer dry completely, and then add another. Keep adding thin layers until the gun is completely covered. MAKE SURE that each layer dries completely before adding the next, and that the layers stay thin, or you will get drips that ruin the look of your gun.
My gun ended up looking VERY modern and recognizable with the black primer on it. I was really worried by this point, but kept on going. Notice I painted all the parts just in case I decided to use them later. (The grappling hook is part of Step 5.)
Step Four: Metalize
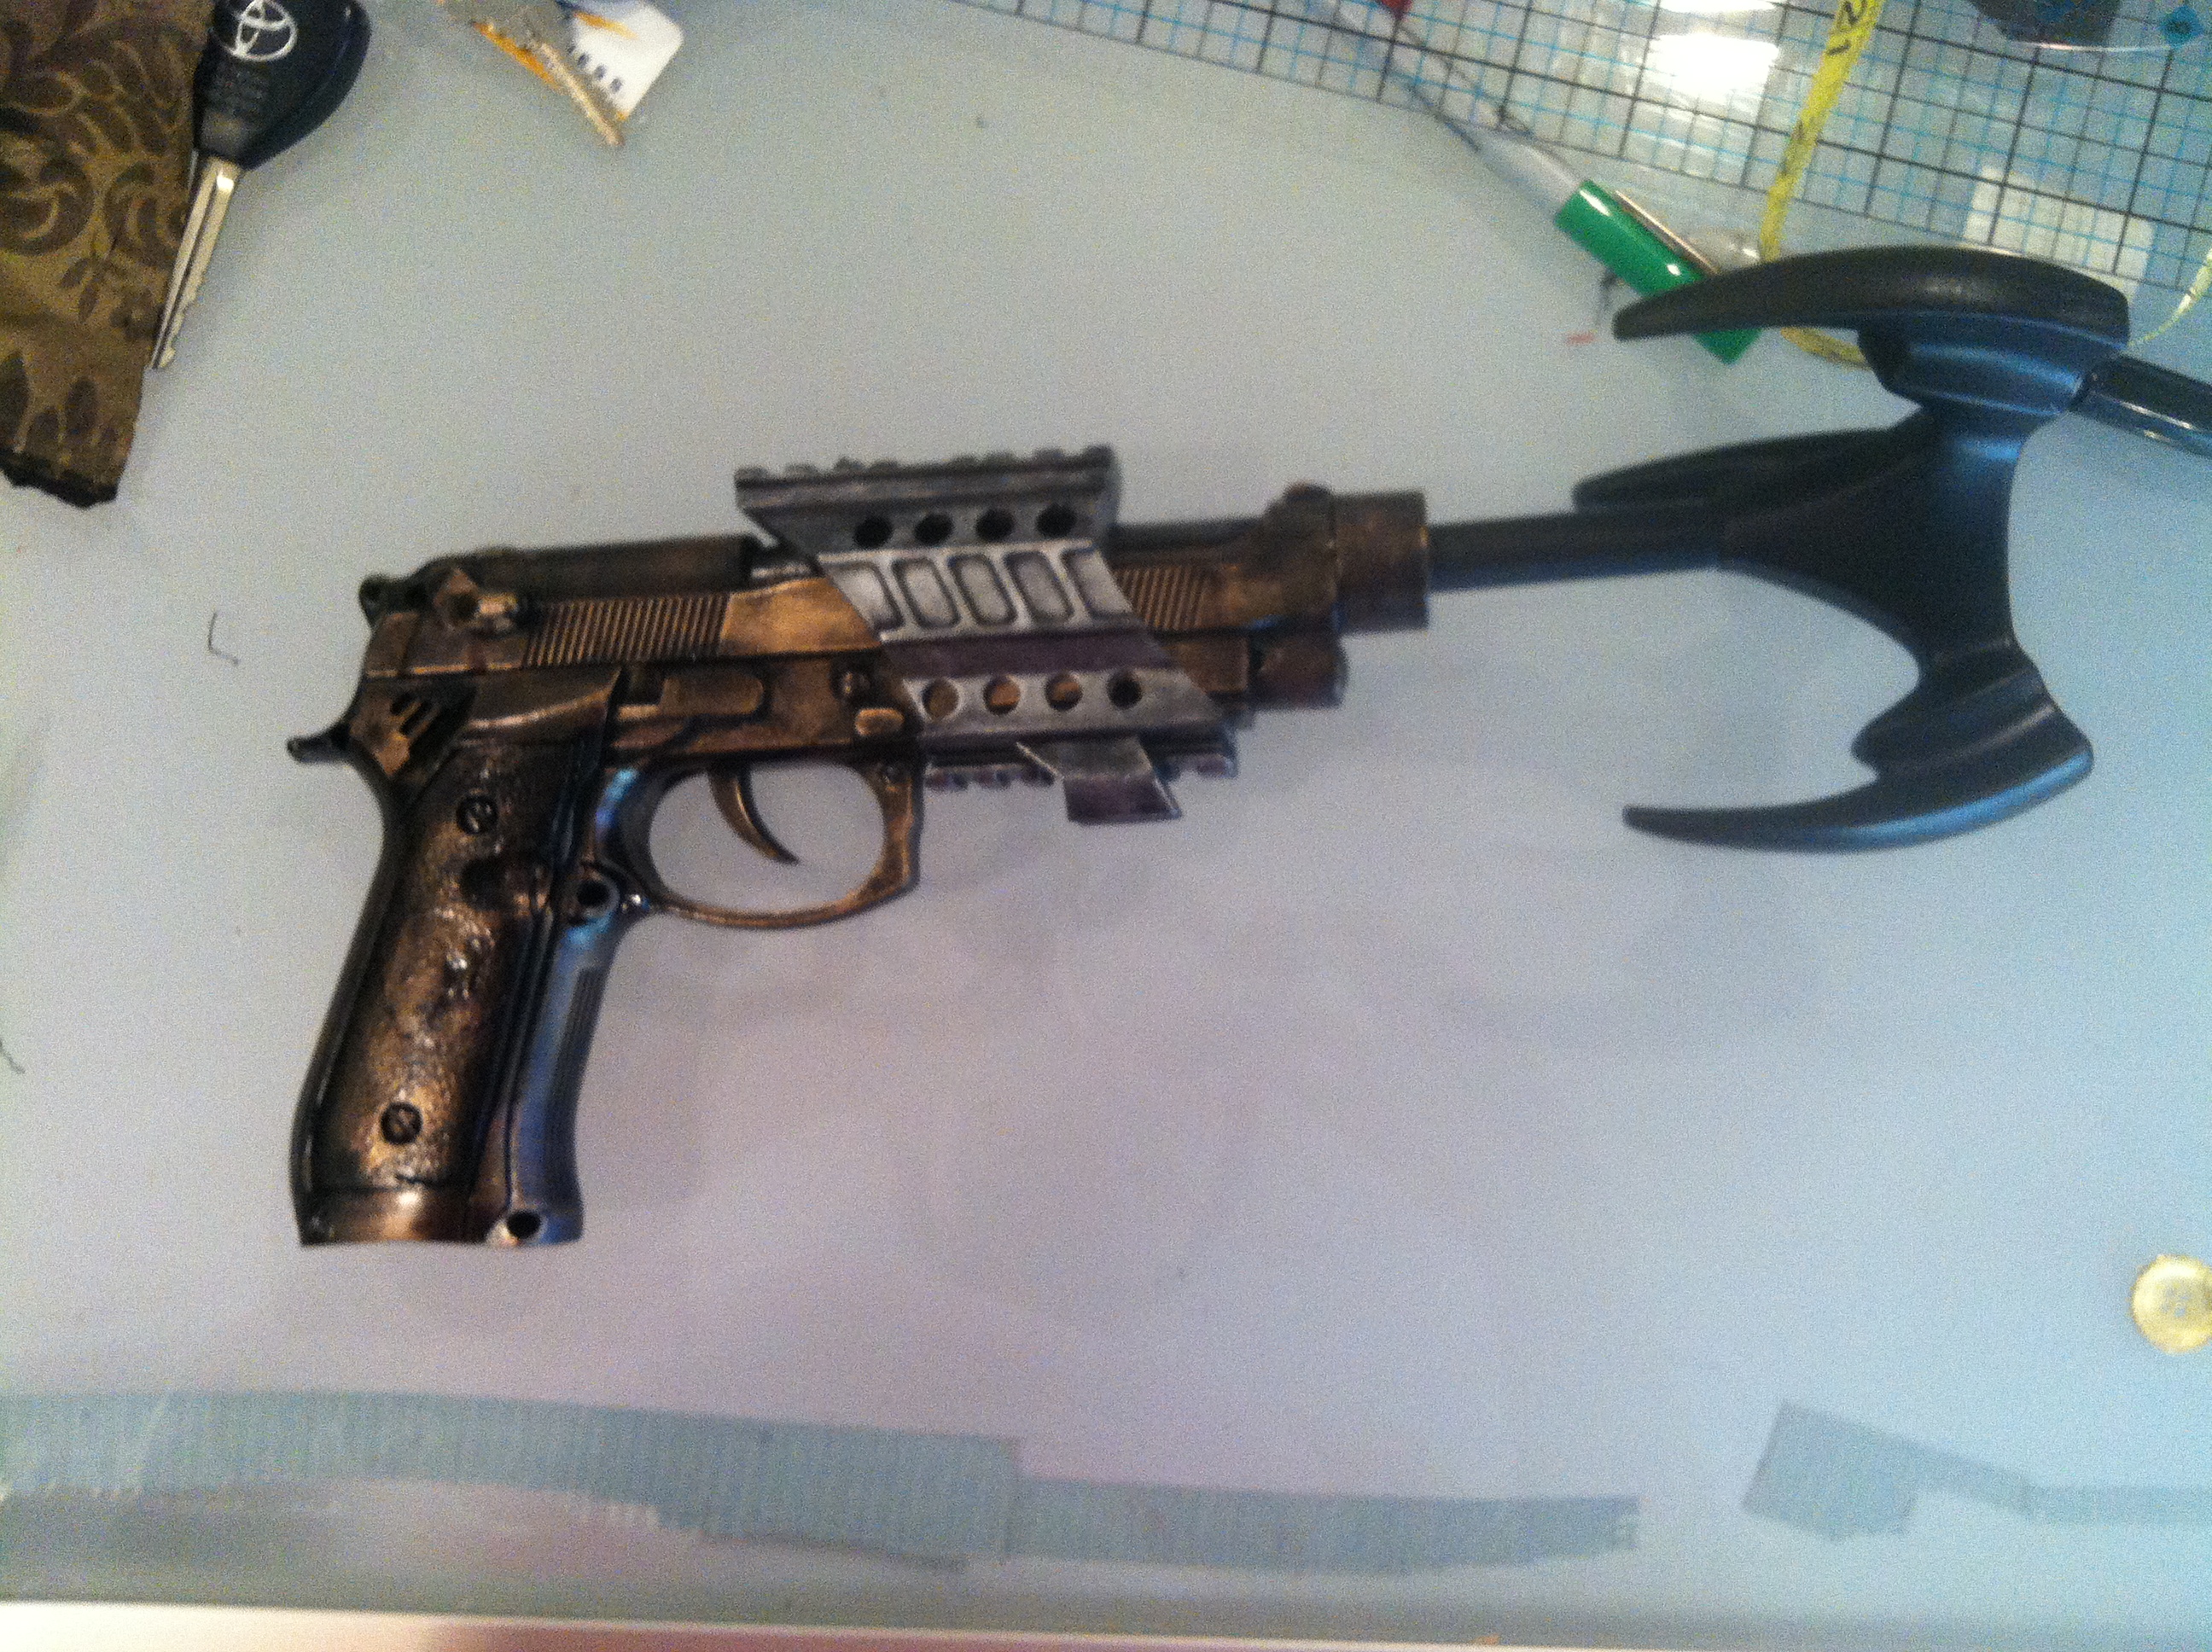 You will need an amazing substance called Rub-n-Buff to make the gun look metallic. It comes in small tubes, but don't let that fool you, a little goes a LONG way. It comes in tons of colors, I used the silver shade and the antique gold for my gun. Different metal looks all put together in one weapon really make something look steampunk, so don't hesitate to use two or three different colors on the different parts of your gun.
You are going to use the Rub-n-Buff to highlight the metal areas of your gun by hand. This of it more as a polish than a paint. Put a small dot of it on a smooth cloth, then carefully start applying it to your weapon. I HIGHLY suggest you practice on something else first to get a feel for it. Remember how you slowly added more and more primer paint to your gun in step three? Start with a tiny bit and then add more. I left a lot of black showing in the crevices of my gun to make it look grimy and old. As you "buff" your weapon, think about what parts of the gun's surface would get touched or rubbed against things the most. Those areas should be the brightest and the crevices should stay darker.
Let the Rub-n-Buff dry for a few hours. It is wax-based and rubs off on everything while wet, so be careful!
Step Five: Customize
This is where you get to let your creativity run wild! My steampunk weapon is a grapple gun, so I will tell you what I did to stylize my weapon in that manner, but don't limit yourself! Do a Google image search and get inspired.
 I bought a toy Batman grappling hook to go with my gun. I painted it black, using the same method described above, and then used a slight brush of Rub-n-Buff to give it a little bit of a metallic reflection. I cut off the handle of the grappling hook and glued it into the barrel of my gun. I lucked out and it fit perfectly. I attached very thin black chain (I think it was supposed to be used in jewelry making) to a Yo-Yo and wrapped it around until it looked like a convincing spool for a grapple gun. And finally I used thick copper wire to make a rigging to attach the yo-yo to the bottom of the gun.
I wanted my gun to have cool chemical chambers on it, so I started testing the cleaning liquids around my house in small bottles I bought at Micheal's. I ended up settling with Murphy's Oil (the kind you use to clean wood) because of its cool amber color and thick consistency. I filled three little perfume bottles with it, drilled three appropriately-sized holes in the top of my gun, and glued them into place. I was careful to glue them in such a way as to permanently seal the bottles as well. Sadly, there was a mishap in my workshop and one of the bottles ended up breaking. I still haven't found a matching bottle to replace it, so my grapple gun only has two canisters of super sticking liquid/super propellent on it.
Seriously, have fun with this last step. Wander around your local craft store or browse the internet and you will find some amazing things to work with! Lights, gears, piping, wood detailing, chemical chambers, moving parts, sound effects, and many other amazing things are possible, but you have to be brave enough to experiment a little.

Do-It-Yourself: Steampunk Bustle Skirt
 The bustle skirt was my favorite part of my Steampunk Batgirl costume. I wanted to create an item that was a steampunk staple, but still hint at the traditional cape that Batgirl is famous for wearing. The skirt is a simple six-panel skirt that is just missing the front three panels. Don't know what that means? That's ok, keep reading and I will do my best to explain. (I simplified some steps in this process, but it will end up looking just like my skirt.)
Waistband
The first thing you need to figure out is the length of your waistband. Measure your TRUE waist, which should be the narrowest part of your torso, a little above your belly button. If you are going to wear the skirt under a corset subtract one inch from that measurement, otherwise add one inch to the measurement.
Example: Waist measurement: 28 inches
Under Corset: 27 inches
Not under corset: 29 inches
 This will end up being the length of your waistband, including seam allowances. The under corset length is smaller to accommodate the smaller waist size and avoid uncomfortable bunching under the corset. Measure and cut a rectangular strip if your fabric, using your adjusted waist measurement as the length and a width of 4 inches.
Take your waistband strip and iron some interfacing on the underside of it. You don't need heavy duty interfacing, just some regular weight stuff to give the waistband some structural strength. MAKE SURE THAT YOU BUY IRON-ON INTERFACING. It will make your life a LOT easier, so ask the store personnel if you are unsure. It's really easy to buy the wrong stuff, and we all hate the walk of shame back through the fabric store that you left 20 minutes ago.
 Before you start sewing, you will want to iron creases into your waistband because it will make things much faster. Fold it over length-wise and iron it until it holds the crease down the center, then fold half inch folds along each edge of the waistband and iron until they hold creases as well. These mark your seam allowances and the creases will make the sewing easier.
 Fold the waistband lengthwise, with the interfacing on the outside. This should be folded opposite of the ironed seam that you ironed earlier. You will then sew the ends closed on the half inch creases that you ironed earlier, but make sure that the lengthwise half inch seams are sewn in the folded position.
Now you are done prepping your waistband! You will turn it right-side out later, but for now we will move on to the panels!
Panels
 I traced my panels from a floor-length skirt onto large pieces of butcher paper (ok, so they were old DnD maps, sue me). Those panels are about 13 inches wide across the top, 34 inches wide across the bottom, and 42 inches long, but I added about 5 more inches on both sides and an extra foot to the length of my panel outline. The fuller you want your bustle, the more fabric you need to add to each panel. I used three enlarged panels to create my steampunk skirt. Remember, always trace an cut patterns length-wise according to the weave of the fabric, just like the picture to the right.
PLEASE NOTE: Only add extra inches of fabric to the panels that you are going to use for the bustle. You won't want to add as much/any extra fabric to the panel pattern for the front of the skirt or you will trip all over it.
 Then sew the panels together by matching the edges and stitching them together to form a circle or semi-circle, like the picture to the left. My skirt only used three panels since it only went half way around my body. Full skirts will usually use five or more panels. Make sure your seams are all facing the same direction on your skirt as you sew. After you sew your panels together, you will want to finish your edges on the underside of the skirt and hem the outer edges. This video shows you ways to do that.
Put it all Together
Now you will pin the panels to the waistband before you sew them. You will choose one of the lengthwise half-inch seam allowances and pin the panels to, and start by pinning the front edges of the skirt to the appropriate place on the waistband. For my skirt, I wanted the skirt to open right in front of my hip bones so that my bloomers and garters would show. The easiest way to do this is to safety pin the waistband on yourself, then pin the front edges of the skirt to where you want them on the waistband.

 Once the front pins are in place, you will need to make pleats to gather the rest of the skirt fabric to the waistband. You will basically fold the fabric over itself, then pin it into place. This it the most tedious part of making the skirt, but remember that the pleats do not have to be perfect.
Once you are done pinning the skirt, carefully sew the pleats in place on the side that you pinned. Iron the pleats flat after you sew them, then close the waistband (be careful that the other seam allowance is folded up inside), and then sew it shut across the bottom.
Bustling the Bustle
Now your basic skirt is finished, it's time to add the bustle. The easiest way is to put your skirt on the dress form and start pinning. There isn't really a magic formula, just start pulling spots and pinning them to higher places to give it the tiered appearance. Once you have everything looking good, hand stitch each spot where you pinned. Don't start sewing until your whole bustle is pinned, because you will probably change your mind... a few times.


Bat Wings
 The "bat" part of the skirt was actually designed to be a completely separate piece. It was made just like a cape, and is hand stitched into the waistband so that it can be detached and reattached very easily. I did that to give the skirt more versatility as a costume piece. I can now wear it with my
 steampunk batgirl, or remove it to be just steampunk!
I measured and drew the desired shape on butcher paper (another old DnD map) and traced one on the black and one on the yellow fabrics. I then carefully cut them out and pinned them together, starting with the point of each bat wing shape to be sure they lined up correctly. I then stitched them together and turned it inside out to hide the edges, just like a simple cape design. Originally, I had planned to add interfacing to give the wings some stiffness and shape, but I really liked how the material flowed without it. Then I simply closed up the top of the "wings" and hand stitched it into the waistband of the skirt, underneath the already finished bustle.


Have questions? Need clarification? Post a reply or email me at Kimi@goldenlasso.net
Steampunk Batgirl Mask
I am creating an unnamed (*cough*) steampunk superhero costume for San Diego Comic-Con. I have never attempted a steampunk outfit before, so I knew there would be a bit of a learning curve. The mask was going to be the most difficult piece of the outfit for me, and a make-it or break-it piece for the cosplay, so I started off my project with that piece. It was a major lesson in patience for me. While not all of my costumes go perfectly, this is the first time that something has gotten ruined and I had to restart from scratch.
Plan A:
 My plan was very simple, I would create the mask out of InstaMorph, then paint and cover parts of it with leather. Easy right? Nope.
The formation of the mask went well enough. InstaMorph is my go-to substance when I have to create something from scratch. It's very easy to work with, but also very strong. Fiberglass will be a big step up, but for now, this works very well. The only drawback is the low melting point, which is around 150 degrees. Do not make something out of this material and then leave it in the car.
Anyway, the formation went very well and I was thrilled with the initial fit and look of the mask. It had amazing potential, but the edges were a little uneven. I sanded these down to get a flatter edge since I eventually wanted it to resemble metal. It sanded easily, but ended up getting a fuzzy texture on the areas I sanded it. Here is the turning point. What I should have done was boil the plastic one more time to smooth this out. Opps. Instead I thought the paint would cover the fuzz and it would end up with a rough metal look. This didn't happen. My mask ended up looking almost furry, and since it had already been painted, I couldn't go back an reform the Instamorph into another shape. Bye bye Plan A!
Plan B:
I was not going to spend hours forming a mask from scratch again, especially because I now doubted that I could get the finished texture that I wanted, so Plan B started with a trip to Michael's. I found surprisingly sturdy white all-face masks for around $5. They were plastic, but had texture and thickness enough to be the base for my alterations. I brought one home and started creating my masterpiece. Plan A was a black mask with leather accents, but my plan changed a lot after the initial failure.
 The shape was actually very easy to get. I simply drew the shape I wanted on the back (just in case the pencil would leave marks), and then cut it with strong scissors. I then rubbed it down with mineral spirits to remove any excess oils or anti-mold coating on the plastic, and sprayed a few base coats of black Krylon Fusion spray paint. I always use the Fusion as a base coat on plastics because it (supposedly) bonds with plastics. It seems to work pretty well for all my projects so far. I used black because it gives a great base to metallic paints, and it looks better than white if the metallic chips for some reason. I used Krylon Copper Metallic spray paint after letting the black dry for a few days. (I've been testing a lot of metal-imitating spray paints and will be doing a blog post to compare them in the future!)
I wanted the mask to look like molded metal, so it was a VERY slow process. To get it smooth you have to do lots of thin layers, but not too thin or you never get rid of the texture. If you spray too thickly, you will start getting drips. PRO TIP: Let each layer dry COMPLETELY before you add on the next one.
Once again, I was too enthusiastic and handled the mask after only a few hours of drying. There are now a few TINY marks on it, but nobody can see them unless they are less than a foot away. Please, don't make my mistake! Let your creation dry for a few days before you move on to  adding rivets, leather, goggles etc. I knew better, but just got too excited!
Next I measured and cut the leather. I glued the edges under so that it would appear smooth and then glued the leather to the mask. After that I used a leather punch to make holes through the leather and mask. The rivets are purely decoration, and were glued in place through those holes. Actually setting the rivets with a hammer (like I did on my Sif costume) would have damaged the mask.
Finally, I added the ears and strap. I cut the ears from Plan A's mask and wrapped them in leather, gluing them in place and using a whip stitch to close the edge. This also added a cool steampunk look to them. I sewed and glued them and the strap in place. All of the leather and straps were taken from a $4 purse that I bought at the thrift store. The last thing I did to the mask was glue on the goggles, which were purchased on Amazon for $7 and dismantled so I could attach them correctly.
 (The ears will lay flat against my head when I wear it.)
Overall, I am much happier with the final outcome than I was with my original design. I think this looks much more "steampunk" and will actually be more comfortable to wear, mostly because of its lighter weight.
Stay tuned for more updates on this very educational cosplay experience!