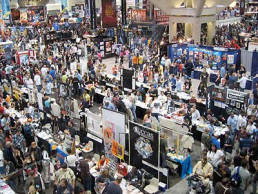
Surviving Comic-Con
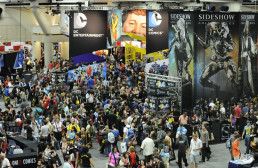
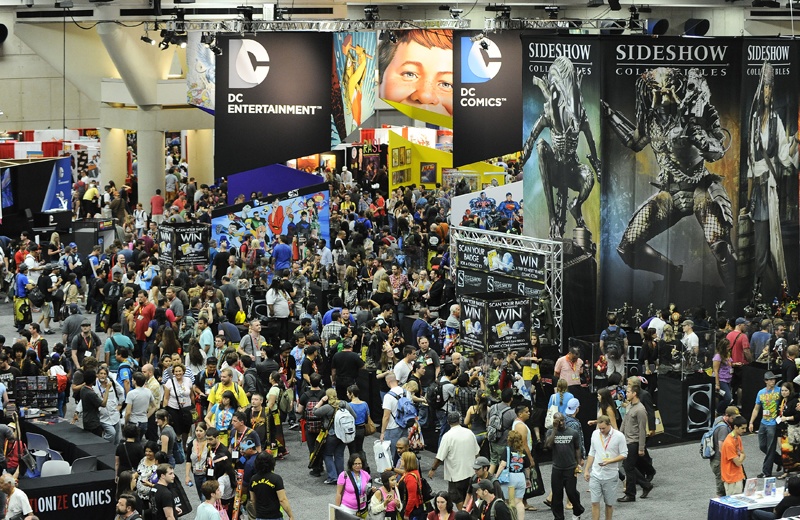
 Comic-Con. Everyone, from cosplayers to comic publishers, is frantically preparing for one of the biggest pop culture events of the year. It's a huge gathering of people on the scale of Mardi Gras or the Super Bowl. Here is my list of tips to having a great time at such a chaotic event. (If you're a cosplayer, you may also want to read my Cosplay Must Haves article!)
1. Have a Plan & Update the Plan!
Spend some time at comic-con.org and make a rough-draft plan before you even leave for San Diego. Figure out what panels are MUST-SEE for you, if there are any exciting events or meet-ups, where your favorite creators are holding signings, and where your favorite booths will be. After you have your rough-draft, highlight your three top choices for each day.
When you get to SDCC, be sure to check updates online and to check the programs they hand out for updates and changes to the schedule. Twitter is also an awesome tool for staying on top of adjustments to scheduling.
YOU WILL HAVE TO MAKE HARD CHOICES. You will never get to everything you want to see. Be prepared for this.
 2. Bring Provisions
You should always carry water, food, hand sanitizer, and painkillers with you. Food and water are incredibly expensive, and you could easily lose an hour standing in line at the Starbucks in the convention center. Bring a backpack or messenger bag full of power bars, trail mix, bottles of water, candy. If your feet or head start hurting in the middle of the day it's always better to be able to deal with it immediately, and you want to avoid getting sick when dealing with the (mostly) unwashed masses.
PRO TIP: I love collapsible water bottles for conventions. They are easy to refill at water fountains and take up less space in your bag when they are empty.
I also recommend bringing a cooler of food with you to leave in your hotel, especially if you are staying anywhere near the Gaslamp district. It's much cheaper/easier to make yourself a sandwich for lunch, or have some milk and cereal in the morning than dealing with the waits and upped prices of local restaurants for every meal. Requesting a fridge is ideal, but those are usually limited and gone unless you arrive on Monday or Tuesday before the Con.
Con-Bag Check List:
- Snacks & Water
- Sharpies to get autographs
- chargers & power strip/ extra batteries
- maps
- painkillers
- hand sanitizer
- cash (many booths don't accept cards!)
- iPod/handheld gaming device & headphones to combat line boredom
- Travel stick of deodorant & mints/gum
- camera/phone that takes pictures
3. Stay Connected
The massive amounts of people really put the strain on technology at SDCC. All cell networks are stretched within an inch of their life, and it's often hard to get service in parts of the convention center. If you are splitting from your party, or want to meet up with specific people, plan it ahead of time or early in the morning before everyone starts using the network. You will waste less time if everyone knows to meet at the outside stairs at 10am, instead of texting and calling and trying to round people up on the fly.
Pack extra batteries for your camera, phone, and even your laptop if you are able. If not, be sure to bring your charger with you and a surge protector. You will be the most popular person in your line if you share the charging power with those around you. It will also guarantee that you are allowed to use the outlet, even if someone's already plugged into it. While you're in the convention center turn off GPS and other non-essential functions on your phone to save battery life. Most of that stuff doesn't work within the heavy concrete walls anyway.
 4. Be Comfortable
If you're a cosplayer, you're screwed. Everyone else, dress as comfortably as possible. Comfortable shoes are the most important thing. You will be on your feet ALL DAY. ALL DAY and maybe most of the evening!!! Wear something with support that is made for running or walking and be sure they are already broken in.
Dress in something that breathes (cottons, natural fabrics) so that you stay comfortable and sweat can evaporate instead of getting sticky. You will probably want to sit on the floor at some point due to exhaustion and lack of seating, so be sure your outfit can handle that. Wear a sweatshirt around your waist, even if it's a warm day. Some of the panel rooms or outside areas can get pretty chilly with the air blasting.
Bring a backpack or messenger bag to carry swag in. If you really like free stuff, bring an extra empty one with you! They bags they hand out are cumbersome and can be hard to carry in crowded areas.
5. Have A Map
Actually, have a few maps. You will want a map of the show floor and convention center. You can print these out early at the Comic-Con website or pick them up on site. A map of the downtown San Diego is really handy as well. With internet/cellular service somewhat unreliable at times, it really helps when you are trying to find events away from the convention center. These are usually available for free from your hotel, or you can print one out before you leave home.
AVOID DRIVING AS MUCH AS POSSIBLE! Walking, even to something many blocks from the convention center, will be faster since most of downtown is at a perpetual standstill. You can always hire the bike carriages that are all over the place if you don't feel like walking. If you are driving in each day, GET THERE EARLY!
6. Wear Sunscreen
It's San Diego for heaven's sake! You never know when your panel's line might end up outside, or if you'll be stuck sitting by a window. You don't want to become a french fry if the walk from your hotel takes longer than expected.
7. Be Prepared for Panels
 Panels can be a nightmare. There are whole survival guides written about attending SDCC panels, and you still wouldn't know everything that you need to know. Here are the basics:
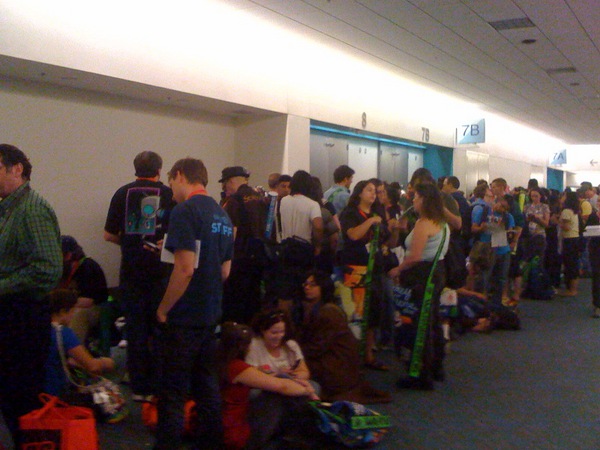
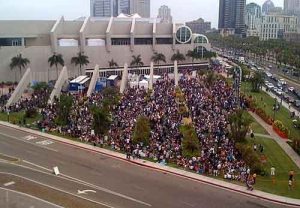
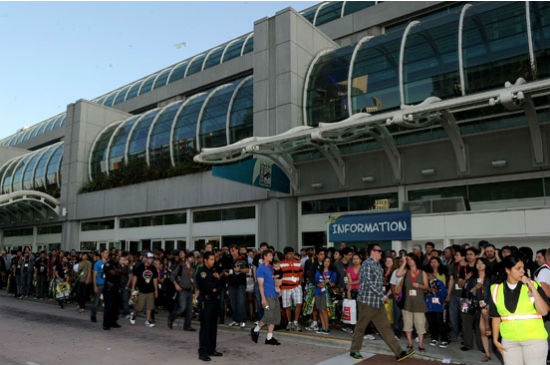
There are lines for the panels, and the more popular something is, the longer the line will be. Hall H has the longest lines (see picture of Hall H line to the right), but with good planning it is usually doable. Some people sleep overnight to get into Hall H, and rumors of famous stars visiting the line late at night abound. If you're planning to spend lots of time in the Hall H line be sure you only have one normal sized chair or sleeping bag and are not saving spots for people not in the line (bathroom breaks are ok). It is also outside, so be ready.
The big thing to know is that they don't clear the room after each panel. So people will sit through many panels to guarantee that they see the one they want in a few hours. Hell, many people just hang out in Hall H all day and never see the rest of the convention. This can be frustrating for people in line because sometimes the room hits max capacity before the whole line is allowed in. Again, if something is really popular, go early and politely sit through the panel(s) before it.
Before spending all your time trying to get into a panel, check to see if it will be posted online. It's a great way to see a panel without dealing with the crowds or when there is a scheduling conflict. You might have to do a little hunting around, but thanks to YouTube, a huge amount of panels are available to watch later. If you go to a panel and want to participate, PLEASE ASK GOOD QUESTIONS. Nobody wants to hear a rant about your feelings on their work for the last 10 years. Make sure your asking something that involves the panel topic and doesn't make the panelists hate you.
 8. Be Early For Everything
Leave yourself extra time to get everywhere. No matter how well you plan your day, there will be issues that come up. This is most important with getting to and from the convention center at busy times. The shuttles can sometimes get off schedule, so catching an early one will ensure that you don't miss your favorite stuff and give you more time on the convention floor. Arrive early for signings, panels, and screenings. There are always lines and the sooner you arrive, the better chance you have of actually getting to participate.
There is no real rule of thumb for this, but it will easily take you two or three times as long to get anywhere.
9. Hygiene
There is a massive number of people at Comic-Con. I don't want to stereotype our subculture, but I've attended enough gaming and comic conventions to know better. PLEASE SHOWER EVERY DAY! PEOPLE NOTICE!! Parts of the convention center get very warm and everyone sweats. I don't care how worn out you are, SHOWER. I highly recommend packing a small travel stick of deodorant in your bag to freshen up throughout the day, especially cosplayers who are wearing bulky or heavy outfits. Please also be sure to brush your teeth daily since you will most likely be conversing with other humans at some point. Mints or gum are a great way to stay fresh throughout the day.
By Sunday, many parts of the convention center develop a distinct odor. If you're not part of the solution, you are part of the problem.
10. Interacting with Cosplayers
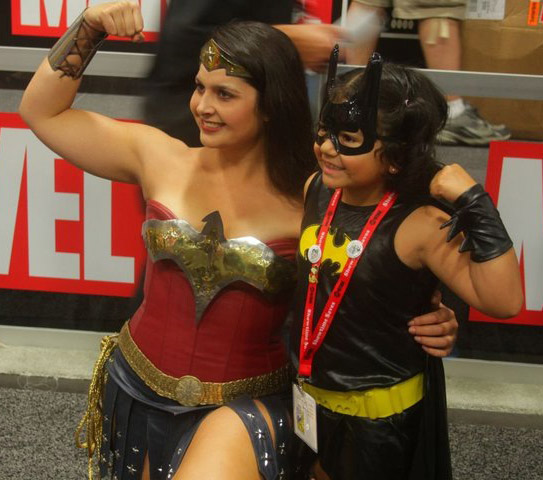 The people who are dressed in costume are called "cosplayers," and they are people too. In fact, they are fans just like you! They are not paid by the convention, and they buy their tickets and hotel rooms just like everyone else. Cosplayers are there to enjoy themselves, not to entertain you. Be respectful. They come from all walks of life and you never know when a cosplayer might be an off duty cop with a passion for sewing. DO NOT TOUCH A COSPLAYER WITHOUT ASKING FIRST! COSPLAY DOES NOT EQUAL CONSENT!
Most cosplayers do love to pose for pictures because we are incredibly proud of the outfits we have made and love the characters. It's always great to meet another fan and very flattering to be asked for a photo. Ask first, and it's always great to have you pose in the picture with us. If you are planning on posting the picture online, please talk to the cosplayer about it first. Most have Facebook pages or DeviantArt pages that you can easily credit.
Be careful of our costumes! We put hundreds of hours and often hundreds of dollars into making them. Some pieces may look very sturdy, but often they are very fragile. Grabbing something or touching something can seriously damage it. Ask before grabbing a prop to pose with or before putting your hand on their shoulder armor.
11. Have Fun
Comic-Con is an amazing experience, and a yearly tradition for many fans. The most important thing is that you enjoy yourself. Take time to soak in the experience and appreciate how cool it is to have so many geek brothers and sisters all in one place!

Pre-Event Skin Care
 Prepping your face for a big event or convention is as important as prepping your costume. Unless it's covered by a mask, your face is a major focal point of your cosplay. You should do everything you can to take care of it!
Rules of Event Prep:
DON'T Try Anything New!
The clock is ticking down until the convention. You're frantic to get your costume done, your trying to figure out your schedule, and the excitement is building. Now is NOT the time to try a product or procedure on your face for the first time. That tanning lotion that your friend loves could leave you looking orange, you might be allergic to that new moisturizer, and even new makeup might do some damage. Experiment when you have a little more time to fix any problems that pop up, and stick with your regular routine right before the convention.
Plucking and Waxing
Make sure you pluck a few days before the convention and/or get waxed at least a week before the convention, but ONLY if you've had it done before! This gives your skin plenty of time to heal up if there is any irritation. Waxing is more unpredictable and tends to show up more when it goes wrong, so leave more time to fix the problem. DON'T TRY WAXING FOR THE FIRST TIME RIGHT BEFORE A CONVENTION!
 Hydrate
Water is the magic beauty potion you've been overlooking for years. Start drinking as much water as you can about two weeks before the convention. It will keep your skin clear and help you avoid flaky dry spots. It will also help you avoid chapped lips, red eyes, dark bags under your eyes, and maintain a healthy weight. Drinking 6-8 glasses of water helps your whole body, so drink.
Avoid Alcohol
Yes, I'm a party pooper. You should avoid drinking during the last week before a convention. One glass of wine probably isn't going to do much, but alcohol dehydrates your body, which causes red eyes, puffiness, bags under your eyes, and more.
Sleep!
A lot of beauty problems can be solved just by getting 8-10 hours of sleep. Red eyes, bags under the eyes, and swelling can all be signs that you didn't get enough sleep last night. Plan on having your costume done, your bags packed, and everything ready to go so that you can spend the night before relaxing and resting.
Daily Skin Care
Wash Your Face at Night
Washing your face strips your skin of natural oils and can dry out your skin. You should really only wash your face at the end of the day to remove makeup and other build up. Washing your face before bed also keeps oils from building up on your pillowcase, which helps prevent breakouts. In the morning, just splash your face with some water instead of scrubbing away all the natural moisture that your skin produces.
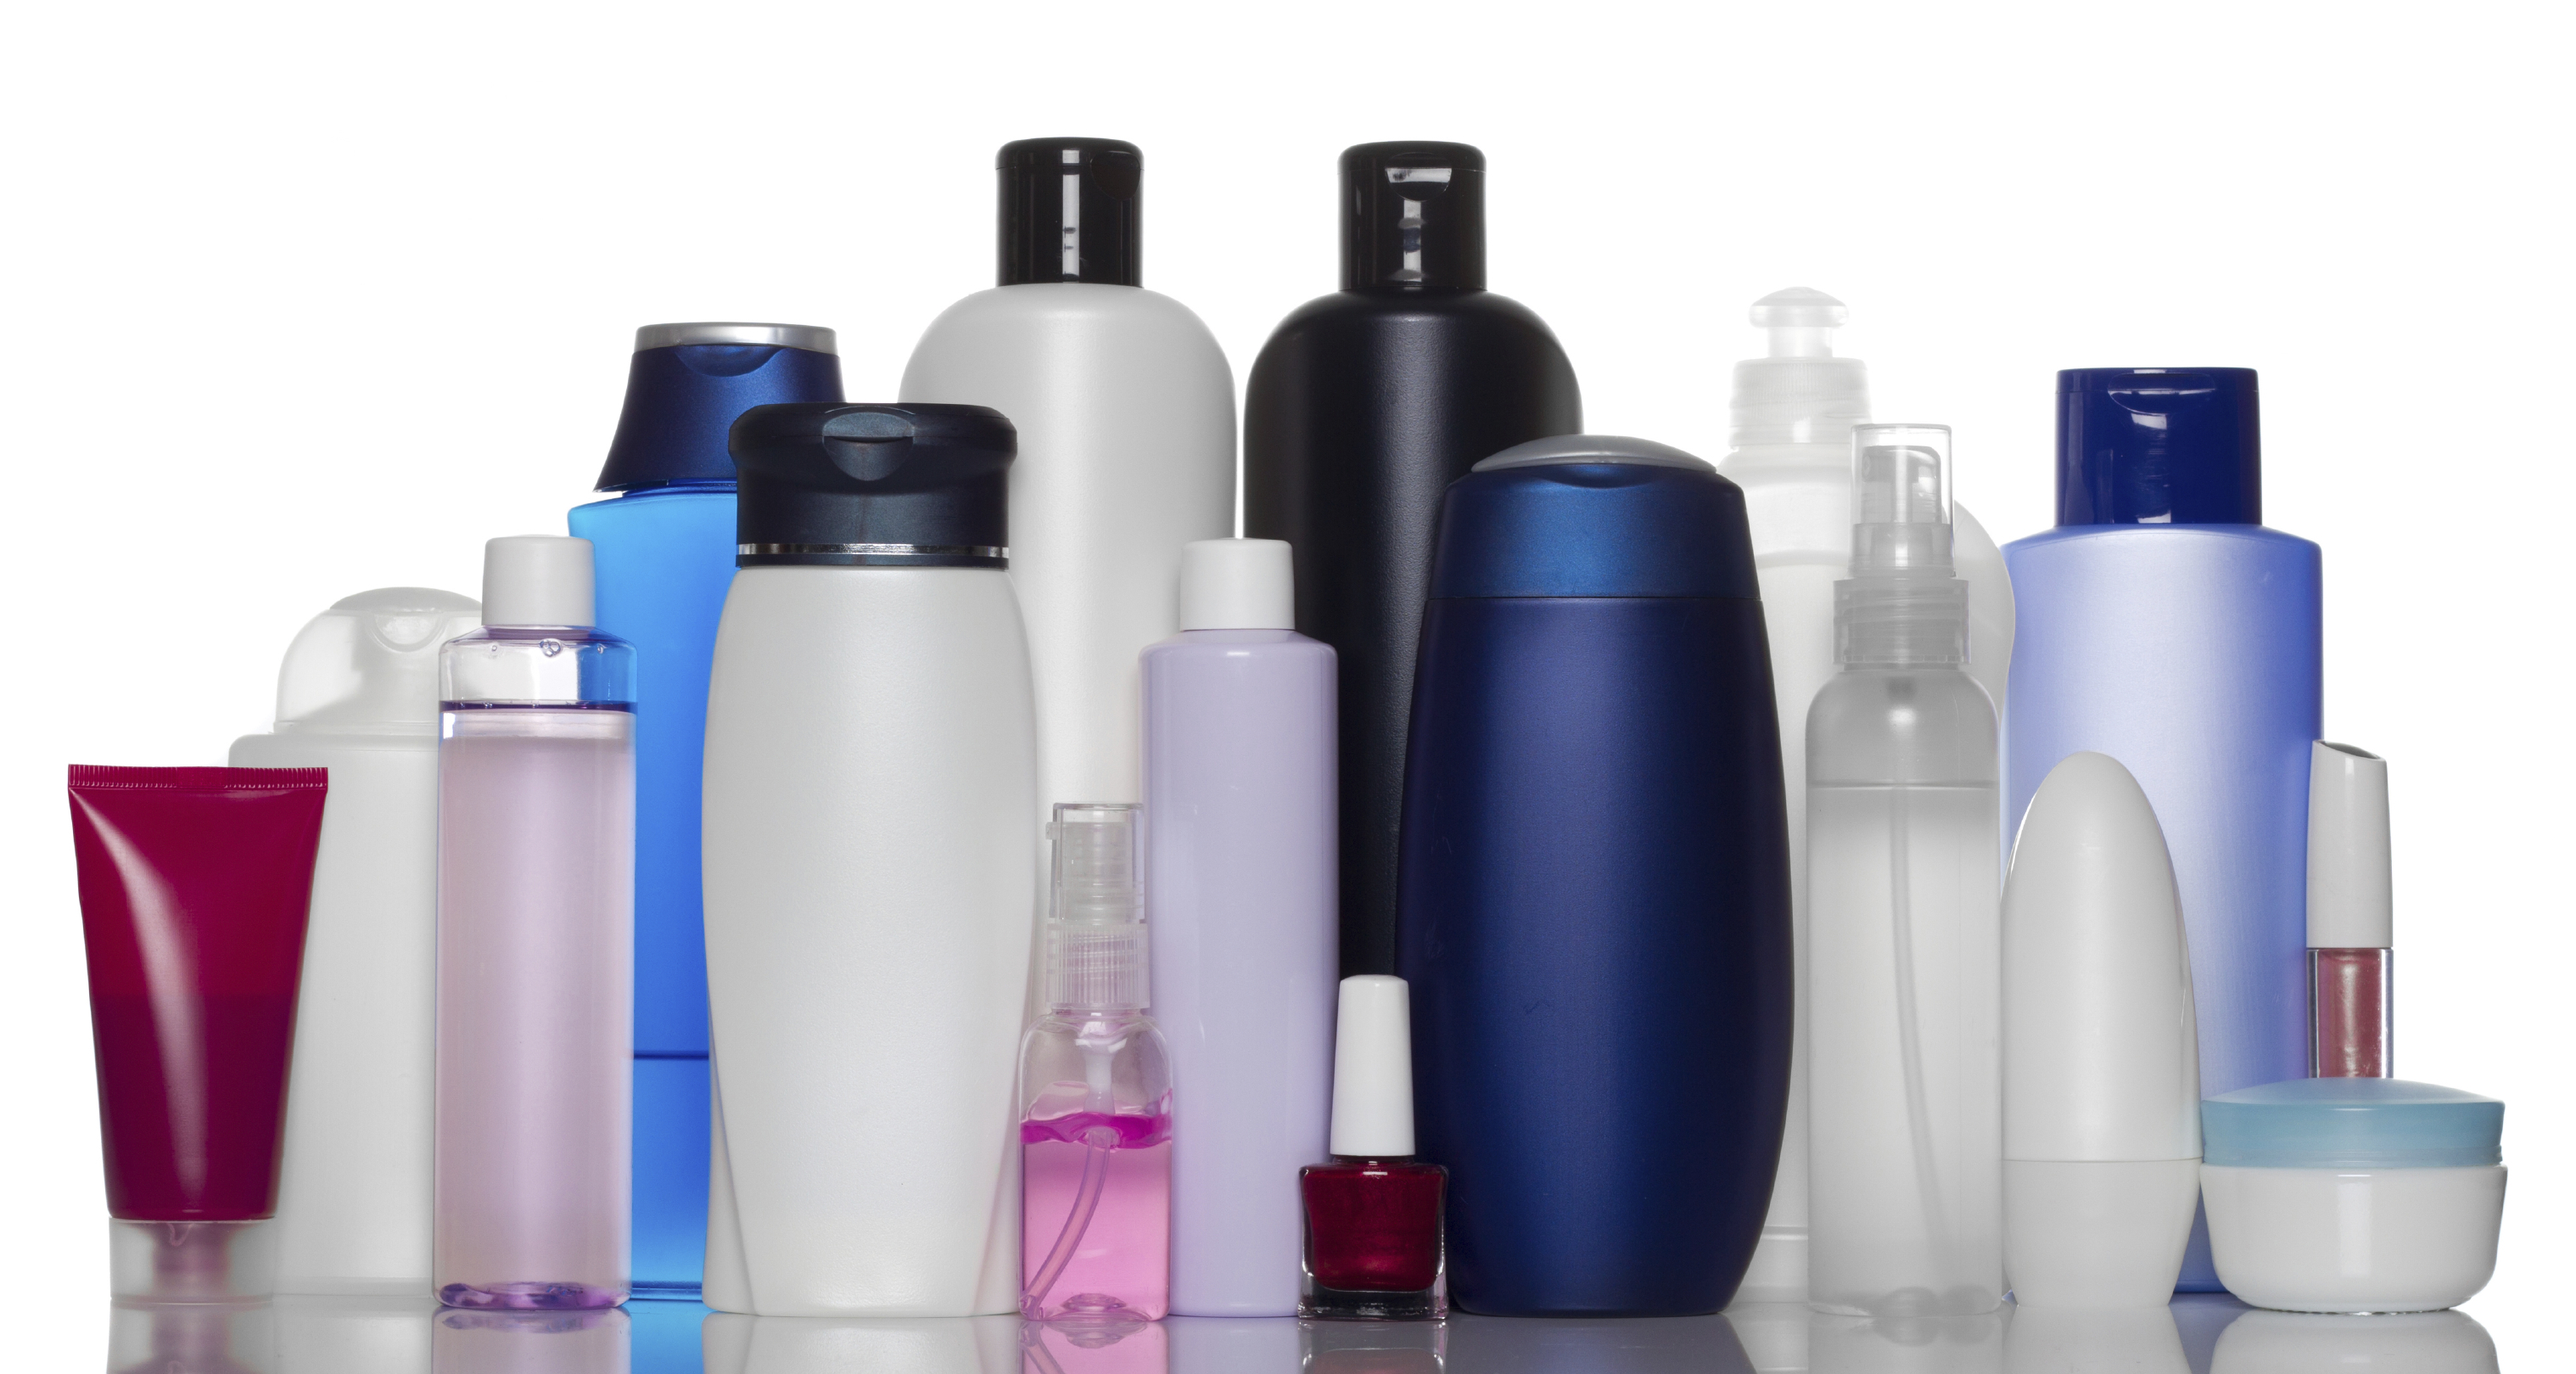 Moisturize
As someone who has an oily face, this can be a rather tricky prospect for me. There is a fine line between keeping my skin smooth and creating a mountain range of zits overnight. However, proper moisturizing helps fight wrinkles and helps makeup look its best. You should moisturize every morning, preferably using a product with at least 30spf sunblock. You can moisturize at night if you have naturally dry skin, but if your skin is oily, try just moisturizing around your eyes. There are lots of moisturizers on the market for different types of skin, so figure out what works for you.
Don't Exfoliate Every Day!
Again, this is about keeping your skin hydrated and avoiding flaky skin. Exfoliating can become a vicious cycle for some women. You exfoliate to get rid of flaky skin, but that dries out your skin and causes flakes. You shouldn't be exfoliating more than a few times a week. This is a big mistake and can actually make you appear older!
Sunblock
You should be wearing sunblock or moisturizer with at least 30SPF every day. Even if you spend most of your day inside, the exposure you get driving or walking your dog can really add up. Sun damage is the number one cause of skin damage and premature aging, and should be put on areas that are prone to showing age such as your face, neck, and chest. Don't forget the back of your hands, especially if you will be driving! If you are planning on spending time in the sun, wear higher SPF and a hat.
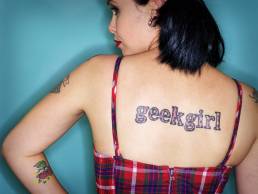
The Geek Girl Problem
 The problem with the geek girl subculture is the unrelenting expectation of uniformity.
I have seen countless articles and posts about the problems with the geek girl subculture. Some are written by geek girls and some are simply commenting on us. Many cast stones at select groups of female geeks for a huge variety of transgressions. Girls are too sexy, not sexy enough, too specialized in their interest, not specialized enough, too fake, too judgmental, too obsessed, not obsessed enough, too mainstream, too antisocial, too popular, not popular enough, and on and on and on. Somehow, people have the idea that if geek girls took their specific advice, we will become a unified army of geekdom.
Are you flipping kidding me? REALLY? Despite our different backgrounds, ethnicities, body types, religions, knowledge, skills, and interests, we are expected to share the same point of view because we have vaginas?
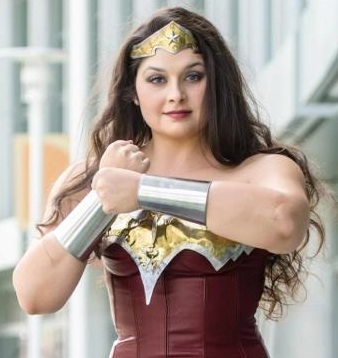
Geek girls are free to dress up as Wonder Women at every convention they can get tickets to, and other geek girls are free to think that they are disrespecting themselves by showing off so much skin. Who has the right to judge others for their opinions? You did no share their excitement at getting a Wonder Woman lunchbox in 2nd grade, or their deeply religious upbringing in a small town. Hopefully both sides behave themselves and respect the other geek's freedom of choice, but neither is better or worse for their opinions, and neither should be expected to change their minds due to peer pressure.
 This uniformity expectation also applies to geek knowledge. We keep banging our heads against the misogynistic opinion that there are only a few "real" geek girls, and the rest of us are using geekery to get male attention. Once again, in spite of our innumerable differences, women are all expected to be experts in every aspect of geek culture to PROVE that they are geeks. I have seen it time and time again, especially at public events and conventions. Usually, it's in the form of a seemingly innocent question about a geeky topic. If the girl fails to answer correctly, *POOF* there goes all her credibility. Suddenly, the woman who spent 74 hours sewing a cosplay outfit, 9 hours in line for a panel, four days writing a Dr. Who blog post, $200 a month on comic books, or maybe is just visiting her very first convention, is lowered to the level of attention-seeking "fake" in the mind of the quizzer (who can be male or female).
Our knowledge on any subject, geek or not, is going to be as varied as our skin color or favorite foods. I hate to break it to everyone, but there aren't merit badges for knowing more nerd trivia than everyone else. Go ahead and whip out your geek fanboy (or fangirl) penis and prove it's the biggest in the room. It's the geek version of driving an inconveniently huge truck or car, everyone knows you're compensating. Judgmental showing off only drives people away from the culture. Ask yourself honestly, is that your goal?
There is no problem with geek girls, the problem is with geek girls not being accepted and respected for who they are as individuals. People desperately want to belong to a group. Sadly, the easiest way to do that is to exclude others. As geek culture rapidly becomes pop culture, we have to embrace the diversity that inevitably comes with a surge in population. Old stereotypes have to change to accommodate new faces, new interest levels, and new ways of expressing one's passion.
If Whovians, tabletop gamers, video gamers, comic readers, Trekkies, Potter Heads, Guildies, LARPers, and so much more are considered "geek," than surely there is room for a huge diversity of women to be considered "geek girls". We ALL have the right to march in the geek parade, even if we don't all march to the same drum... or trumpet... or tuba... or baton... or agree there is a parade at all...
10 Convention Necessities for Cosplayers
 Cosplaying completely changes the convention experience. The crowds, schedules, lines, and costs are only more stressful once costumes are added to the mix. Here is a list of "must-haves" that will make your cosplay experience easier.
1) Emergency Repair Kit
This is a large kit that you keep in your car or hotel room for the length of the convention. It should include a sewing kit, duct tape, fashion tape, a hot glue gun, industrial glue, masking tape, permanent markers or touch-up paint in the colors of your costume and props, stain remover, and fabreeze. Crazy things happen at conventions and it's best to be prepared for anything.
2) Business Cards
These make a cosplayer's life a lot easier. Nobody wants to take time to spell out their Twitter handle or email address in the middle of the busy convention floor. You don't have to spend money on these. Even if you just write your contact info on a bunch of post-its ahead of time, photographers and other cosplayers will really appreciate it.
PRO TIP: Be careful not to put your personal phone number or full name on these cards, unless you are willing to deal with stalkers showing up at your house. Set up a cosplay email account if your email address includes your last name... or if you have a crazy complicated email address.
3) Pockets
Pockets are one of the most difficult things to build into a costume, especially women's costumes. A place to store your cell phone, your ID, and a credit card are worth more than gold when it comes to working the convention floor. Whether it's a hidden pocket glued into the top of your go-go boots, a small matching bag that you make out of extra fabric, or a significant other who is willing to follow you around with a backpack, it is vital that you have a way to transport your stuff. Make sure you at least have your ID somewhere on you in case something happens.
4) Floor Kit
This is the mini version of your emergency repair kit and should go with you around the convention. I highly suggest fashion/2-sided tape (the pre-cut strips are best), small tube of super glue, eyelash glue, and lipstick are the musts. If you have room in your bag or pockets, I also suggest masking tape.
5) 3 Different Poses
You will get asked to pose for pictures so put some thought into it before you arrive at the convention. Photographers will usually shoot a few pictures in a row, but they will lose interest faster if you stand frozen in the same pose for all of them. Try to hold a pose for a few seconds, then switch it up. Practice poses at home in front of a mirror, or have a friend shoot pictures of you. Most people at conventions are not professional photographers and they will do you no favors by setting up the shot or making you look good. Practice makes perfect!
6) A Posse
Conventions are big places where all manner of people are shoved into a high stress environment together. If you can, attend a convention with friends or other cosplayers. They will hold your props while you stand in the bathroom line, help keep an eye out for up-skirt camera pervs, and take pictures of you when you see your favorite celeb.
7) Snacks & Water
Dehydration and empty stomachs can ruin your day very quickly. It's easy to forget to take care of yourself when you are caught up in enjoying yourself. Suddenly you realize that you haven't eaten in six hours and the line for the nearest food is 45 minutes long. Have a granola bar hidden somewhere on your person. Water is harder to transport (and bathroom breaks are a pain in some costumes) so be sure you hydrate extra in the days leading up to the convention.
8) Gum or Mints
Conventions are crowded. Bad breath sucks. Enough said.
9) Costume Check List
These will help you get your entire costume to and home from the convention. Nothing sucks more than getting dressed and realizing that the amazing belt buckle that you made is still on your sewing table. It's even worse when you realize that you left a vital part of your cosplay at the hotel when you were in a hurry to head home. A check list makes sure every little bit stays with you. It's worth the extra effort.
10) A Plan
Conventions are becoming very popular. Parking, tickets, hotel rooms, and panel lines can be a real nightmare. Trust me, there is NOTHING worse than showing up for a convention in costume and figuring out that the only open parking is six blocks away. Do your research ahead of time. Know where the parking is and how much it costs, buy your tickets days or weeks before, and know the costume and prop rules for the event. It will save you a lot of time, stress, and disappointment in the end.
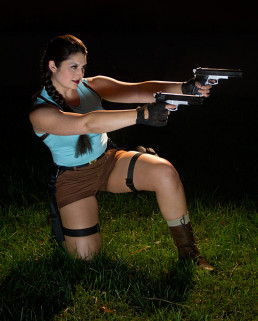
Bringing Lara to Life
 Lara Croft has always be an idol of mine. I was just entering adolescence when the first Tomb Raider game was released, and had just started to play video games. There was controversy over her sexy clothing and the rumors of a "Tomb Raider Nude Code" for every Tomb Raider release. People claimed that she was just a way to market to geek boys, but she was my gateway into loving video games as well. Lara was empowered and could kick some serious ass, but was always a lady at the same time. Classic Lara had used her considerable talents and wealth to chase her (very dangerous) dreams. It was her desire that drove her, and the love and respect she had for her father. She was one of the only female fighters who became a hero by choice, not because of a traumatic experience where they were victimized. (They have since changed this for the new Tomb Raider game, and it makes me very sad.) Also, she had major curves, was 5'9", and had really long dark hair. Talk about a girl I could relate to!
I was invited to participate in a cosplay event for E3, but I needed to wear a video game costume. At first I refused, due to my complete lack of video game cosplays. Then it dawned on me... LARA! I did a rough Lara costume a few years ago, but had a lot of work to do (in about a week and a half) to bring it up to the standards of my other cosplays. Now, LOTS of people do Lara cosplays. They are easily recognizable, even with small mistakes and inconsistencies. Wonder Woman without armor looks odd, but people don't really notice if Lara is missing her backpack, or if her boots are the wrong color. If you wear a aqua colored shirt, shorts, gun holsters, and braid your hair, you're set! However, I thought it would be a disservice to my favorite archeologist (sorry Indy!) if I didn't pay attention to the small details in classic Lara's outfit.
Boots
Lara's classic boots are brown. This is one of the details that most often gets overlooked because it is so easy to find black boots that approximate the design of Lara's. I don't make boots, so these were the first step in this cosplay process because I needed them to arrive in less than a week. They had to look rugged and utilitarian enough to be useful climbing through tombs. After extensive searching, I ended up getting these boots from Amazon.com.
 Shorts
Reference pics differ slightly on the color of Lara's shorts, but most are either a dark Khaki color or a variation chocolate brown. Since I had some Khaki shorts that fit well already, I decided to customize them to fit Lara's style. The first step was getting them the right color. The shorts were dyed them with a combination of brown dyes to get the balance that looked the most like the reference pic to the left. I present the before and after pictures:


The dye actually wasn't absorbed into some of the thread of the shorts, which gave them some great (unplanned) texture and detail. After dying them, I shortened and hemmed them within an inch of their lives!
Shirt
Getting Lara's shirt to look right is all about tailoring. No shirt fits that well over a pair of large breasts without a few nips and tucks. I started with a Bella women's short sleeve shirt in seafoam blue, and basically remade it. I removed the sleeves and opened the neck more to imitate Lara's tank top. This gave it a pretty good fit, but it was still too loose around the waist and the arm holes had gaps due to the super-bra I was wearing (don't judge). I ended up adding darts to the front of the shirt to make sure it fit around the breasts well, and took in about a half inch around the waist area on each side. This gave it a much more fitted look that matched Lara's. I will have to be very careful with this shirt because any stretching will undo the work I put into fitting it perfectly.
 Other Accessories
If you're still reading this, you must be planning your own Lara cosplay... or are hoping for some sexy finished cosplay pics. The rest of the pieces of the outfit I bought, mostly on Amazon and Ebay. I highly suggest looking in military surplus for brass belt buckles for a more realistic, but still classic Lara look. I found mine, and the leather backpack on Ebay. The backpack was actually a purse which required some alteration of the straps and a removal of a loop handle. The guns were the most difficult thing to find. I pieced them together off of Amazon finds, but have since found a great deal for Lara guns and holsters. These are almost exactly like what I ended up with, but actually are cheaper! I had to remove the upper leg strap on my holsters (just like with the pair I linked to above) in order to match Lara's classic look.
PRO TIP: Make sure your holsters have clips/ties/straps/etc that keep the guns in the holsters. There is nothing less Lara-like than sitting down and having your guns crash to the floor.
 Styling
Last but not least, the famous Lara braid. I am very lucky to have incredibly long, dark hair. However, mine is layered and does not have the thick full look that Lara's does when braided. My solution was to buy a bag of weave hair at my local wig store. They usually run about $3, but you have to be careful that it matches your hair color well enough to look natural. It's not good quality hair, so it's not good for styling, but it worked well to braid in with my natural hair. I just attached it to some banana clips by folding it over and using tiny elastic bands. On the night of the event, I french braided my own hair and slowly clipped in the home-made extensions in with my own. It worked very well and matched perfectly.
I'm just starting to learn about makeup, and so (like all my cosplays) I did a youtube search for the type of look I wanted. I wanted her eyes to stand out a lot, just like in the games. I used the eye styling from this youtube video, but didn't use any of the other tips. Yes, it says it's styled after Kim Kardashian. Just ignore that, because the eyes look cool when they are finished.
And... you've got Lara Croft!

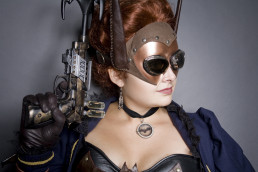
Steampunk Batgirl Mask
I am creating an unnamed (*cough*) steampunk superhero costume for San Diego Comic-Con. I have never attempted a steampunk outfit before, so I knew there would be a bit of a learning curve. The mask was going to be the most difficult piece of the outfit for me, and a make-it or break-it piece for the cosplay, so I started off my project with that piece. It was a major lesson in patience for me. While not all of my costumes go perfectly, this is the first time that something has gotten ruined and I had to restart from scratch.
Plan A:
 My plan was very simple, I would create the mask out of InstaMorph, then paint and cover parts of it with leather. Easy right? Nope.
The formation of the mask went well enough. InstaMorph is my go-to substance when I have to create something from scratch. It's very easy to work with, but also very strong. Fiberglass will be a big step up, but for now, this works very well. The only drawback is the low melting point, which is around 150 degrees. Do not make something out of this material and then leave it in the car.
Anyway, the formation went very well and I was thrilled with the initial fit and look of the mask. It had amazing potential, but the edges were a little uneven. I sanded these down to get a flatter edge since I eventually wanted it to resemble metal. It sanded easily, but ended up getting a fuzzy texture on the areas I sanded it. Here is the turning point. What I should have done was boil the plastic one more time to smooth this out. Opps. Instead I thought the paint would cover the fuzz and it would end up with a rough metal look. This didn't happen. My mask ended up looking almost furry, and since it had already been painted, I couldn't go back an reform the Instamorph into another shape. Bye bye Plan A!
Plan B:
I was not going to spend hours forming a mask from scratch again, especially because I now doubted that I could get the finished texture that I wanted, so Plan B started with a trip to Michael's. I found surprisingly sturdy white all-face masks for around $5. They were plastic, but had texture and thickness enough to be the base for my alterations. I brought one home and started creating my masterpiece. Plan A was a black mask with leather accents, but my plan changed a lot after the initial failure.
 The shape was actually very easy to get. I simply drew the shape I wanted on the back (just in case the pencil would leave marks), and then cut it with strong scissors. I then rubbed it down with mineral spirits to remove any excess oils or anti-mold coating on the plastic, and sprayed a few base coats of black Krylon Fusion spray paint. I always use the Fusion as a base coat on plastics because it (supposedly) bonds with plastics. It seems to work pretty well for all my projects so far. I used black because it gives a great base to metallic paints, and it looks better than white if the metallic chips for some reason. I used Krylon Copper Metallic spray paint after letting the black dry for a few days. (I've been testing a lot of metal-imitating spray paints and will be doing a blog post to compare them in the future!)
I wanted the mask to look like molded metal, so it was a VERY slow process. To get it smooth you have to do lots of thin layers, but not too thin or you never get rid of the texture. If you spray too thickly, you will start getting drips. PRO TIP: Let each layer dry COMPLETELY before you add on the next one.
Once again, I was too enthusiastic and handled the mask after only a few hours of drying. There are now a few TINY marks on it, but nobody can see them unless they are less than a foot away. Please, don't make my mistake! Let your creation dry for a few days before you move on to  adding rivets, leather, goggles etc. I knew better, but just got too excited!
Next I measured and cut the leather. I glued the edges under so that it would appear smooth and then glued the leather to the mask. After that I used a leather punch to make holes through the leather and mask. The rivets are purely decoration, and were glued in place through those holes. Actually setting the rivets with a hammer (like I did on my Sif costume) would have damaged the mask.
Finally, I added the ears and strap. I cut the ears from Plan A's mask and wrapped them in leather, gluing them in place and using a whip stitch to close the edge. This also added a cool steampunk look to them. I sewed and glued them and the strap in place. All of the leather and straps were taken from a $4 purse that I bought at the thrift store. The last thing I did to the mask was glue on the goggles, which were purchased on Amazon for $7 and dismantled so I could attach them correctly.
 (The ears will lay flat against my head when I wear it.)
Overall, I am much happier with the final outcome than I was with my original design. I think this looks much more "steampunk" and will actually be more comfortable to wear, mostly because of its lighter weight.
Stay tuned for more updates on this very educational cosplay experience!

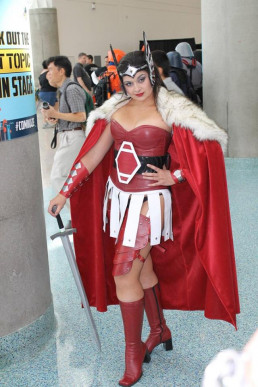
Debut of Sif & WonderCon
 What a crazy weekend! I am still recovering and it's Thursday. Seriously, who's idea was it to have my Irish music persona and cosplay persona collide? Two days of cosplaying at a convention with a concert and night of heavy drinking in between is not the best idea. Fun, but not the best idea.
Sif debuted at WonderCon and was a huge success. I was asked to pose for more pictures than ever before and got more complements than ever before, despite the fact that most people couldn't identify my character. Oh well, they still appreciated the craftsmanship and the overall impact. I consider this to be my most successful cosplay to date.
There are many reasons for this, but here is a list of the biggest differences between Sif and my previous cosplays:
- I was the only Sif at WonderCon (I'm pretty sure) and this made me stand out. It also helps that I was nearly 6ft of bright red woman warrior. I did not blend in.
- I finally invested in a good quality makeup kit. It made a huge difference in the photos and the quality of the images that were taken at this convention. I felt a little ridiculous putting it on the first day, but the impact it had on my cosplay was undeniable. I looked good the morning after St. Patrick's Day! I can't even begin to explain how amazing that is!
- I'm getting better at posing and working the convention floor. Despite my experience working at Renaissance Faire and performing on stage, it's taken me a while to get comfortable as a cosplayer at conventions. I still have things to work on, but I'm getting much more comfortable.
- I picked a character very suited to my body type and physical features. This is always a smart move with cosplayers. A woman as tall as I am can look awkward in group pictures, but when you're supposed to be a Norse goddess it makes more sense. I'm working on some cosplays for San Diego ComicCon that are not in my body type, we will see how that goes...
- My outfit is friggin' leather. That's just stinkin' impressive and badass. Not to brag, but it is!
I still have improvements to make to this outfit, but overall I am incredibly pleased with how everything turned out. I'm hoping to have a photo shoot with this outfit very soon and will be posting a gallery once I finish collecting all the images off the internet. If you have a good picture, please email it to me! I'd love to see it!
I did discover that this is the best cosplay to wear in cold or rainy weather. It was POURING rain on Saturday. The cloak is very resistant to water and isn't harmed by the rain! The hood flips up to protect my leather headpiece and makeup. Even the boots are actually pleather rain boots! It was unplanned, but it worked out very well on this stormy WonderCon weekend.

WonderCon was a very fun convention, and I hope it returns to Anaheim again next year. There is a bigger variety of vendors at this show since the booths are probably much cheaper than at SDCC. The crowds are also much smaller. Everyone says it's like SDCC was 10 years ago, but I wouldn't know. I love the current Comic-Con for all it's crazy size and commercialism, but I really enjoyed WonderCon as well. The parking was a mess. The traffic in the whole area was terrible and the shuttle buses were a mess because of it. We spent a very large percent of Sat dealing with that situation. Not fun. I highly recommend getting a hotel in walking distance, or if you wait until the last minute like I did, get a hotel with a shuttle. Sunday was very much improved because of my Saturday night hotel stay and the parking/shuttle it provided. That was my only real problem with this convention, and it was made worse by the rain. I hope they can come up with some productive solutions for next year to keep the traffic flowing more smoothly.
Overall, it was an amazing weekend that I will never forget! I met and got to spend time with so many incredible people and revel in my two favorite pastimes, performing (cosplaying and an MWOW concert) and drinking. What could be better?
WonderCon Countdown: Sif's Belt and Skirt
WonderCon has arrived in Southern California! While this has caused many Northern California people sorrow, I am happy to have an event before SDCC to debut my Sif cosplay! There is only one problem... it's not done yet. I have made a lot of progress and will be able to finish tonight, but sleep may be sacrificed. Everything is looking great and I am very excited!
Belt
Sif's belt is a trademark of her costume. No matter how many times she is redesigned, she almost always has a prominent, geometric belt buckle in the center of her abdomen. I started with a faux leather corset belt that I got on Ebay for $6.99. I really liked the pattern the sections made and how it added texture. Plus, it's stretchy without being spandex. Bonus points! The biggest problem is that I wanted the pattern in the belt to accent and frame the Sif buckle, which meant I had to move the buckles already on the belt. I removed them with a seam ripper and restitched them on the opposite side of the belt which would be on my back. I stitched the front together to prep it for the Sif buckle.


 The buckle was actually much easier than I expected. I measured and cut the basic shape out of an old teaching poster I had. It was stronger than poster board, but not as thick as cardboard... plus I already had it. I'm not planning on teaching Kindergarten again anytime soon, so it's not a huge loss. I cut up the rest of the red leather purse that I used to make straps for my leg armor, and covered the polygon (see? I'm such a teacher...) by gluing it and then stitching the edges. I was happy that my new sewing machine could handle the laminated poster board and leather.

The white boarders on the belt were the most time consuming piece, just because they needed to be perfect. I traced the finished, red leather polygon on the back of my white leather hide and measured out the designs. Then I carefully cut out each section so the lines would be perfect and keep the geometric look. Once it was cut I sewed white stitches 1/8th inches from the edges of the white. These served no structural purpose, but added texture and gave the illusion that the white was stitched onto the red. Then I carefully used barge cement to glue the white onto the red. This was the most stressful part, because if I messed up I'd have to start ALL over again. I also had to glue the white leather on perfectly so the lines and angles would stay straight. Luckily, non of the leather had stretched, and it ended up looking great.
Skirt

The skirt was fairly simple, but time consuming. Lots of measuring and cutting very straight lines. I had it basically put together, but realized that it looked like cheap plastic from even just a few feet away. I decided that adding metal studs would give the leather a little more weight and help give it more texture. I carefully added them to each strip of the skirt. This is pretty challenging since the leather was very prone to wrinkling under the studs and the wrinkles showed up a lot on the white. Once this was finished, I put the waist band on over my corset, inside out. I than taped (you don't want to use pins on leather because they leave holes) each strip in place to get the desired look. It's important to do this with the corset on, because the measurements will be very off otherwise. Finally, I sewed everything down and added Velcro to close it at the top. I'd usually use laces to close a leather skirt, but it's not going to show and I wanted it to stay as flat as possible under the corset.
To Do
I still need to finish the garter belt that will hold up my leg armor, and my sword belt tonight. My first try at making a cosplay sword ended in a very unremarkable, heavy sword that flakes paint at every turn, so I will be wearing my backup LARP sword this weekend. It's very lightweight and doesn't distract from the outfit. The armor will be the most difficult part, so I hope the concept for the garter belt works. Wish me luck!
I'll be posting pictures from WonderCon and from the Merry Wives' St. Patrick's Day concert this weekend, so check out my facebook page or twitter feed to see them!

Lady Sif's Cape
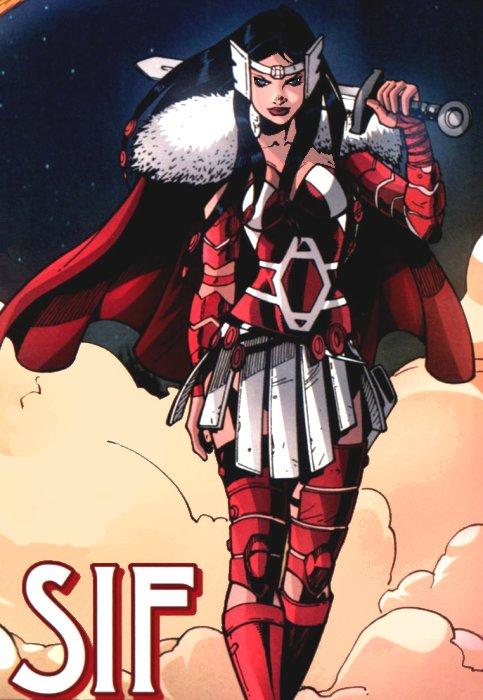 Sif is an Asgardian goddess in Marvel comics, and is based on a beautiful (blond!) goddess in Norse myth. Her current costume pays tribute to this with a red cape adorned with large amounts of white fur.
As with all my cosplays, I wanted to make her cape as realistic and functional as possible. This meant changing it into a cloak so that it could actually do some good in the frigid Norse climate where her myth originated. It also meant finding a use for the furry shoulder pads, which seem very functional but would keep the wearer much warmer if they were located on the inside of the cloak. Once again, I fell back on historical costuming for the answer.
The Kinsale Cloak is a traditional design that originated in Ireland. It is very popular with historical reenactors because of it is a very attractive garment and is incredibly functional. It is a lined cloak that will keep you very warm, but its trademark piece is the hood that hangs down around the shoulders when not covering the wearer's head. I decided that I'd get the desired Sif look by lining the Kinsale cloak hood with fur, then wearing it around my shoulders.Plus, I already had the pattern. Huzzah!
I am very happy with the results... ignore my exhausted face and pajama pants.


This was the first time I had worked with (fake) fur. It was challenging, but I was lucky enough to get some pointers from very experience friends.
- Cutting - Don't cut through all the hair! It will ruin the texture and make your edges look bad. Flip it over and make shallow cuts to the fabric at the base of the hairs.
- When sewing, pin the hairs flat away from your seam allowances before you pin pieces together. Yes, this takes a LOT of pins, but it keeps you from sewing the hairs into your seams and messing up the cool look of your fur. It may seem time consuming, but it will save you a lot of time later and really improve the look of the whole garment.
The fur will get EVERYWHERE, but once you finish off your garment it *should* stop shedding since it should only be losing hair around the edges where you cut. Be sure you have a good quality lint roller on hand to clean up your garment after you finish.
I have about a month until WonderCon, and I still have to finish Sif's belt, skirt, and sword. Those are all fairly simple pieces that are very similar to previous projects, so I might actually be done early. Amazing!
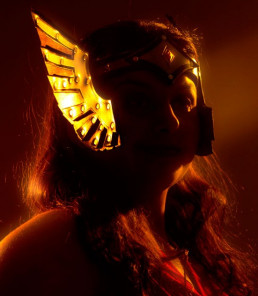
Sif Update
 MY HEADPIECE ARRIVED!!!! WOOHOO! Ahem... but more on that at the end of this post...
My Sif cosplay project is coming along nicely. It seems there are never enough hours in the day, but I'm checking things off my list whenever I can. I am getting more and more excited about this project as I see it coming together. I really resemble Sif physically and think this could really be an attention getter at WonderCon and ComicCon.
The leg armor is still being reshaped, slowly but surely. I have a few adjustments to make on it, but it's looking better and better! I'm still deciding what buckle design to go with, there are so many choices!
I have all of my fabrics and have started cutting. I'm very happy with my choices, but again, I'm stumped. I love the fabric that I got for Sif's cape, but I can't decide if I want to line it with white or red. The red is more accurate for the character, but the white will make the rest of the outfit stand out more. The comic geek and the costumer inside me are at war over this. Right now the comic geek is winning. We will see...
Top to bottom: Fur for Sif's cape, red yummy fabric for Sif's cape, white leather for Sif's skirt, red imitation leather for different cosplay
The big news is that my Sif headpiece arrived!! I'm so excited! It's always very nerve-wracking for me to have pieces commissioned. I'm a huge perfectionist and don't like handing control and money over to someone else. I procrastinated for months before I finally bit the bullet and got in touch with a leather craftsman from the SCA. I originally asked for white because I assumed it would be easier to get than silver. WRONG. Evidently, silver leather paint is easier and lasts longer than white. So with very specific directions and many emails in the last few weeks I signed the most important piece of this cosplay off to a total stranger.
And damn am I happy with the results!
An Asgardian goddess is born!
I'm taking pictures as I tackle the cloak/cape. I'll post info on that when there is more to see.