Props in Tabletop Games
Utilizing props is one of my GMing trademarks. I think it is a great way to spice things up and keep a story interesting for the players. Whether it’s a one-shot or a campaign you have run for years, props can help the players immerse themselves more fully into the game world and make events more memorable.
However, before you add props to your game, ask yourself why you are doing it. Think about the type of game you are running. Are the players the type that would appreciate a little extra spice? Are they already roleplayers who may just need a little something extra to inspire them? If you have doubts, you might want to bring it up to them first. There are some types of players (*cough* min-maxers *cough*) that won’t appreciate your efforts. If you think your players would benefit from them, consider the setting and tone of your game. What type of props will best serve your needs?
 Items from the Story

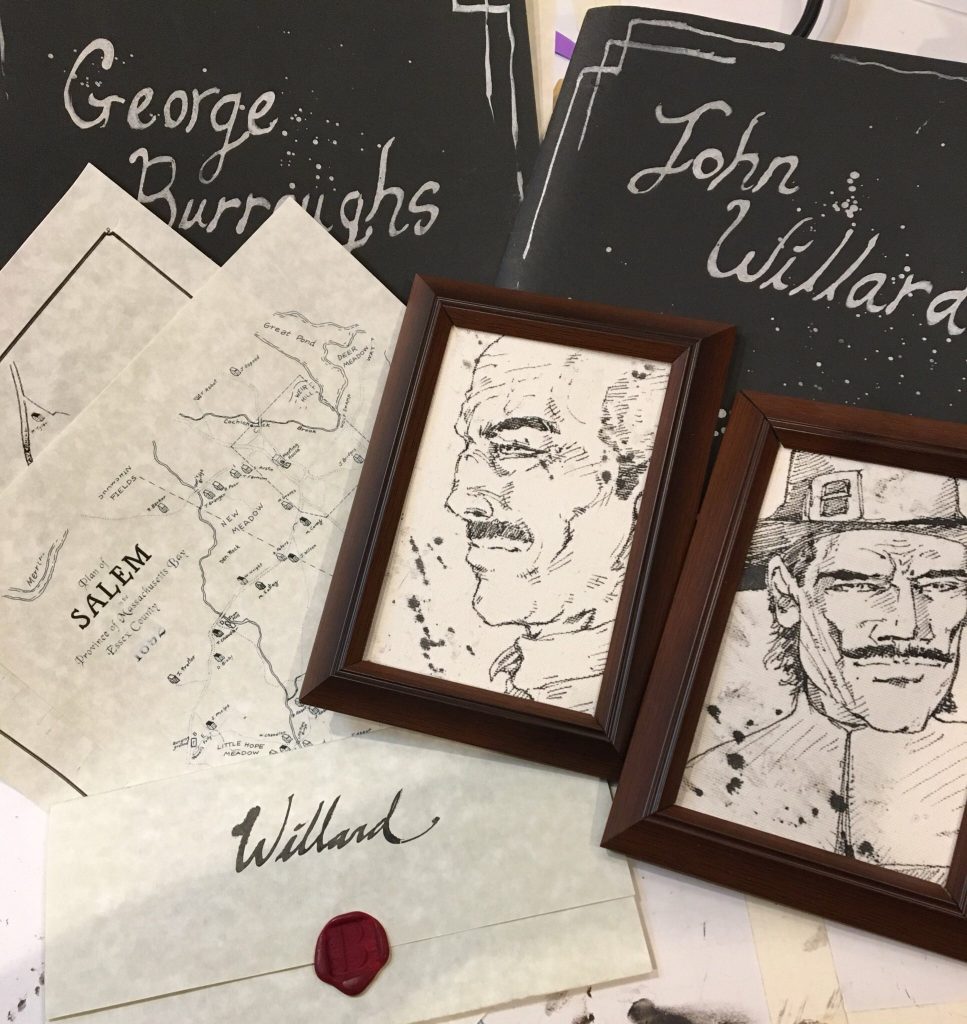
Prop items from the story are easily used by the GM to influence the game. The easiest to make are paper items that the characters need, such as maps, letters, paintings and photographs. When I ran a game set in the Salem Witch Trials, I created individual letters for each character that served as their motivation for teaming up to save their town. They also had maps of Salem on parchment paper. Having a contract or wanted poster in their hands immerses the players in the story. These props are really easy to make with the help of a computer and some parchment resume paper. There are a variety of simple methods for aging paper using common household items if you are running a historical or fantasy campaign. Sealing wax or ink stamps are a fantastic touch to finish off important documents.
Other items can also be used to move the story along and give the players information. Books, jewelry, crystals, potion bottles, and so much more! Use your imagination! I made wands and spell books for a Harry Potter game which kept the table lively and in character. It’s much more interesting for the players to study a real book for clues than to roll dice and have you describe what they notice. Once I used jewelry as a way for the party to identify each other as allies. It’s a great visual for them to reference during the game and then is a great souvenir for them after it is over.
Room Decorations
Decorating the table or your gaming room can be a great way to set a specific tone for your game session and it will help players get into character. I suggest starting with the lighting, because that will make the most difference to the vibe in the room. If your players are in a dungeon or if you are playing something like Vampire the Masquerade with a dark tone, turn down your overhead lights. Bring in some other light sources, like table lamps, so that the players can still read their character sheets. Buying colored light bulbs from your local hardware store is another great way to change up the look of a room without moving too much around.
Decorate your table too! We were delighted when one of our players brought candelabras for our Vampire game. They became such a staple of our game that when we couldn’t burn candles anymore, we replaced them with cheap battery powered ones from the Halloween store. Small things like this can give a campaign some unique character and can be fun for the players.
 Food & Drinks
Providing themed refreshments makes the players very happy. It fills their bellies while also immersing them in the game world. The plates and cups you use to serve the food are also props. I often find myself holding my beverage of choice like my character would hold it, swishing or sipping a pewter mug or wine glass in character as well. There are many resources online with recipes from Star Wars, Lord of the Rings, Star Trek, A Song of Ice and Fire, and other fictional sources. Historical foods are also a great way to add to a campaign. I highly suggest that you test and taste a recipe before serving it to your gaming group!
Costumes
I love costumes, but I am not always a fan of them around the gaming table. Individual items, such as a hat or elf ears, can be a great addition and help a player stay in character. I suggest talking to your group and starting slow. Really consider how each costume piece will add to the game. Goggles or glasses can add a chance for in-character mannerisms, like nervously adjusting them or cleaning them when they are thinking about something. A longsword may be entertaining the first session, but eventually it will probably end up leaning against the wall and forgotten. Full costumes can get uncomfortable or distracting during a game. Plus, why wear a full costume when you only see each other from the table up? Don’t sacrifice comfort and fun to look the part. There are a number of online costume shops that can help find individual pieces for historical and fantasy games, as well as futuristic and science fiction games. I always suggest checking out your local thrift store or Goodwill before dropping a large amount of money online. I’ve put together whole costumes from second-hand stores. You never know what you will find!
 Miniatures
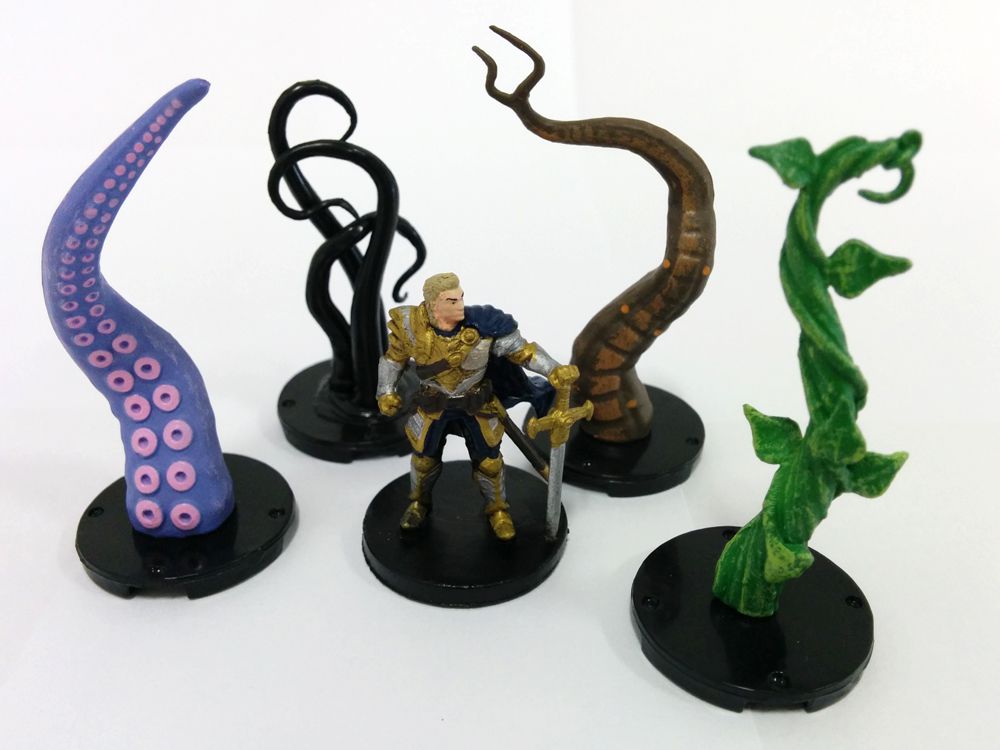
The most common prop in tabletop RPGs are minis. It’s easy to forget that these are props and that they really help with keeping the narrative clear for all the players. The Happy Jacks D&D campaign, Desert of Despair, really made me appreciate how much miniatures help the group visualize what is happening. Having actual spiders or giants to fight, instead of using paper clips or extra dice as stand-ins, can make a big difference. You don’t need to drop a fortune on specific minis for each combat, but using something that is about the right shape is always helpful. If you play D&D or other games that involve miniatures, consider building up a diverse collection of miniature foes for your players to face.
Once you decide that you want to add props to your game, choose carefully! Not all props are created equal! It’s better to add one perfect prop than to drop tons of stuff on the party that will detract from the game rather than add to it. Props will not save a bad game, but if you use them wisely, they can be a fantastic way to add a little dramatic flair to a game.
(This article was first released to Happy Jack's RPG Patreon supporters! Support our show for access to great previews and exclusive content!)
Do-it-Yourself: The Perfect Cutting Table
The perfect cutting table is a dream for many crafters and DIYers, but sadly, professional cutting tables are expensive! However, you can adapt your existing tables to be the next best thing by adding a top to them for only about $50! These table tops are made of material that pins can be put directly into to hold your fabric and crafting materials securely in place.
Step 1: Measure your table space!
My tables were 4ft x 8ft. Pushed together they were almost exactly 8ft x 8ft.
Step 2: Visit your local home improvement store!
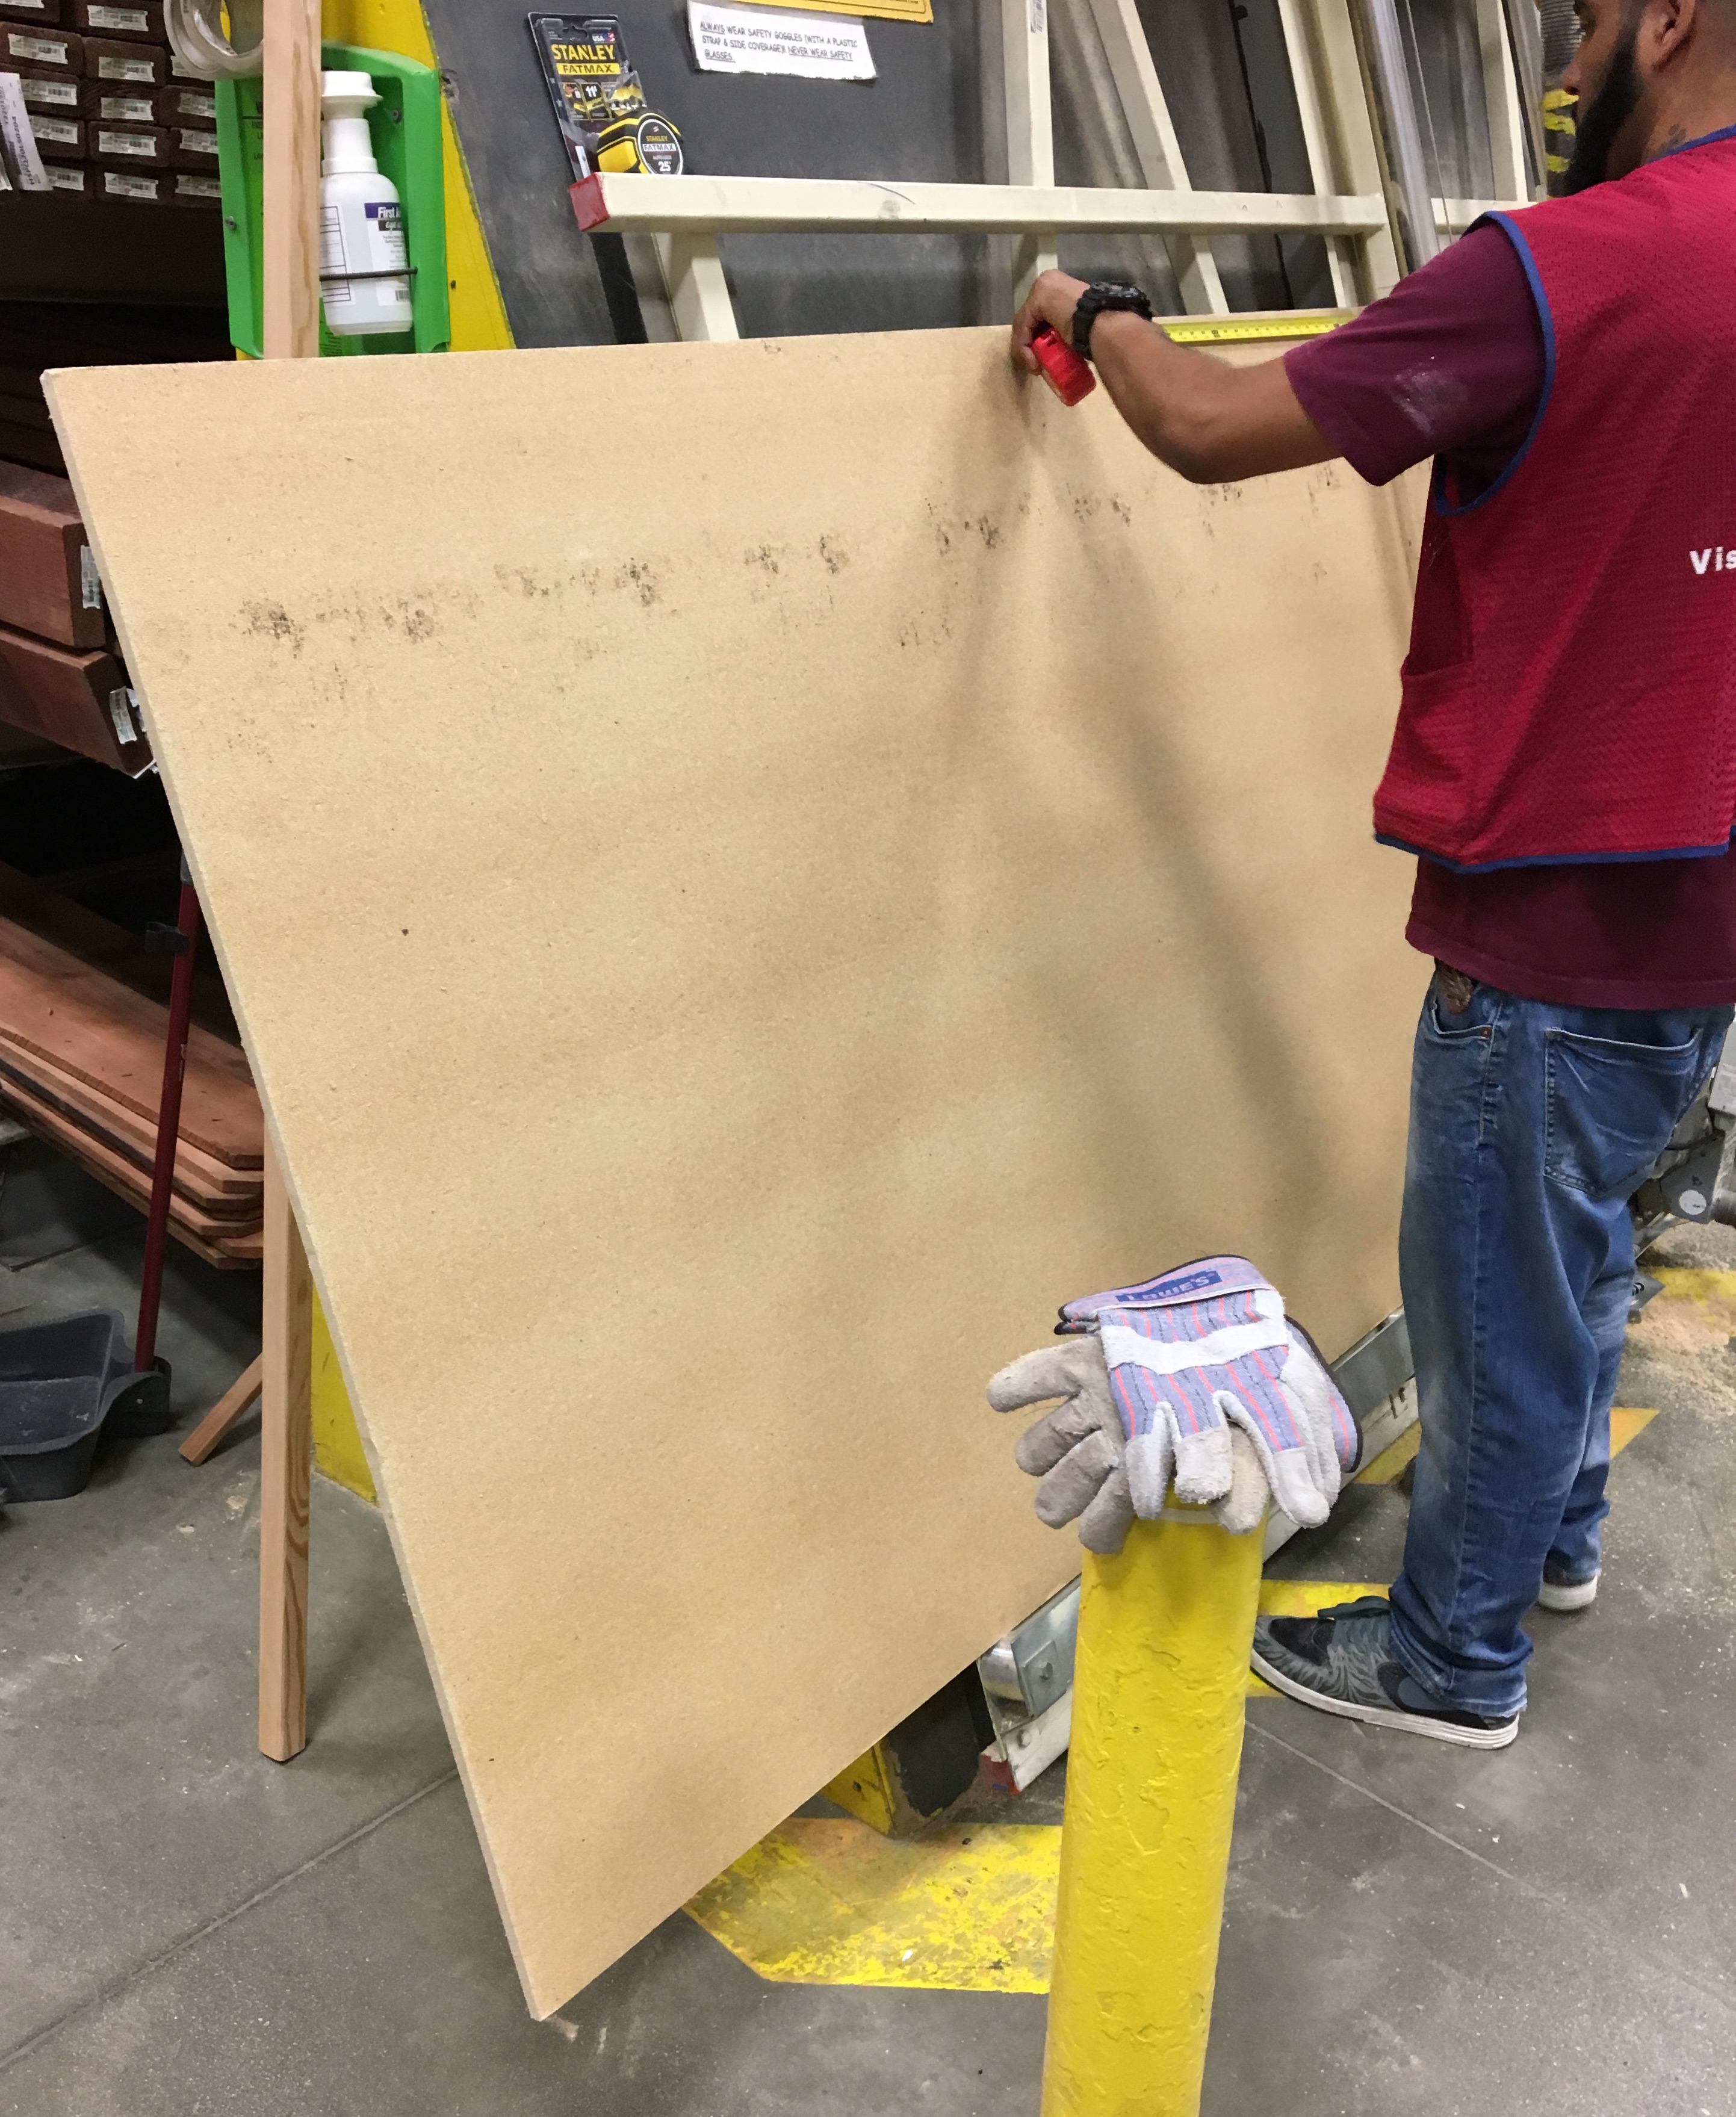
You are looking for large boards of insulation called homasote. (That is the brand name and the store employees should be able to direct you to the same material under a generic name. Think Kleenex vs. facial tissue.) This material is a fiber composite, and has a consistency and weight similar to cork board, but more heavy duty. It's generally tan in color but one side might be painted.
It costs around $20 for a 4x8 piece. Make sure you buy enough to cover your desired space, and have the store cut it into the right shapes to fit on your table AND fit in your car. (Trust me on that last part... doh!)
Step 3: Get the board in place!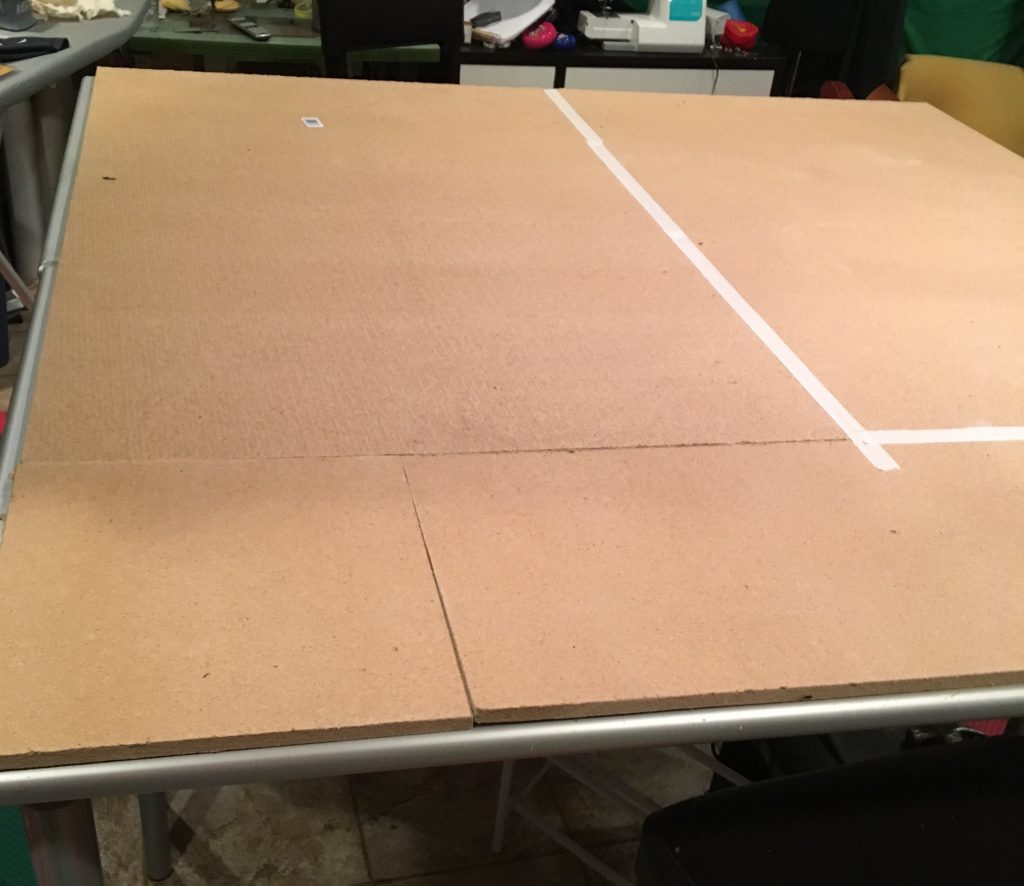

Lay the pieces out to cover the table, then use heavy duty masking tape to cover the seams and keep the boards together. Use the tape to seal the edges of the board to the edges of the table to keep it from slipping around. (DON'T GLUE IT DOWN! You want to be able to easily replace it if something happens!)
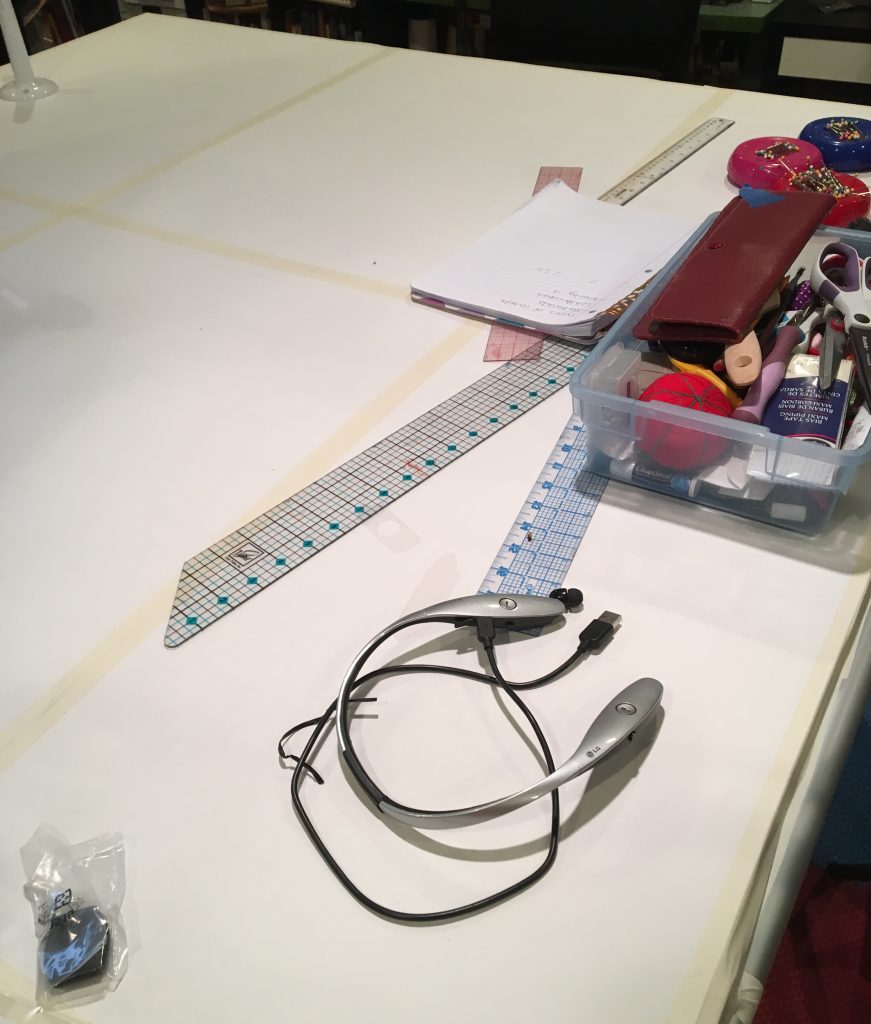 Step 4: Cover it!
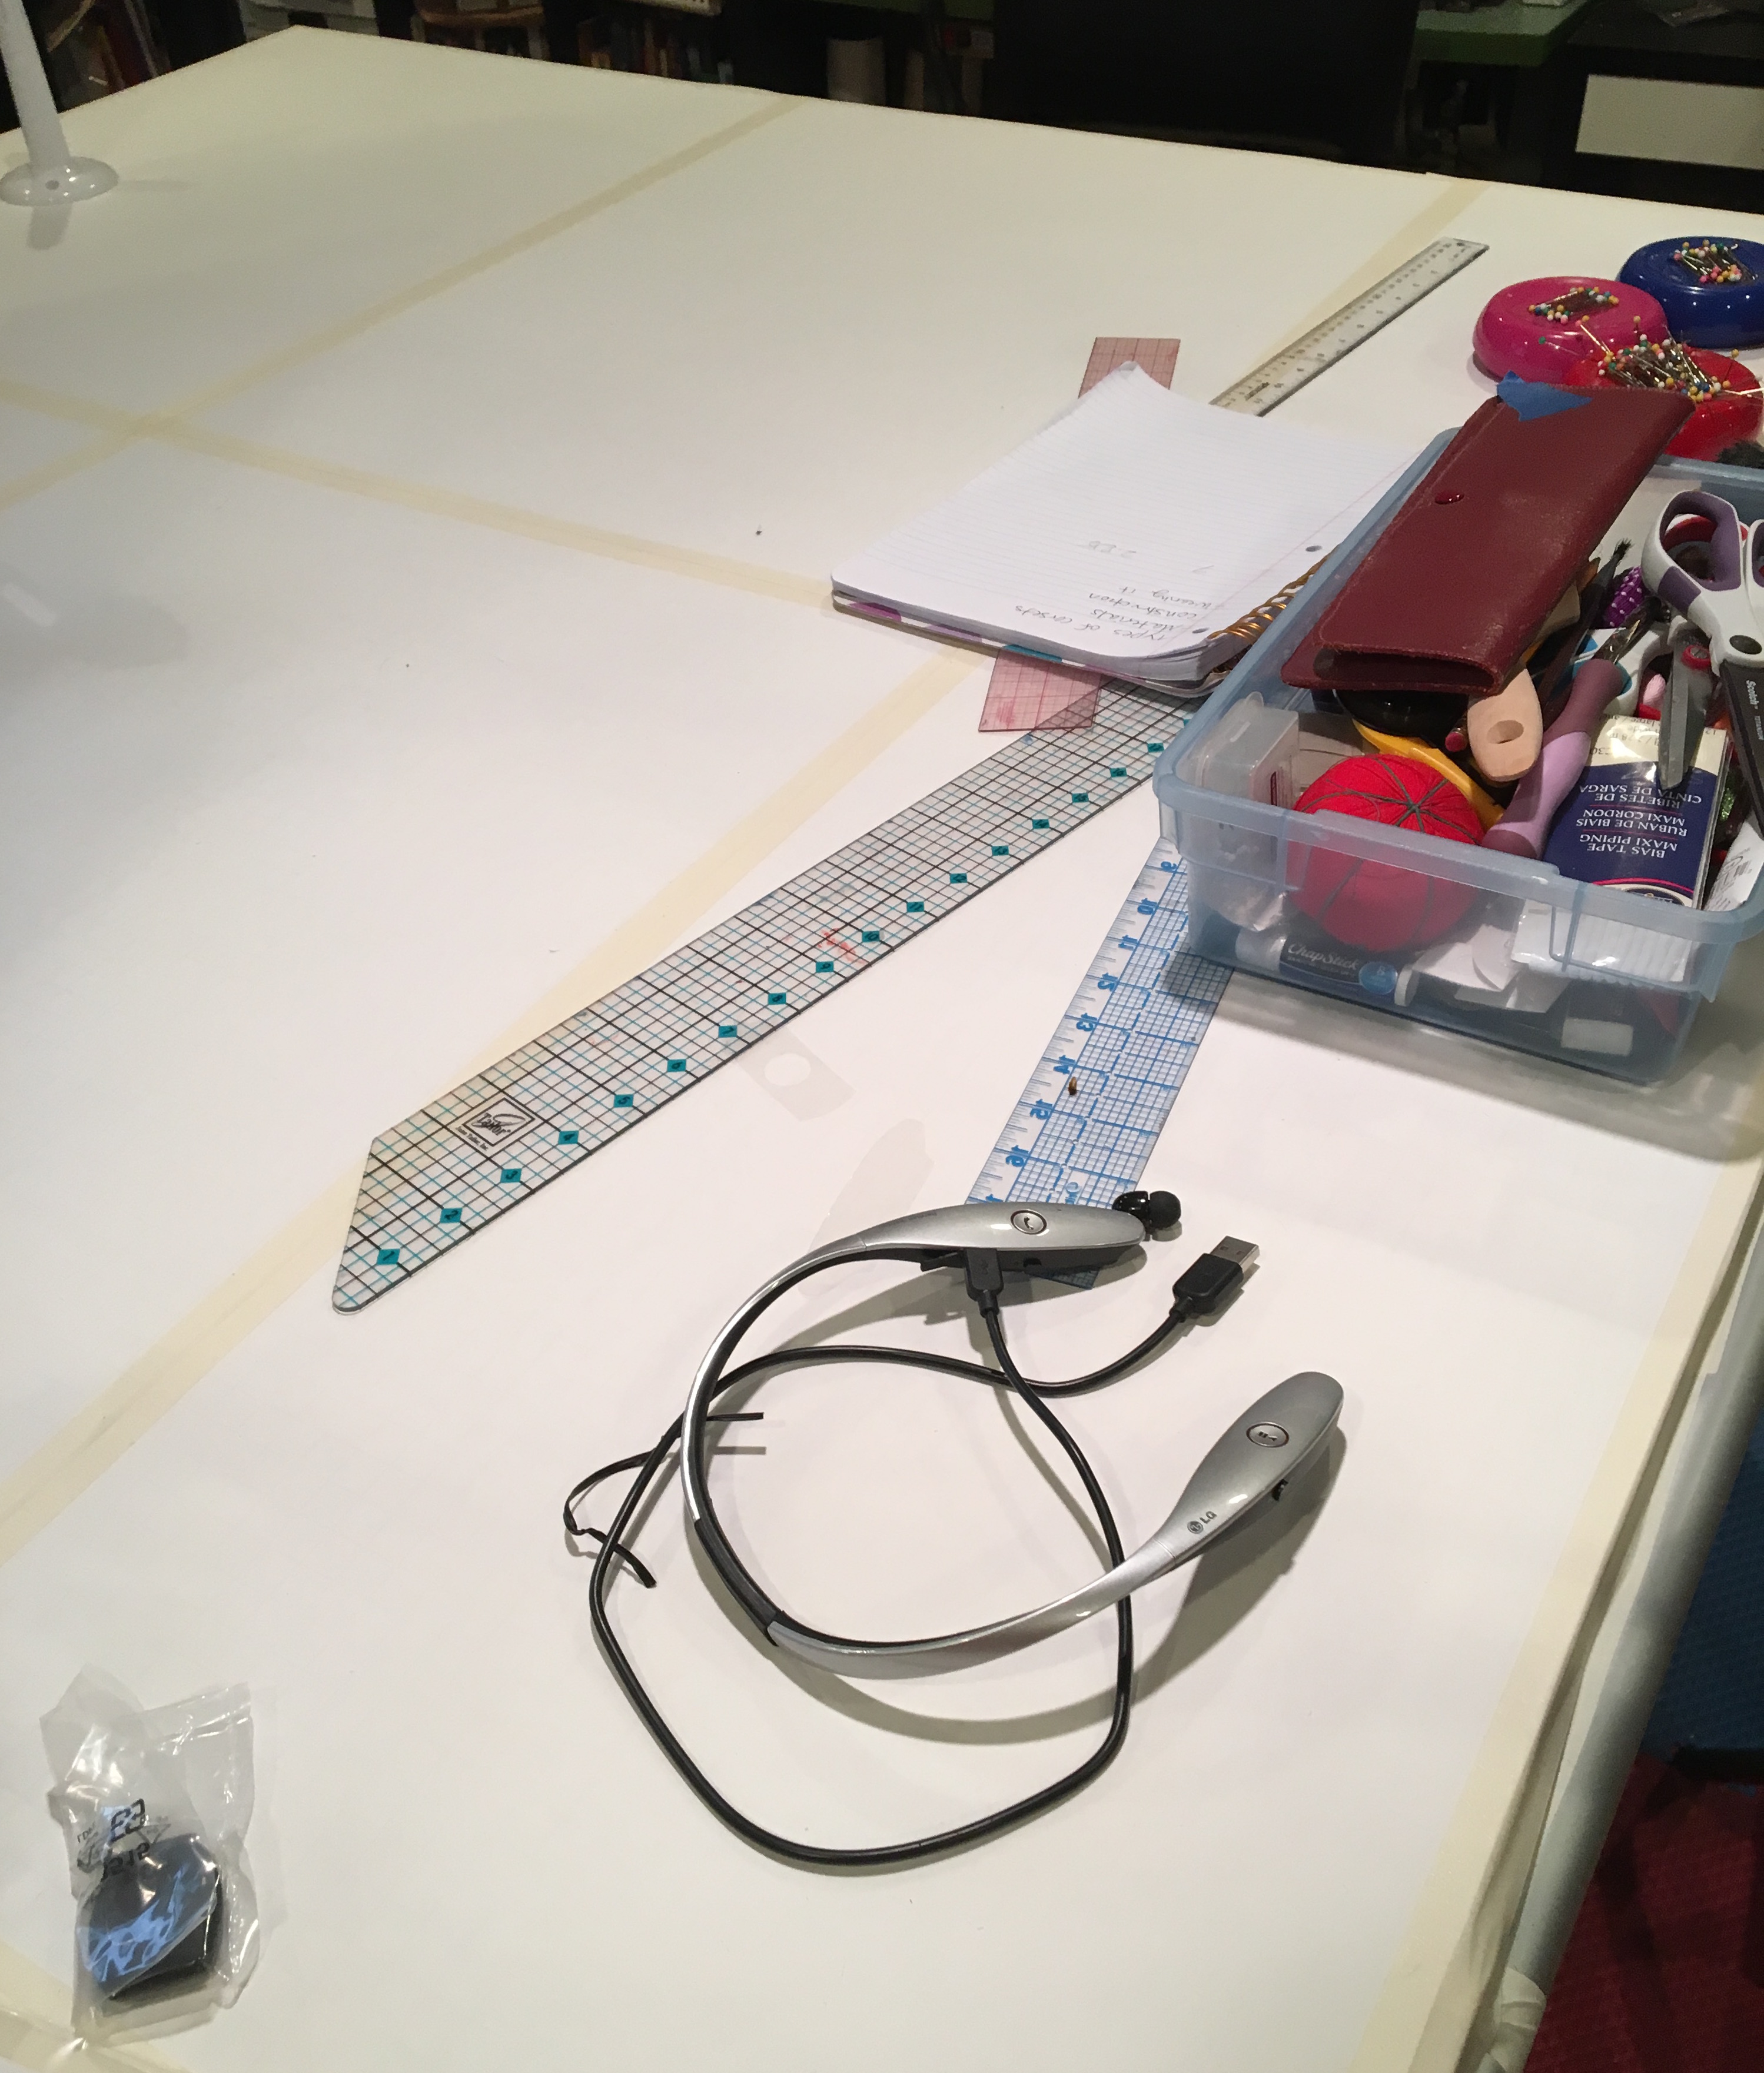
The best material to use is tag paper. It's easy to get and cheap to replace if you want a clean work surface. Butcher paper can work as well but won't hold up as well. Use the masking tape along the seams of the paper to finish off the table and give yourself a smooth work surface.
YOU'RE DONE! :)
Have fun with your awesome new cutting table!
Do-it-Yourself: Easy Metal Etching
A simple, safe way to etch designs into metal costume and cosplay pieces. This will also work for metal knives and tools!
Materials:
1 9 volt battery
2 low voltage wires
4 alligator clips
1 cup salt water
Many Q-tips
Electrical tape/nail polish/vinyl sticker
Metal object
Post any questions in the comments below or reach out on social networks! Thank You for Watching! Subscribe if you want more Golden Lasso Girl videos!
Watch More GoldenLassoGirl Videos: http://tinyurl.com/glgvideos
Subscribe to GoldenLassoGirl: http://tinyurl.com/glgsubscribe
Twitter: https://twitter.com/goldenlassogirl
Instagram: https://instagram.com/goldenlassogirl
Facebook: http://fb.me/goldenlassocosplay
Do-it-Yourself: Crafting Safety
Safety is something that many of us slack on when we are crafting! Check out this short video to learn the 5 things you should have to keep yourself safe while creating your cosplay or other craft project.
Post any questions in the comments or reach out on social networks! Thank You for Watching! Subscribe if you want more Golden Lasso Girl videos!
Watch More GoldenLassoGirl Videos: http://tinyurl.com/glgvideos
Subscribe to GoldenLassoGirl: http://tinyurl.com/glgsubscribe
Twitter: https://twitter.com/goldenlassogirl
Instagram: https://instagram.com/goldenlassogirl
Facebook: http://fb.me/goldenlassocosplay
Tabletop RPGs: Tips for New Players
"I'd love to play D&D but I don't know how and don't want to mess up the game."
I've heard this statement from many people over the years, many of whom became avid gamers with a little assistance. Playing tabletop RPGs is a lot of fun, but it can also be intimidating for new players. Unlike most board games with a set goal and predicable player experience, RPGs change with every choice that the characters make during the game session.
Not having a "right way" or rails to fall back on can make inexperience players feel unsure and self conscious, but don't let that keep you from joining a game!
Nobody learns to play a tabletop RPG without sitting at a table and actually playing.
You can memorize everything about the game, but becoming a good RPG player takes practice. You will learn as you go, and even after playing for decades you will keep learning from new experiences. Just like the characters we play, we get XP as we go!
It always helps to have some guidance though, and so, I'd like to impart some knowledge that will be helpful to new players.
Who is in charge?
 The Game Master (GM), or Dungeon Master (DM) if you are playing D&D, is in charge of running the game. It is their job to make sure that the game is engaging, follows the system's rules, and that everyone is having fun. They are, in many ways, the "god" of your game world. They create the setting, non- player characters, monsters, situations and everything else that you and your fellow players will face in the game.
It is important to note that the GM does NOT get to make your choices for you.
They can create the dungeon with a dragon inside, but they cannot make your character walk in and slay it. That has to be your choice. If you want your character to head to the local tavern instead, you have that right! (But I can't guarantee the GM won't turn around and make the dragon attack the tavern!)
It's a good idea to befriend your GM. They are the best resource for everything related to your campaign and can help you with any questions you have along the way. Work closely with them as you learn the system and show your appreciation for all the hard work they put in to keeping the game going. You show up and play once a week, but they spend hours prepping before every session. Without the GM, there is no game.
How do I build my character?
 I could write a whole post about creating a character (and I probably will in the future!) but for now, I will try to keep it short and sweet.
Talk to your GM before you start making your character and ask for their advice. Different games have different flavors and you don't want your character to bring a gun to a magic fight, or be an evil character in a group of holy paladins. Or maybe you do want that, but you should get permission from your GM before adding that type of complexity to the game.
All systems have a set of mechanics to help you build a character's abilities, so make sure that you read that section of the players handbook thoroughly. If you have questions about the process, your GM and fellow players are your best resource to help you make your character. There are also many online forums where you can ask any questions that you might have during character creation.
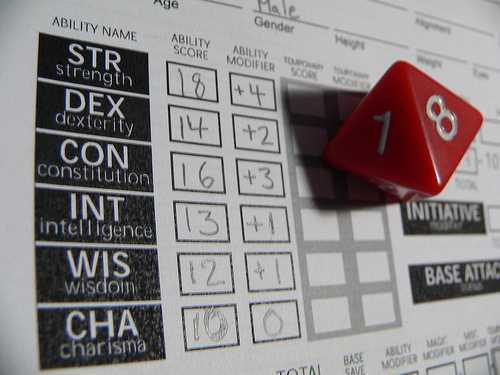 Make sure that your character's stats (strength, intelligence, etc) support the skills and abilities that you select for them. For example, most fighters will need a lot of physical stat points, such as strength and constitution, while magic users or investigation types will need more intellectual stats. It's not helpful to have a fighter who isn't strong enough to wear their armor! Chose your stats and abilities wisely, because they change slowly once the campaign starts!
Next, develop your character's personality. Hopefully, you had something in mind while you were working on his/her stats and skills. Some game systems have personality stuff built in to character creation which give you a basic framework for a personality and back story. If so, great! Just use that as a basic structure and add in some smaller details. If not, you have a bit more to do to create your character.
What can my character do?

Your character can TRY anything that you'd like, but they won't always succeed. Take chances and think out of the box. Every problem should have multiple solutions. Success is determined by your dice rolls and the GM's choices. Choose wisely! Saying, "I shove a sword up his butt!" may not be as funny as you expect when it actually happens in the game.
Be an active participant!
Tabletop RPG game sessions can last a long time, usually several hours for a single session. The time can sometimes pass slowly, especially during combat, it's important to take an ACTIVE interest in everything that is happening during the game. That means listening and participating in character, maybe even taking notes so that you can remember important details later.
Combat can take time, but it's important that you are paying attention to what other players are doing on their turns!
There is nothing worse than being in the midst of a difficult combat and having a player do something useless because they have no idea what the last player did on their turn. Be aware of what players are doing so that you can make good tactical choices and contribute to the battle!
What is metagaming? Why is it bad?
 Metagaming is making decisions based upon out of game knowledge. For example, you saw your GM's notes and know that there is a dragon in the dungeon. If you have your character avoid the dungeon, you are metagaming. Your character doesn't know there is a dragon waiting to eat you. You are using PLAYER knowledge to make a choice in game, not CHARACTER knowledge. For obvious reasons, metagaming can really mess up a game. DON'T DO IT!
Ask Questions!
Nobody expects you to know everything! Asking questions, in character or out of character, is a natural part of the game. Everyone does it, no matter how long they have been playing. Why do you think gamers carry around the game rule books all the time?
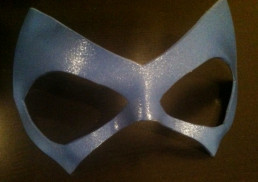
Do-It-Yourself: Superhero Mask
 A good superhero mask can make or break a costume, whether it's for a kid's party, Halloween, or a convention. I use a very simple method to create my superhero masks, and with a few craft supplies and household items, you can create your own mask that will look great and be easy on your wallet!
Materials:
- Craft Foam - Packs run about $7 and individual sheets around $1.
- Styrofoam Wig Head - Found online or at wig shops for about $2 - $4.
- Scissors/ Xacto Knife/ razor blade
- Heat Gun / Hot Hair dryer
- Mod Podge (spray or brush on type)
- Masking Tape
- Spray Paint (optional)
Process:
 Step 1: Decide what color and shape of mask you want. Get craft foam of the correct color (or as close as possible) and start sketching your shape lightly in pencil. The side you draw on will eventually become the back side of your mask, so don't worry about erasing mistakes perfectly. I use an Xacto knife or razor blade to cut my masks out because it's easier to get smooth edges on the foam. To insure that my masks are symmetrical, I usually draw one side, cut out almost all of it, then fold it over and trace it to make the other half of the mask.
 Step 2: Molding the foam mask to fit the contours of your face is very easy! Start by taping the mask in place on the foam wig head, making sure that the side with pencil marks becomes the back. Don't use pins because they can leave holes in the foam or will melt it if they heat up during this process. The tape might lose its grip if it gets too hot, but it will keep the mask in place for the beginning of the process.
Using a heat gun or a very hot hair dryer, start heating up the foam mask and gently pressing the mask into place. Be careful not to burn your finger or start melting the foam, especially if you are using a heat gun. If you smell something burning, STOP! I find that it works better to start in the middle of the mask near the nose since that area takes the most shaping, then move to the outer areas of the mask. Once you have the shape you like, let the mask cool completely before moving on to the next step.
 Step 3: If your mask is already the correct color, move on to step four, but if the foam is not the right color now is the time to paint your mask. Leave it on the Styrofoam head, re-taping it so that the tape is on the back of the mask only. Then carefully spray paint or paint the mask by hand. It's important to keep the mask on the head during this phase so that it keeps its new shape. I highly recommend testing your paint on a scrap of foam first because some paints will damage/melt foam. You will notice how messed up my Styrofoam head is in the pictures!
Step 4: After your mask is completely cooled and the paint is TOTALLY dry, you will seal your mask with a clear coat of Mod Podge. I usually use the spray on variety, which is available at craft stores, Wal-Mart and other places, but brushing it on can work as well. MAKE SURE THAT YOUR MASK IS STILL ON THE STYROFOAM HEAD WHEN YOU DO THIS and that the tape is attached to the back side. The Mod Podge will give your foam a shiny look and texture that resembles latex or leather. I recommend multiple coats of Mod Podge to give your mask more strength and to help it keep its shape. Let each coat dry completely before adding the next and leave the mask on the Styrofoam head for at least 24 hours after the last coat.
 Step 5: There are many methods to wear your new mask. You can punch holes on the sides of the mask and tie ribbon or string to it, then tie it behind your head. For the "superhero" look, I usually use spirit gum to attach it directly to my face. Spirit gum is pretty cheap and available at most costume stores. Be sure to buy it in a pack with the spirit gum remover. Trust me on that. I learned the hard way. I also recommend testing it out on a small spot on your before the event, just in case it irritates your skin. You don't want to show up to work on Monday with a raccoon mask rash!
This technique seems simple, but it can create amazing things! With practice, patience, and a little creativity, you will be able to create incredible masks and finish off even the most professional costumes!
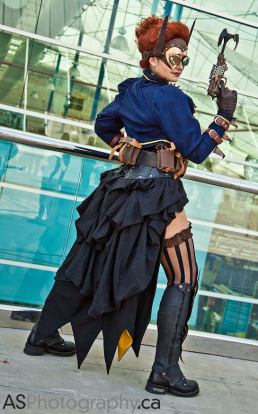
Do-It-Yourself: Steampunk Bustle Skirt
 The bustle skirt was my favorite part of my Steampunk Batgirl costume. I wanted to create an item that was a steampunk staple, but still hint at the traditional cape that Batgirl is famous for wearing. The skirt is a simple six-panel skirt that is just missing the front three panels. Don't know what that means? That's ok, keep reading and I will do my best to explain. (I simplified some steps in this process, but it will end up looking just like my skirt.)
Waistband
The first thing you need to figure out is the length of your waistband. Measure your TRUE waist, which should be the narrowest part of your torso, a little above your belly button. If you are going to wear the skirt under a corset subtract one inch from that measurement, otherwise add one inch to the measurement.
Example: Waist measurement: 28 inches
Under Corset: 27 inches
Not under corset: 29 inches
 This will end up being the length of your waistband, including seam allowances. The under corset length is smaller to accommodate the smaller waist size and avoid uncomfortable bunching under the corset. Measure and cut a rectangular strip if your fabric, using your adjusted waist measurement as the length and a width of 4 inches.
Take your waistband strip and iron some interfacing on the underside of it. You don't need heavy duty interfacing, just some regular weight stuff to give the waistband some structural strength. MAKE SURE THAT YOU BUY IRON-ON INTERFACING. It will make your life a LOT easier, so ask the store personnel if you are unsure. It's really easy to buy the wrong stuff, and we all hate the walk of shame back through the fabric store that you left 20 minutes ago.
 Before you start sewing, you will want to iron creases into your waistband because it will make things much faster. Fold it over length-wise and iron it until it holds the crease down the center, then fold half inch folds along each edge of the waistband and iron until they hold creases as well. These mark your seam allowances and the creases will make the sewing easier.
 Fold the waistband lengthwise, with the interfacing on the outside. This should be folded opposite of the ironed seam that you ironed earlier. You will then sew the ends closed on the half inch creases that you ironed earlier, but make sure that the lengthwise half inch seams are sewn in the folded position.
Now you are done prepping your waistband! You will turn it right-side out later, but for now we will move on to the panels!
Panels
 I traced my panels from a floor-length skirt onto large pieces of butcher paper (ok, so they were old DnD maps, sue me). Those panels are about 13 inches wide across the top, 34 inches wide across the bottom, and 42 inches long, but I added about 5 more inches on both sides and an extra foot to the length of my panel outline. The fuller you want your bustle, the more fabric you need to add to each panel. I used three enlarged panels to create my steampunk skirt. Remember, always trace an cut patterns length-wise according to the weave of the fabric, just like the picture to the right.
PLEASE NOTE: Only add extra inches of fabric to the panels that you are going to use for the bustle. You won't want to add as much/any extra fabric to the panel pattern for the front of the skirt or you will trip all over it.
 Then sew the panels together by matching the edges and stitching them together to form a circle or semi-circle, like the picture to the left. My skirt only used three panels since it only went half way around my body. Full skirts will usually use five or more panels. Make sure your seams are all facing the same direction on your skirt as you sew. After you sew your panels together, you will want to finish your edges on the underside of the skirt and hem the outer edges. This video shows you ways to do that.
Put it all Together
Now you will pin the panels to the waistband before you sew them. You will choose one of the lengthwise half-inch seam allowances and pin the panels to, and start by pinning the front edges of the skirt to the appropriate place on the waistband. For my skirt, I wanted the skirt to open right in front of my hip bones so that my bloomers and garters would show. The easiest way to do this is to safety pin the waistband on yourself, then pin the front edges of the skirt to where you want them on the waistband.

 Once the front pins are in place, you will need to make pleats to gather the rest of the skirt fabric to the waistband. You will basically fold the fabric over itself, then pin it into place. This it the most tedious part of making the skirt, but remember that the pleats do not have to be perfect.
Once you are done pinning the skirt, carefully sew the pleats in place on the side that you pinned. Iron the pleats flat after you sew them, then close the waistband (be careful that the other seam allowance is folded up inside), and then sew it shut across the bottom.
Bustling the Bustle
Now your basic skirt is finished, it's time to add the bustle. The easiest way is to put your skirt on the dress form and start pinning. There isn't really a magic formula, just start pulling spots and pinning them to higher places to give it the tiered appearance. Once you have everything looking good, hand stitch each spot where you pinned. Don't start sewing until your whole bustle is pinned, because you will probably change your mind... a few times.


Bat Wings
 The "bat" part of the skirt was actually designed to be a completely separate piece. It was made just like a cape, and is hand stitched into the waistband so that it can be detached and reattached very easily. I did that to give the skirt more versatility as a costume piece. I can now wear it with my
 steampunk batgirl, or remove it to be just steampunk!
I measured and drew the desired shape on butcher paper (another old DnD map) and traced one on the black and one on the yellow fabrics. I then carefully cut them out and pinned them together, starting with the point of each bat wing shape to be sure they lined up correctly. I then stitched them together and turned it inside out to hide the edges, just like a simple cape design. Originally, I had planned to add interfacing to give the wings some stiffness and shape, but I really liked how the material flowed without it. Then I simply closed up the top of the "wings" and hand stitched it into the waistband of the skirt, underneath the already finished bustle.


Have questions? Need clarification? Post a reply or email me at Kimi@goldenlasso.net
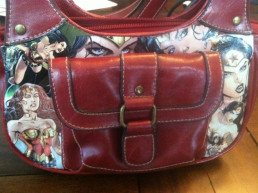
Do-it-Yourself: Comic Book Purse
 This is a great technique called decoupage, which has been around for a LONG time. I had seen it done, but it took the geek powers of @amy_geek, @ArkhamAsylumDoc, @TheStephThorpe, and all the other amazing girls in our crafting group to get me to try it. This was my first decoupage project!
Materials:
Purse
Think about what you want to do with your purse, and choose an appropriate style and color. For example, I wanted to make a Wonder Woman themed purse so I chose red leather to match Wonder Woman's outfit. Ideally, you want to decorate areas that bend and flex as little as possible. Purses with stiffer sides are better than bag- types. I found mine at the Goodwill store for $7.
 Mod Podge & Paint Brush
This wonderful substance is similar to Elmer's Glue and is available at most craft stores, but I found mine at Walmart. It comes in multiple sizes and usually costs less than $10. I chose the gloss finish type, but there are other choices. While you're there, buy a cheap paintbrush to apply the Mod Podge. I prefer the finer bristle ones because it's easier to apply the Mod Podge smoothly and they are less likely to mess up the pictures. Don't spend a lot of money though because, if you forget to wash it quickly enough, the Mod Podge will ruin your brush.
Pictures
Actually, any paper product will do, but pictures are the most interesting and easy for other people to recognize. I bought some used Wonder Woman comics at my local shop. I suggest comic books from the last few years due to their higher printing quality and vibrant colors, but anything will work. If you don't want to cut up comics, you can make color Xerox copies of them to use for your project instead.
PRO TIP: If you are buying comics for this project, look through them before you buy them! It's amazing how little a character can show up in their own comic!
Process:
Step 1: Stuff the purse with a towel so that it doesn't give when you put pressure on it, then wipe off the purse with a damp paper towel and maybe some mild soap. I don't recommend  cleaners because you never know how they will affect the Mod Podge or the purse. Once the purse is totally dry, move on to the next step.
Step 2: Decide what area of the purse you'd like to start working on and choose a picture that will fit there. Cut the picture out in a square-ish shape with lots of extra around it but be careful not to mess up other pictures you might use. It is easier to trim away extra when you start applying it to the purse than to try to fill in gaps in your collage. Hold the picture up to the DRY purse, then trim away the extra so that it fits the space. If you'd like, you can use a light pencil or your fingernail to mark the edges before you trim them.
Step 3: With your paint brush, apply a medium layer of Mod Podge to the area you intend to place your first picture. It shouldn't be dripping, but you should be able to see the white coloring. CAREFULLY place the picture on the Mod Podged area and smooth it out with your fingers. The now-wet paper will rip if you pull on it too much.
 Step 4: Spread a thin layer of Mod Podge over your image with your paint brush. This layer should be pretty thin and clear when applied, and will dry completely clear. Be sure to add extra to the cut edges of your picture and flatten them with your paintbrush. You don't want any edges or seams sticking up. If wrinkles appear, smooth them with your brush or the tips of your fingers. This might be a sign that you didn't stuff your purse enough, so add more stuffing!
Step 5: Repeat steps 2 - 5 with other pictures until the purse is covered to your liking! You do not have to wait for the Mod Podge on one picture to dry before starting on the next. Don't be afraid to overlap them!
Step 6: After the bag is done being decorated, add more thin layers of Mod Podge on top of the decorated areas to keep them protected. Wait at least 48 hours before using your purse. You can always add another layer of Mod Podge if you see areas becoming worn!
Congrats! You now have a custom piece of accessory artwork to enjoy!


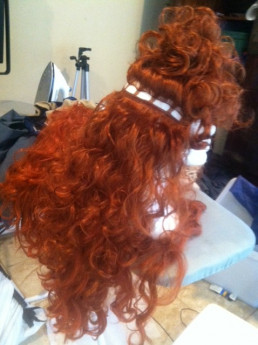
Do-It-Yourself: Merida Wig (from Brave)
 Merida is the high-spirited new princess from Disney/Pixar's new movie, Brave. One of her defining features is her amazing curly red hair. It took Pixar artists over three years to perfect the program that created Merida's trademark locks. It's the single most identifiable part of any Merida costume, and a huge challenge to create.
The biggest challenges for the wig were the specific shape and size, color and highlights, varied textures, and movement. After doing lots of internet shopping I decided that a single, store-bought wig would never achieve the look I wanted. As always, cost was a factor and I was not willing to buy a custom wig for my Merida cosplay, so I started researching and figuring out how to make one of my own.
I decided that combining multiple wigs would be the best course of action. I specifically bought three different wigs so that the hair wouldn't match perfectly. Normal hair has different texture and coloration throughout, and I hoped to mimic this look. In the end this was very successful and the final product ended up looking much more lifelike (other than it's crazy size) due to the variety in it. One was a very high quality wig (they will usually cost between $40 and $60 depending on where you shop) and the other two were cheaper costume wigs (usually around $20). Look for sales, used wigs, or outlet stores to save more money. You want the colors to match very closely, but if there is a shade or two difference between them it will still appear natural. ")
Step 1: Take the cheaper wigs apart. This is a mind-numbingly repetitive and slow process. Basically you use a seam ripper to carefully detach the strands of hair from the headpiece. As you can see in the picture to the right, the hair in most wigs is attached in rows. Clip most of the wig up on top of the foam head and start removing these rows from the back neckline. Be careful to keep these rows as intact as possible so it is easier to restitch them back onto the main wig. You just want to remove the stitches that attach the rows to the elastic/skull cap, not the stitches that keep the row of hair together.
PRO TIP: Start at the bottom back and stack the rows of hair neatly as you go. Then you will be able to sew them onto the same area on the new wig and the will be about the right size row and length.
") Step 2: Sew the hair, by hand, onto the higher quality wig. It's important to use a higher quality wig for the base so it is comfortable and fits well. It will stay on your head more easily and look more realistic. The cheaper hair will look better if it is mixed in with high quality hair. Sewing hair to a wig is very similar to removing it. Use a hair clip to pile most of the hair on top of the foam head, and start reattaching hair at the back neckline. As you can see in the picture to the right, the higher quality wigs have more elastic in them so they can adjust more precisely. You want the hair to be straight between each strip of elastic, but don't pull it tight. If it's too tight, the wig will not stretch properly to fit on your head. Just stitch it where it lays naturally on the foam head. You will stitch the hair to the elastic strands in the wig, NOT TO THE OTHER HAIR!
Step 2: Sew the hair, by hand, onto the higher quality wig. It's important to use a higher quality wig for the base so it is comfortable and fits well. It will stay on your head more easily and look more realistic. The cheaper hair will look better if it is mixed in with high quality hair. Sewing hair to a wig is very similar to removing it. Use a hair clip to pile most of the hair on top of the foam head, and start reattaching hair at the back neckline. As you can see in the picture to the right, the higher quality wigs have more elastic in them so they can adjust more precisely. You want the hair to be straight between each strip of elastic, but don't pull it tight. If it's too tight, the wig will not stretch properly to fit on your head. Just stitch it where it lays naturally on the foam head. You will stitch the hair to the elastic strands in the wig, NOT TO THE OTHER HAIR!
When you are done stitching, try it on to make sure that it still fits. If it doesn't, you will have to remove the hair you added and try again. Seriously, don't sew it on too tight.
Step 3: Styling the huge wig. This is the most stressful part because you can really mess up wigs if you aren't careful. NEVER STRAIGHT BRUSH A CURLY WIG. You can really mess it up. Carefully shake it or bounce it up and down to give it life or use your fingers to remove tangles carefully. Wig spray can be very helpful to keep tangles down since it reproduces the natural oils that we make for our hair. It also makes the hair look more shiny and real.
 To get the volume and shape of Merida's hair, I had to do a lot of teasing around the sides of the head. Teasing hair is very counter-intuitive, because you are basically creating strategic tangles in the hair to make it stand farther from the scalp. Again, clip the hair at the very crown of the wig up and out of the way, you only want to tease hair that will be hidden by it later. Take a small section of the remaining and pull it straight up from the wig, then brush BACKWARDS from the about half way up the strand towards the roots. Use a round bristle brush and lots of hairspray to make it easier. Short, quick strokes are best. This obnoxious YouTube video can show you much better than I can describe it, but just watch the first 30-40 seconds of it to get the idea. With a curly wig, the most important thing is to make sure you put the teased areas UNDER non-teased hair, so plan well! You don't want it to show and you can't just brush the hair smooth like you can with real hair. You might want to practice on a cheap wig or your own hair before you try on your main wig.
Curling wigs is a pain. If possible, always buy wigs already curled the proper amount. You cannot use curling irons or any heated hair styling tools on most wigs. The wigs I purchased were pretty curly, but there were a few strands that were sticking out oddly when I finished teasing. To amend this, I used old-fashioned plastic curlers (the ones that have foam and then clip shut) to wrap these strands and then CAREFULLY dipped them in boiling water for about thirty seconds. Be very careful to not dip non-curler hair in the water because it will straighten it, and don't burn yourself! After dipping them, carefully run just the curler hair under cold water. Having a second  person to hold the wig head and extra hair is very helpful if you try this method of curling. Once the curlers have been dipped in cold water, carefully unwind them from the curlers and let them dry. Once they are dry, hairspray the heck out of them! I chose to use a few different sizes of curlers to give the same variety of curl size that Merida's hair has, and you may want to use the same trick if you are trying to recreate natural curls.
Step 4: Wear it! I was very happy with the final product, but I may add even more hair to it before next time! I saw a LOT of Merida cosplayers at San Diego Comic-Con and the wigs were what really set the good ones apart. In cosplay, size does matter.
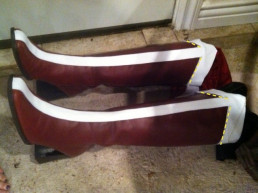
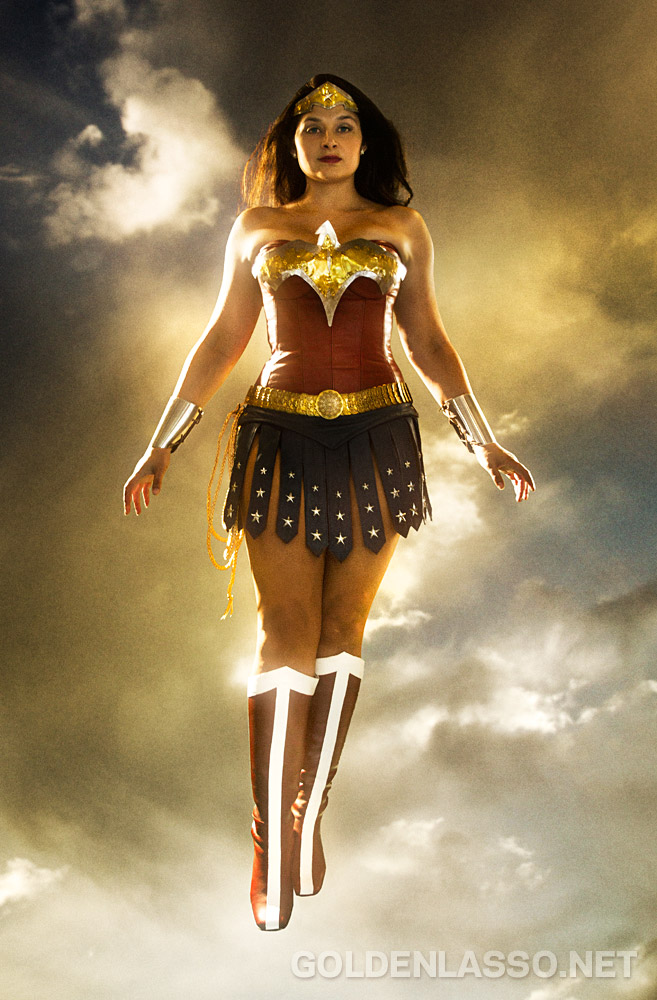
Do-It-Yourself: Wonder Woman Boots
 When I first designed my Wonder Woman cosplay, I wanted to make something that would be a believable real-world interpretation of Diana. That did not include the white and red go-go boots that are part of Wonder Woman's trademark costume, so I chose to go for the more Amazonian look of greek sandals and lace-up steel greaves. Since then, I have wanted the more traditional boots so I can be more easily recognized at cosplay events... because people seem to think I'm a patriotic Xena. Go fig.
There are a lot of affordable Wonder Woman boots for sale, however, my unique costume made things difficult because the shiny, bright red boots available online wouldn't match my muted, matte leather look. This limited me to two options, have them custom made or make them myself. My teacher salary and common sense made me choose the latter.
Step one, find boots. This step was very difficult for me, but I had an incredibly specific set of requirements and I was not willing to compromise... or pay over $50. I did weekly searches of Ebay, Etsy, and my local used clothing stores to find the perfect pair. Ebay eventually resulted in the perfect pair of tall leather burgundy boots in my size, for a price that I was willing to pay. With shipping, they put me back about $30. I had leftover white leather from my Sif cosplay, so it worked out perfectly.
 The next step is to make the pattern. I highly suggest that you get a friend to help you with this because you have to be wearing the boots to get an accurate measurement. I used white interfacing that I cut in strips and taped in place with scotch tape to create my pattern. The interfacing has similar properties to the leather, and was already laying around my workshop. I started with the stripe at the top of the boot, being careful to cut it in a triangle based shape that would peak in the front and then meet behind my calf. I then measured a long strip to run down the front of the boot.
When I got the mock-up fitting exactly right, I carefully pulled these pieces  off the boot (careful to keep them together as one piece) and traced them onto the back of the white leather. I used a pencil to insure that it wouldn't show later and CAREFULLY cut them out. Make sure that you cut one for the right and one for the left, they should be mirror images of each other. If you get two identical pieces, you did it wrong. After I cut them out I stitched white thread along the edges of the white to give it texture. It will also make it look like the stripes are sewn on, when they will (mostly) just be glued on.
PRO TIP: Cut slowly and don't use the full length of the scissor blades. This will insure you get smooth lines without those annoying jagged spots.
Once the pieces are cut, you should TAPE the stripes in place on the boot using masking or painters tape. Pins will leave little puncture marks in the leather, so avoid them. You should be wearing the boots for this step because the intended center of the boot and where the center of the boot is on your calf may be two different things. Trust me, I learned that the hard way. Double and triple check that you like the way the boots look and that they match each other. Pay special attention to the high point at the top of the boot and if the front stripe lands in the same place on both boots. Once they match you are ready to start attaching them!
 I wanted to make sure my boots were super strong, so I sewed the top stripe to the top of the boot. (The yellow dotted lines in the picture to the left show exactly where I did the sewing.) You can usually use a normal sewing machine for this unless the boots aren't made of dress leather. Once this part is sewn together you should stuff your boots (with newspaper, extra cloth, etc) until they hold their shape themselves. You will then use Barge cement to glue down the stripe in the front and to finish attaching the stripe at the very top of the boot. Follow the application directions on the can to get the best hold. This glue needs 24 hours minimum of undisturbed drying time to get it's full hold, so don't wear the boots for this step.
Wait at least 24 hours before messing with the boots. Seriously. This is the hardest part for me, but learn from my mistakes and don't move the boots around until they have dried for at least 24 hours. Once the boots are completely dry, you should remove the tape and try them on and see if everything turned out the way you wanted! If there are any small spots that aren't glued down around the edges you can add tiny drops of Barge with a toothpick or small paintbrush.
Congratulations! You can now make your own unique pair of custom Wonder Woman boots on a budget!