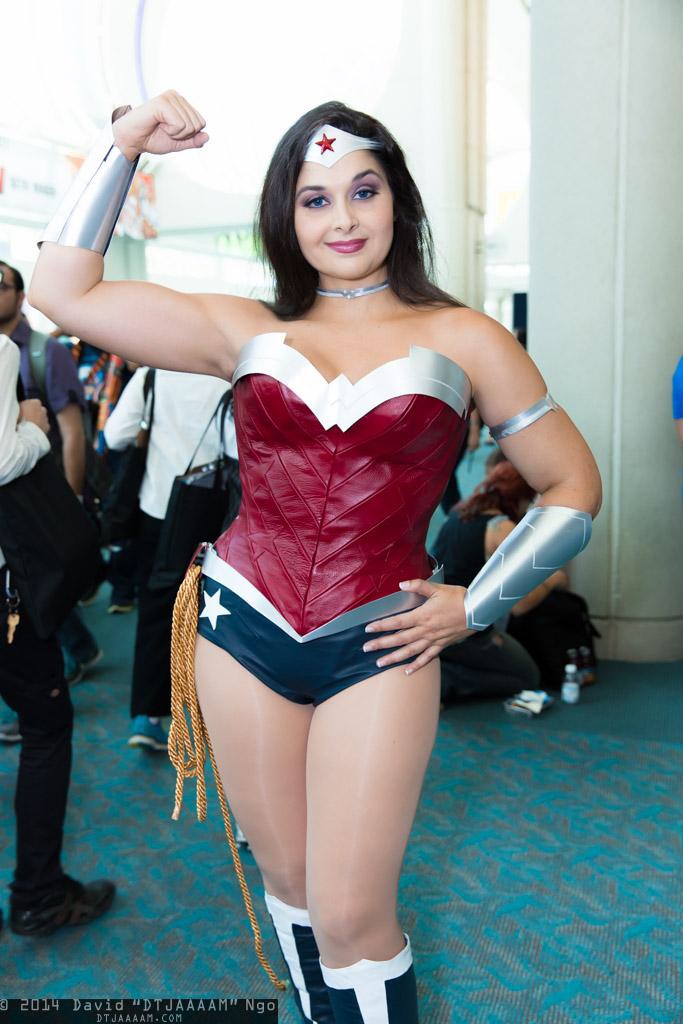
Do-it-Yourself: New52 Wonder Woman Corset
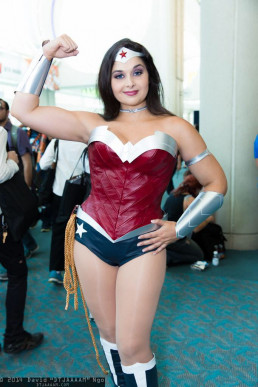
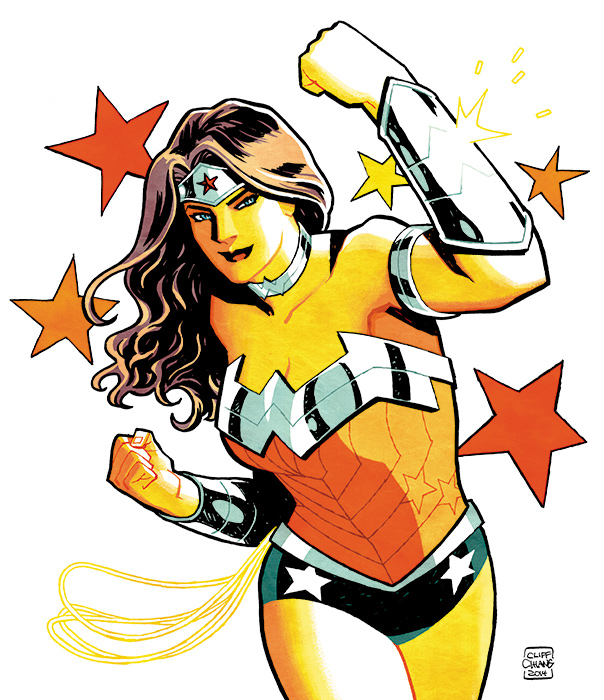 Wonder Woman's corset in the New52 is stunning. The complex chevron pattern combined with stars is intricate and eye-catching. As difficult as it is to draw, it's even more difficult to sew. Chevrons are quite a challenge and are also very time consuming.
Now there are two ways to make this corset, the easier way (still not super easy) and the hard way. The easy way would be to buy/make a corset, then make the straight lined chevrons out of a stretch fabric to cover that corset. I was hesitant to use this method because it can result in the chevrons looking warped as the fabric stretches to match the curves of the body, and because I wanted my corset to look like it was made out of leather.
Thus, the hard way.
Please Note: This is a difficult project that requires pretty advanced sewing skills. You will need to be familiar with making corsets and have a corset pattern that works for you as a base for this tutorial. You will also need a walking foot for your sewing machine if you are using leather.
Step 1: Use your corset pattern to make a mock-up. Make sure you use the same type of fabric that you will eventually use for the base of your final corset, I recommend something heavy like duck cloth.
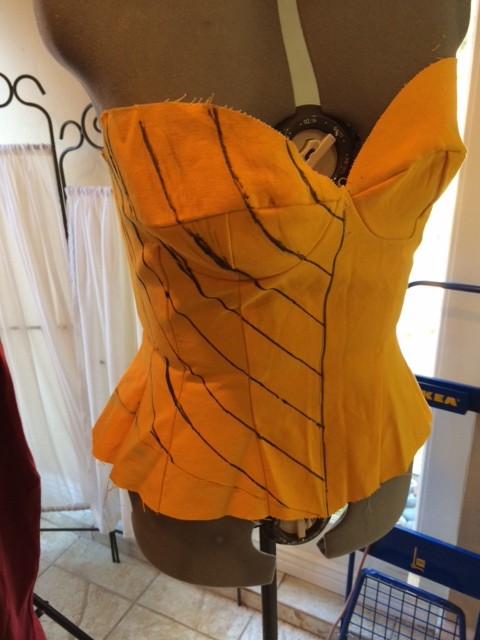
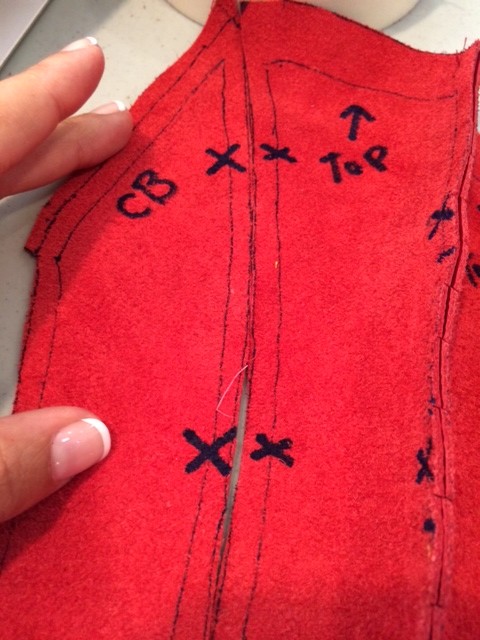
Step 2: Put this mock-up on a dress form, a volunteer, or yourself if you have a friend to help. Then draw chevrons on half of the mock-up. Measure equidistant meeting points on the center front of the corset as a base, then draw out from there. The trick is that these cannot be straight lines drawn with a ruler. You will get a tube shape if you tried to make a corset out of straight lines that would not form to the contours of your body correctly. You have to draw chevrons that form to the body's curves and appear to make straight chevrons. YOU WILL GET LOTS OF FREAKY SHAPED STRIPS. THAT IS OK!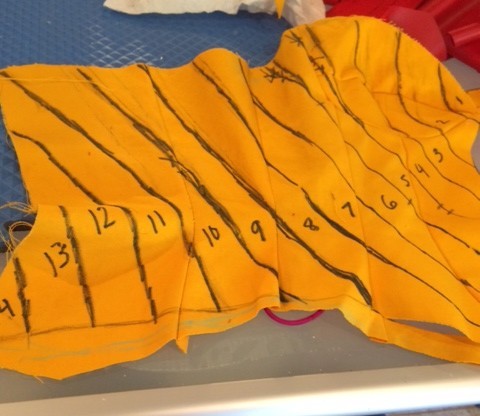
Step 3: Mark the lines on your mock-up with notches and numbers so you can keep track of which order the pieces go in, and where they meet. Cut the mock-up along the lines you drew to create the pattern for your final corset cover. DON'T FREAK OUT AT THE STRANGE SHAPES YOU GET!
 Step 5: Trace your pattern pieces onto your final fabric and add a 1/2 inch seam allowance around each piece. Make sure you have two complete sides for your corset and the pieces for each side should be a reflection of each other. Make sure you copy over the notches and identifying marks onto the BACK side of these pieces. I used leather but other pleathers will work as well. Stretch fabrics will not work and will warp the final product, try the previous method listed above if you want to use a stretch fabric.
 Step 6: Carefully, starting from the top center piece, sew one side of the corset together. Make sure to line up the notches, they are your guide! Now sew the refection side of it together. You should now have two complete halves of a corset cover that are reflections of one another.
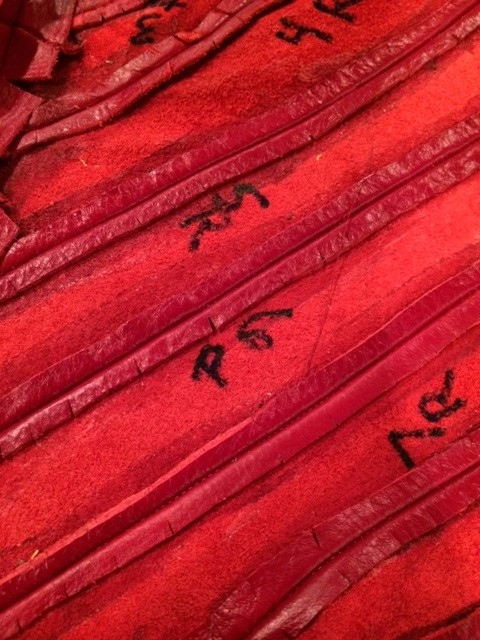
Step 7: Using rubber cement, glue all of your seam allowances flat against the back of your corset cover. Make them all as flat as possible. Flat seam allowances will make your life easier later and make your final product look better! Make sure the glue is dry before moving on to step #8.
 Step 8: Now it's time to make the chevrons happen! Meeting the right sides of the corset center fronts (those are two edges) use pins or tape if you are using a leather-like material to insure that the seams of your chevrons meet up. You might have to do a little manipulating and stretching to make the pieces line up perfectly in the front, but this is a VERY important step. You don't want your chevrons to not line up. Sew them together on the wrong side down what now is the center front of your corset cover.
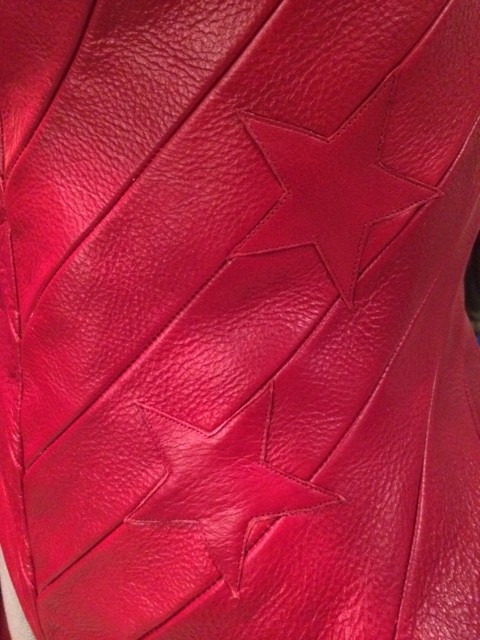 Step 9: The hardest part of your project is over!! Congrats!! Now cut out the stars from the same material as your chevrons, making sure they have the correct proportions to your chevrons. Put a small amount of rubber cement on the back of each star and place it where you'd like it on the corset. The glue will help hold the star in place while you top-stitch it down.
Step 10: Using your corset pattern, make the base corset with metal boning.
Step 11: Again using your dress form, a volunteer, or yourself if you have a friend to help you, put your 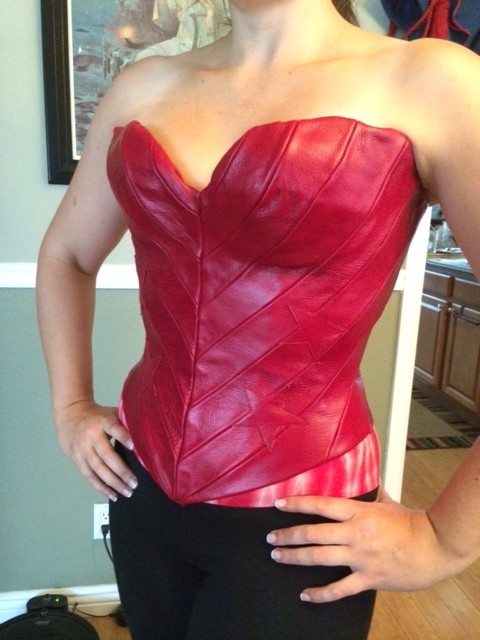 base corset in place. Then, finding the exact center, use bardge cement to glue the center seam of your chevroned corset cover to your base corset. This will keep the center front from moving around. You can also glue around the cups of the corset and along the sides and center back once the front has dried.
Step 12: Hand stitch the edges of your corset cover down on the inside of your base corset. This takes a while and you will definitely need a thimble if you are using leather. Make sure you stitch down all the edges!
Step 13: Grommet the corset.
CONGRATS!! YOU ARE DONE!! Hopefully you have an amazing piece of cosplay art to enjoy!

Rainfall's Wonder Woman
http://www.youtube.com/watch?v=XATiV3gmy-Q
A few months ago, I was asked to help bring my hero to life. I thought I was dreaming when Sam Balcomb of Rainfall Films brought the initial idea to me. Was it possible that Wonder Woman might finally be represented well on screen? Would I really get to help make that dream into a reality?

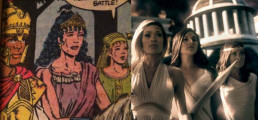
Since that fateful day, I've been able to talk about Wonder Woman even more than usual. Breaking down everything from Diana's history and motivations, to classic comic poses and ancient Greek myths. We decided to heavily base our short on the Perez-era Wonder Woman, complete with Them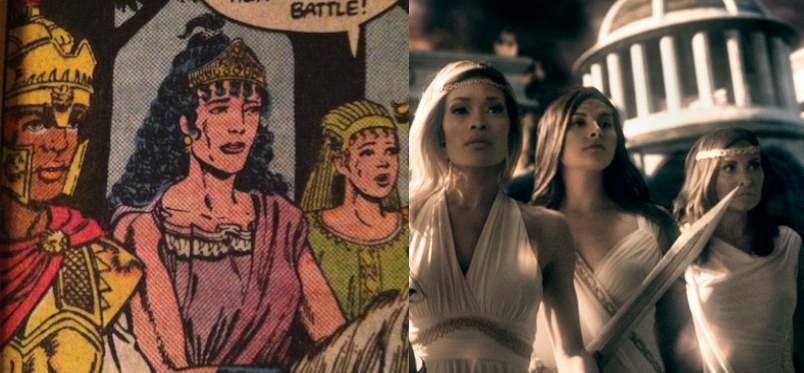 yscira and monsters out of Greek mythology. We poured over my collection of Wonder Woman comics to capture all the details, even if they would go unnoticed by most of the audience. Through it all, the Rainfall team was adamant about being true to the character, and making a truly kick-ass female superhero.
Then there was the most daunting task of all: designing the outfit. Costuming is a huge part of my life, and I've tried my hand at Wonder Woman's costume before, but we really wanted something unique that would pay homage to Diana's Greek and warrior roots. It had to be functional, but still capture the iconic look that is so familiar to pop culture. We finally settled on two distinct looks, a more armored suit for the flashbacks to Paradise Island and a sleeker look for the city scenes. Our incredible costuming team, Heather Greene and Sarah Skinner, were able to create the entire costume from scratch, including the leather armor and steel scale maille. Yours truly braided the Lasso of Truth!
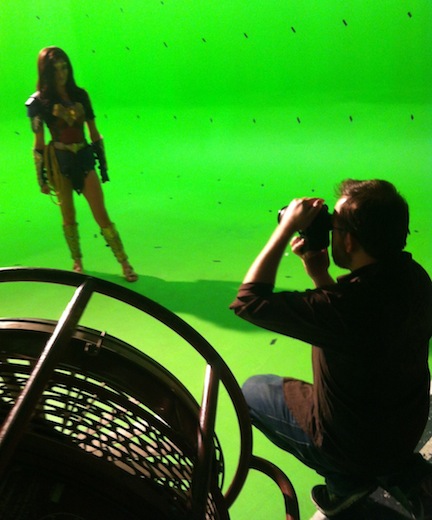 The days on set were incredible. Everyone was thrilled to be a part of the project. Rileah Vanderbilt, who plays Wonder Woman in the short, was incredibly dedicated and a huge Wonder Woman fan! The stunt team was incredibly talented and we all watched in amazement as Wonder Woman, with their help, flew for the first time. America Young, Clare Grant, Alicia
 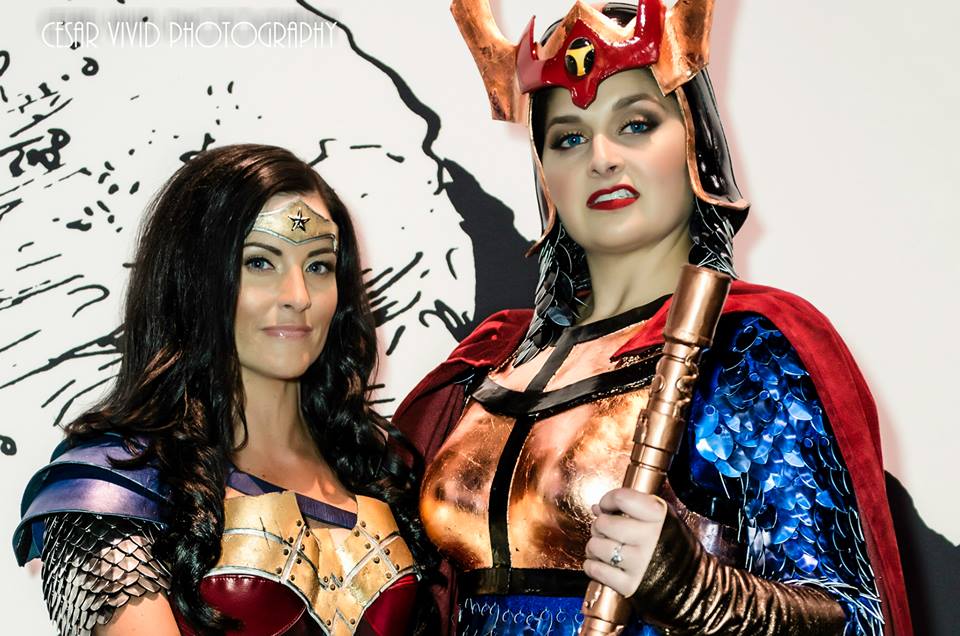 Marie, Christy Hauptman, and myself filled out the rest of the Amazons. It was so much fun getting to know these wonderful women while dressing up and playing with swords. It was even more fun to reconnect with all of them at Comic-Con 2013 a few weeks after shooting. Rileah and I even hit the convention floor cosplaying as Wonder Woman and Big Barda, also from DC Comics.
This was truly a labor of love. By combining our talents and passion for this character, I believe we were able to create something worthy of the Amazon Princess. I will be posting more info about this project in coming weeks, but in the meantime, I hope you enjoy our passion project!
Do-It-Yourself: Wonder Woman Boots
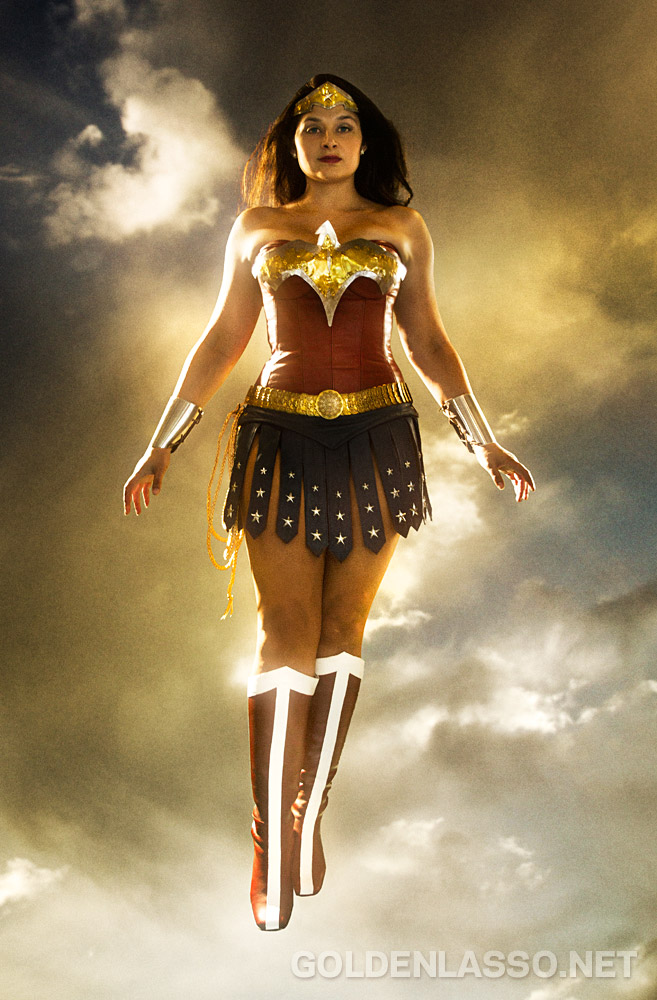
 When I first designed my Wonder Woman cosplay, I wanted to make something that would be a believable real-world interpretation of Diana. That did not include the white and red go-go boots that are part of Wonder Woman's trademark costume, so I chose to go for the more Amazonian look of greek sandals and lace-up steel greaves. Since then, I have wanted the more traditional boots so I can be more easily recognized at cosplay events... because people seem to think I'm a patriotic Xena. Go fig.
There are a lot of affordable Wonder Woman boots for sale, however, my unique costume made things difficult because the shiny, bright red boots available online wouldn't match my muted, matte leather look. This limited me to two options, have them custom made or make them myself. My teacher salary and common sense made me choose the latter.
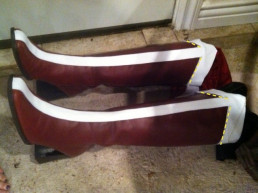
Step one, find boots. This step was very difficult for me, but I had an incredibly specific set of requirements and I was not willing to compromise... or pay over $50. I did weekly searches of Ebay, Etsy, and my local used clothing stores to find the perfect pair. Ebay eventually resulted in the perfect pair of tall leather burgundy boots in my size, for a price that I was willing to pay. With shipping, they put me back about $30. I had leftover white leather from my Sif cosplay, so it worked out perfectly.
 The next step is to make the pattern. I highly suggest that you get a friend to help you with this because you have to be wearing the boots to get an accurate measurement. I used white interfacing that I cut in strips and taped in place with scotch tape to create my pattern. The interfacing has similar properties to the leather, and was already laying around my workshop. I started with the stripe at the top of the boot, being careful to cut it in a triangle based shape that would peak in the front and then meet behind my calf. I then measured a long strip to run down the front of the boot.
When I got the mock-up fitting exactly right, I carefully pulled these pieces  off the boot (careful to keep them together as one piece) and traced them onto the back of the white leather. I used a pencil to insure that it wouldn't show later and CAREFULLY cut them out. Make sure that you cut one for the right and one for the left, they should be mirror images of each other. If you get two identical pieces, you did it wrong. After I cut them out I stitched white thread along the edges of the white to give it texture. It will also make it look like the stripes are sewn on, when they will (mostly) just be glued on.
PRO TIP: Cut slowly and don't use the full length of the scissor blades. This will insure you get smooth lines without those annoying jagged spots.
Once the pieces are cut, you should TAPE the stripes in place on the boot using masking or painters tape. Pins will leave little puncture marks in the leather, so avoid them. You should be wearing the boots for this step because the intended center of the boot and where the center of the boot is on your calf may be two different things. Trust me, I learned that the hard way. Double and triple check that you like the way the boots look and that they match each other. Pay special attention to the high point at the top of the boot and if the front stripe lands in the same place on both boots. Once they match you are ready to start attaching them!
 I wanted to make sure my boots were super strong, so I sewed the top stripe to the top of the boot. (The yellow dotted lines in the picture to the left show exactly where I did the sewing.) You can usually use a normal sewing machine for this unless the boots aren't made of dress leather. Once this part is sewn together you should stuff your boots (with newspaper, extra cloth, etc) until they hold their shape themselves. You will then use Barge cement to glue down the stripe in the front and to finish attaching the stripe at the very top of the boot. Follow the application directions on the can to get the best hold. This glue needs 24 hours minimum of undisturbed drying time to get it's full hold, so don't wear the boots for this step.
Wait at least 24 hours before messing with the boots. Seriously. This is the hardest part for me, but learn from my mistakes and don't move the boots around until they have dried for at least 24 hours. Once the boots are completely dry, you should remove the tape and try them on and see if everything turned out the way you wanted! If there are any small spots that aren't glued down around the edges you can add tiny drops of Barge with a toothpick or small paintbrush.
Congratulations! You can now make your own unique pair of custom Wonder Woman boots on a budget!
Steampunk Batgirl Mask
I am creating an unnamed (*cough*) steampunk superhero costume for San Diego Comic-Con. I have never attempted a steampunk outfit before, so I knew there would be a bit of a learning curve. The mask was going to be the most difficult piece of the outfit for me, and a make-it or break-it piece for the cosplay, so I started off my project with that piece. It was a major lesson in patience for me. While not all of my costumes go perfectly, this is the first time that something has gotten ruined and I had to restart from scratch.
Plan A:
 My plan was very simple, I would create the mask out of InstaMorph, then paint and cover parts of it with leather. Easy right? Nope.
The formation of the mask went well enough. InstaMorph is my go-to substance when I have to create something from scratch. It's very easy to work with, but also very strong. Fiberglass will be a big step up, but for now, this works very well. The only drawback is the low melting point, which is around 150 degrees. Do not make something out of this material and then leave it in the car.
Anyway, the formation went very well and I was thrilled with the initial fit and look of the mask. It had amazing potential, but the edges were a little uneven. I sanded these down to get a flatter edge since I eventually wanted it to resemble metal. It sanded easily, but ended up getting a fuzzy texture on the areas I sanded it. Here is the turning point. What I should have done was boil the plastic one more time to smooth this out. Opps. Instead I thought the paint would cover the fuzz and it would end up with a rough metal look. This didn't happen. My mask ended up looking almost furry, and since it had already been painted, I couldn't go back an reform the Instamorph into another shape. Bye bye Plan A!
Plan B:
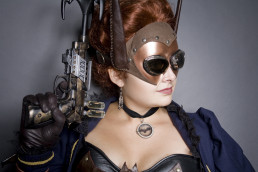
I was not going to spend hours forming a mask from scratch again, especially because I now doubted that I could get the finished texture that I wanted, so Plan B started with a trip to Michael's. I found surprisingly sturdy white all-face masks for around $5. They were plastic, but had texture and thickness enough to be the base for my alterations. I brought one home and started creating my masterpiece. Plan A was a black mask with leather accents, but my plan changed a lot after the initial failure.
 The shape was actually very easy to get. I simply drew the shape I wanted on the back (just in case the pencil would leave marks), and then cut it with strong scissors. I then rubbed it down with mineral spirits to remove any excess oils or anti-mold coating on the plastic, and sprayed a few base coats of black Krylon Fusion spray paint. I always use the Fusion as a base coat on plastics because it (supposedly) bonds with plastics. It seems to work pretty well for all my projects so far. I used black because it gives a great base to metallic paints, and it looks better than white if the metallic chips for some reason. I used Krylon Copper Metallic spray paint after letting the black dry for a few days. (I've been testing a lot of metal-imitating spray paints and will be doing a blog post to compare them in the future!)
I wanted the mask to look like molded metal, so it was a VERY slow process. To get it smooth you have to do lots of thin layers, but not too thin or you never get rid of the texture. If you spray too thickly, you will start getting drips. PRO TIP: Let each layer dry COMPLETELY before you add on the next one.
Once again, I was too enthusiastic and handled the mask after only a few hours of drying. There are now a few TINY marks on it, but nobody can see them unless they are less than a foot away. Please, don't make my mistake! Let your creation dry for a few days before you move on to  adding rivets, leather, goggles etc. I knew better, but just got too excited!
Next I measured and cut the leather. I glued the edges under so that it would appear smooth and then glued the leather to the mask. After that I used a leather punch to make holes through the leather and mask. The rivets are purely decoration, and were glued in place through those holes. Actually setting the rivets with a hammer (like I did on my Sif costume) would have damaged the mask.
Finally, I added the ears and strap. I cut the ears from Plan A's mask and wrapped them in leather, gluing them in place and using a whip stitch to close the edge. This also added a cool steampunk look to them. I sewed and glued them and the strap in place. All of the leather and straps were taken from a $4 purse that I bought at the thrift store. The last thing I did to the mask was glue on the goggles, which were purchased on Amazon for $7 and dismantled so I could attach them correctly.
 (The ears will lay flat against my head when I wear it.)
Overall, I am much happier with the final outcome than I was with my original design. I think this looks much more "steampunk" and will actually be more comfortable to wear, mostly because of its lighter weight.
Stay tuned for more updates on this very educational cosplay experience!
WonderCon Countdown: Sif's Belt and Skirt
WonderCon has arrived in Southern California! While this has caused many Northern California people sorrow, I am happy to have an event before SDCC to debut my Sif cosplay! There is only one problem... it's not done yet. I have made a lot of progress and will be able to finish tonight, but sleep may be sacrificed. Everything is looking great and I am very excited!
Belt
Sif's belt is a trademark of her costume. No matter how many times she is redesigned, she almost always has a prominent, geometric belt buckle in the center of her abdomen. I started with a faux leather corset belt that I got on Ebay for $6.99. I really liked the pattern the sections made and how it added texture. Plus, it's stretchy without being spandex. Bonus points! The biggest problem is that I wanted the pattern in the belt to accent and frame the Sif buckle, which meant I had to move the buckles already on the belt. I removed them with a seam ripper and restitched them on the opposite side of the belt which would be on my back. I stitched the front together to prep it for the Sif buckle.


 The buckle was actually much easier than I expected. I measured and cut the basic shape out of an old teaching poster I had. It was stronger than poster board, but not as thick as cardboard... plus I already had it. I'm not planning on teaching Kindergarten again anytime soon, so it's not a huge loss. I cut up the rest of the red leather purse that I used to make straps for my leg armor, and covered the polygon (see? I'm such a teacher...) by gluing it and then stitching the edges. I was happy that my new sewing machine could handle the laminated poster board and leather.

The white boarders on the belt were the most time consuming piece, just because they needed to be perfect. I traced the finished, red leather polygon on the back of my white leather hide and measured out the designs. Then I carefully cut out each section so the lines would be perfect and keep the geometric look. Once it was cut I sewed white stitches 1/8th inches from the edges of the white. These served no structural purpose, but added texture and gave the illusion that the white was stitched onto the red. Then I carefully used barge cement to glue the white onto the red. This was the most stressful part, because if I messed up I'd have to start ALL over again. I also had to glue the white leather on perfectly so the lines and angles would stay straight. Luckily, non of the leather had stretched, and it ended up looking great.
Skirt

The skirt was fairly simple, but time consuming. Lots of measuring and cutting very straight lines. I had it basically put together, but realized that it looked like cheap plastic from even just a few feet away. I decided that adding metal studs would give the leather a little more weight and help give it more texture. I carefully added them to each strip of the skirt. This is pretty challenging since the leather was very prone to wrinkling under the studs and the wrinkles showed up a lot on the white. Once this was finished, I put the waist band on over my corset, inside out. I than taped (you don't want to use pins on leather because they leave holes) each strip in place to get the desired look. It's important to do this with the corset on, because the measurements will be very off otherwise. Finally, I sewed everything down and added Velcro to close it at the top. I'd usually use laces to close a leather skirt, but it's not going to show and I wanted it to stay as flat as possible under the corset.
To Do
I still need to finish the garter belt that will hold up my leg armor, and my sword belt tonight. My first try at making a cosplay sword ended in a very unremarkable, heavy sword that flakes paint at every turn, so I will be wearing my backup LARP sword this weekend. It's very lightweight and doesn't distract from the outfit. The armor will be the most difficult part, so I hope the concept for the garter belt works. Wish me luck!
I'll be posting pictures from WonderCon and from the Merry Wives' St. Patrick's Day concert this weekend, so check out my facebook page or twitter feed to see them!
Sif Update
 MY HEADPIECE ARRIVED!!!! WOOHOO! Ahem... but more on that at the end of this post...
My Sif cosplay project is coming along nicely. It seems there are never enough hours in the day, but I'm checking things off my list whenever I can. I am getting more and more excited about this project as I see it coming together. I really resemble Sif physically and think this could really be an attention getter at WonderCon and ComicCon.
The leg armor is still being reshaped, slowly but surely. I have a few adjustments to make on it, but it's looking better and better! I'm still deciding what buckle design to go with, there are so many choices!
I have all of my fabrics and have started cutting. I'm very happy with my choices, but again, I'm stumped. I love the fabric that I got for Sif's cape, but I can't decide if I want to line it with white or red. The red is more accurate for the character, but the white will make the rest of the outfit stand out more. The comic geek and the costumer inside me are at war over this. Right now the comic geek is winning. We will see...
Top to bottom: Fur for Sif's cape, red yummy fabric for Sif's cape, white leather for Sif's skirt, red imitation leather for different cosplay
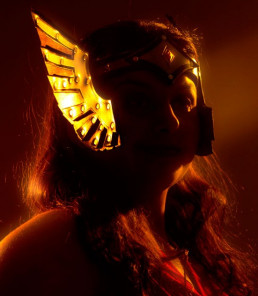
The big news is that my Sif headpiece arrived!! I'm so excited! It's always very nerve-wracking for me to have pieces commissioned. I'm a huge perfectionist and don't like handing control and money over to someone else. I procrastinated for months before I finally bit the bullet and got in touch with a leather craftsman from the SCA. I originally asked for white because I assumed it would be easier to get than silver. WRONG. Evidently, silver leather paint is easier and lasts longer than white. So with very specific directions and many emails in the last few weeks I signed the most important piece of this cosplay off to a total stranger.
And damn am I happy with the results!
An Asgardian goddess is born!
I'm taking pictures as I tackle the cloak/cape. I'll post info on that when there is more to see.
Sif's Leg Armor
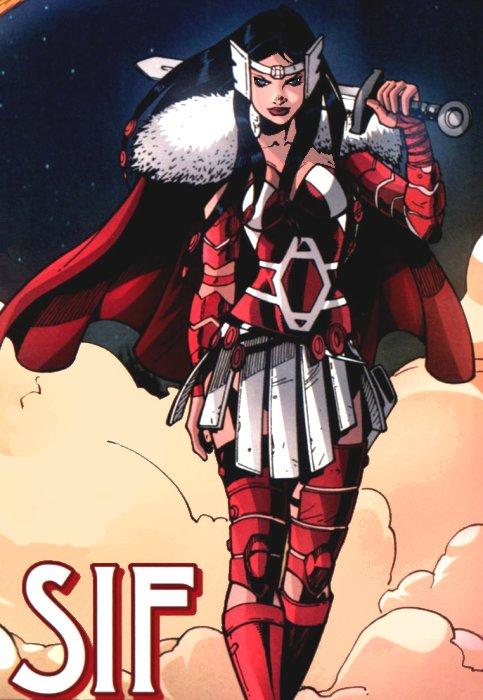
My first cosplay of 2012 is going to be Lady Sif, lover of Thor in the Marvel Universe. Although I'm a DC fangirl usually, I've always liked the concept of Sif and am very similar to her physically. Also, Jaimie Alexander (who played Sif in the Thor movie) was at my house for a photo shoot a few months ago. I took it as a sign from the Asgardian gods that I should cosplay Sif this year.
I will be using the red leather corset that I made for my Wonder Woman outfit. The most challenging piece is the leg armor, so I started on that first. I bought a pair of dirt-cheap, $30 tassets from an online store. For anyone who doesn't know what a tasset is, they are worn like this:
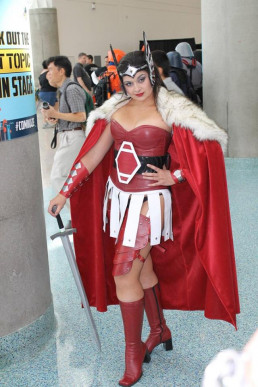
and here is what Sif looks like:
Not exactly what I needed, but a good start. The first thing I needed to fix was the color. The tassets I got were imitation (CHEAP) leather with many imperfections and this horrible cherry red color. That is not the Sif I'm going for. I want to make a realistic, leather clad warrior, not a cherry red snow bunny with a sword.
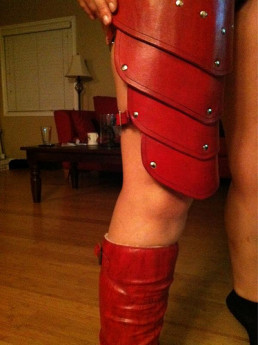
Step 1: Fix the color. I used shoe dye to change the color and then used shoe polish to bring out the imperfections and darken the edges. This aged the material and made it shine like real leather. The original color is on the right and the new look is on the left. I have since done another coat of the shoe polish, so they are even darker now.

Step 2: Add straps and remold the "leather" so they will strap to my legs like Sif's armor. Tassets are flat, but I needed mine to strap to my legs and be form fitting. First thing I did was visit my friendly local Goodwill store and buy a leather purse that matched my re-purposed tassets. This purse's straps and buckles became the straps that will hook around the back of my leg and hold the armor on me. Not bad for $4.99. To remold the leather I sprayed it with rubbing alcohol (best thing to stretch or change the shape of colored leather) and wrapped them closed with strips of fabric. Then I shoved them between my couch cushions for the night to make sure they stayed curled in a leg shape. I sprayed them about 3 times before I went to bed.

And... DONE!

Ok, not totally done, but very close. I think I will have to use the rest of the purse to create a garter belt to help support their weight before I finish the costume.