Do-it-Yourself: The Perfect Cutting Table
The perfect cutting table is a dream for many crafters and DIYers, but sadly, professional cutting tables are expensive! However, you can adapt your existing tables to be the next best thing by adding a top to them for only about $50! These table tops are made of material that pins can be put directly into to hold your fabric and crafting materials securely in place.
Step 1: Measure your table space!
My tables were 4ft x 8ft. Pushed together they were almost exactly 8ft x 8ft.
Step 2: Visit your local home improvement store!
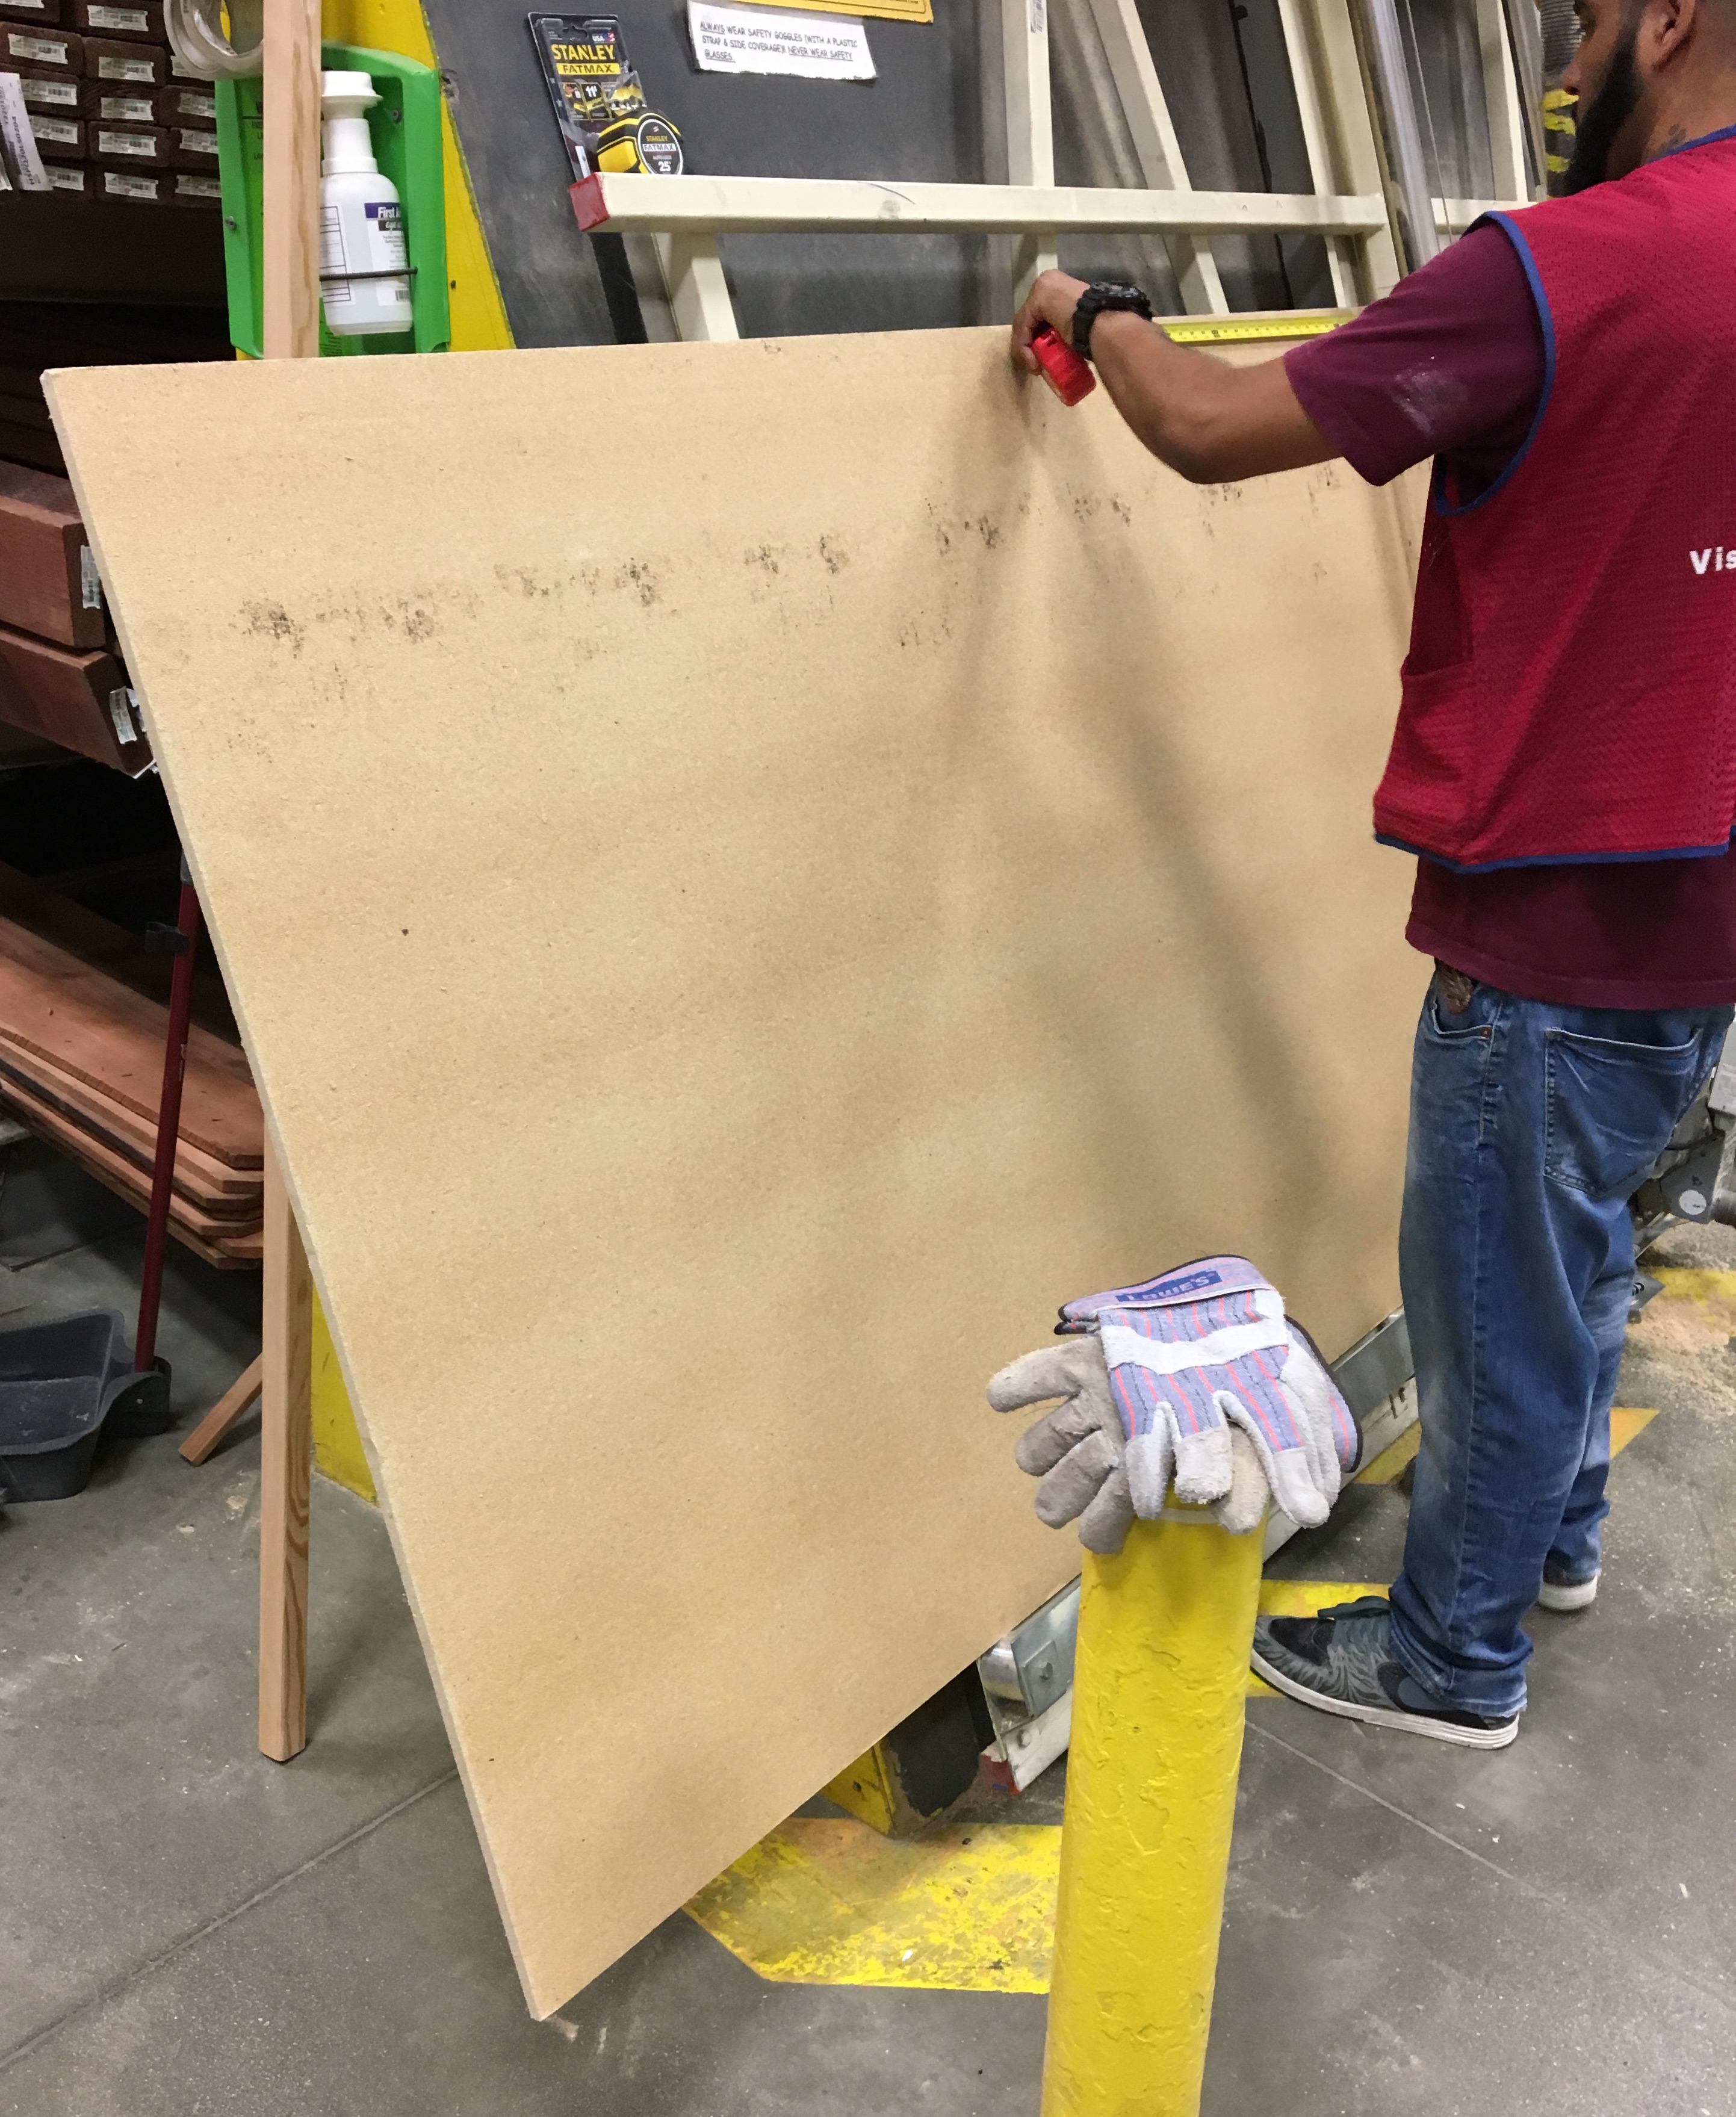
You are looking for large boards of insulation called homasote. (That is the brand name and the store employees should be able to direct you to the same material under a generic name. Think Kleenex vs. facial tissue.) This material is a fiber composite, and has a consistency and weight similar to cork board, but more heavy duty. It's generally tan in color but one side might be painted.
It costs around $20 for a 4x8 piece. Make sure you buy enough to cover your desired space, and have the store cut it into the right shapes to fit on your table AND fit in your car. (Trust me on that last part... doh!)
Step 3: Get the board in place!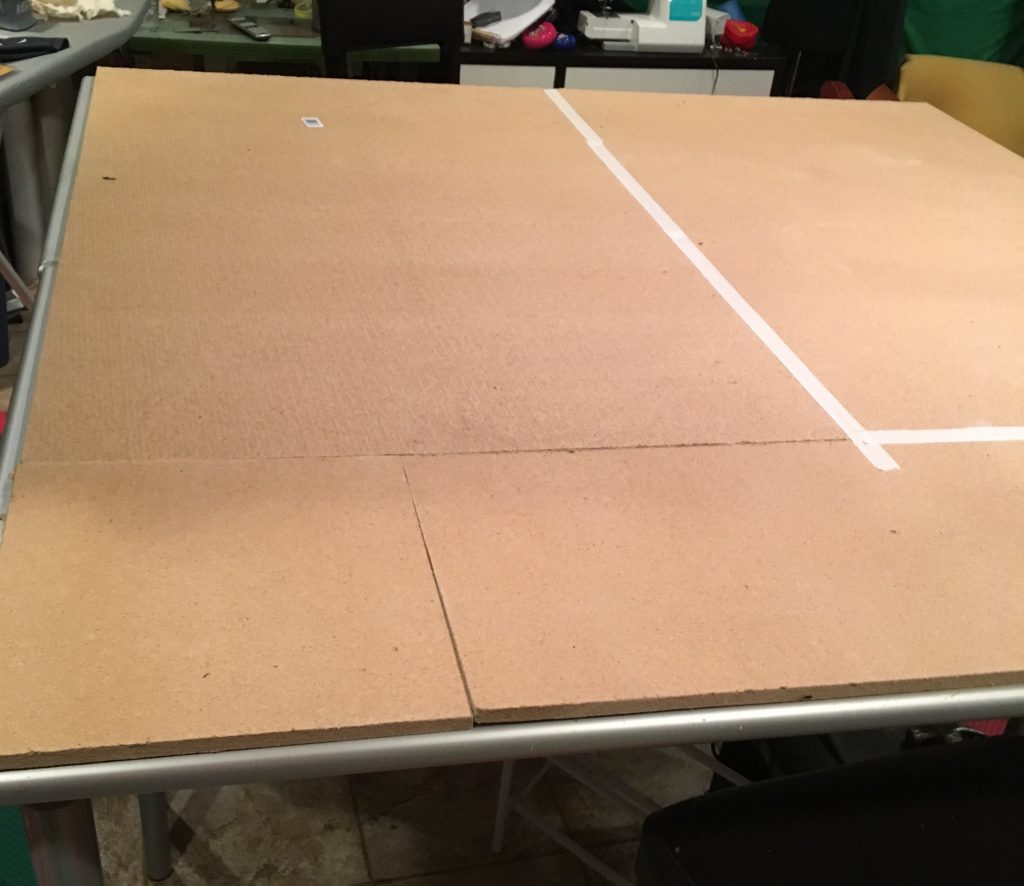

Lay the pieces out to cover the table, then use heavy duty masking tape to cover the seams and keep the boards together. Use the tape to seal the edges of the board to the edges of the table to keep it from slipping around. (DON'T GLUE IT DOWN! You want to be able to easily replace it if something happens!)
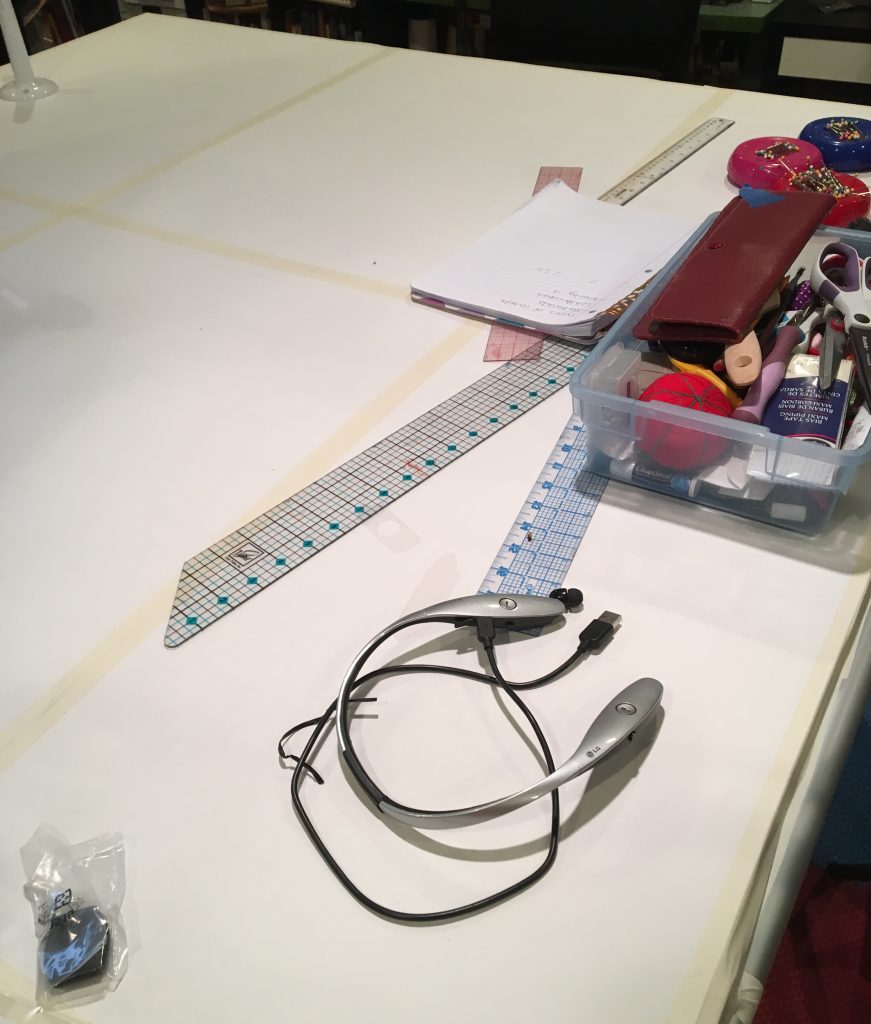 Step 4: Cover it!
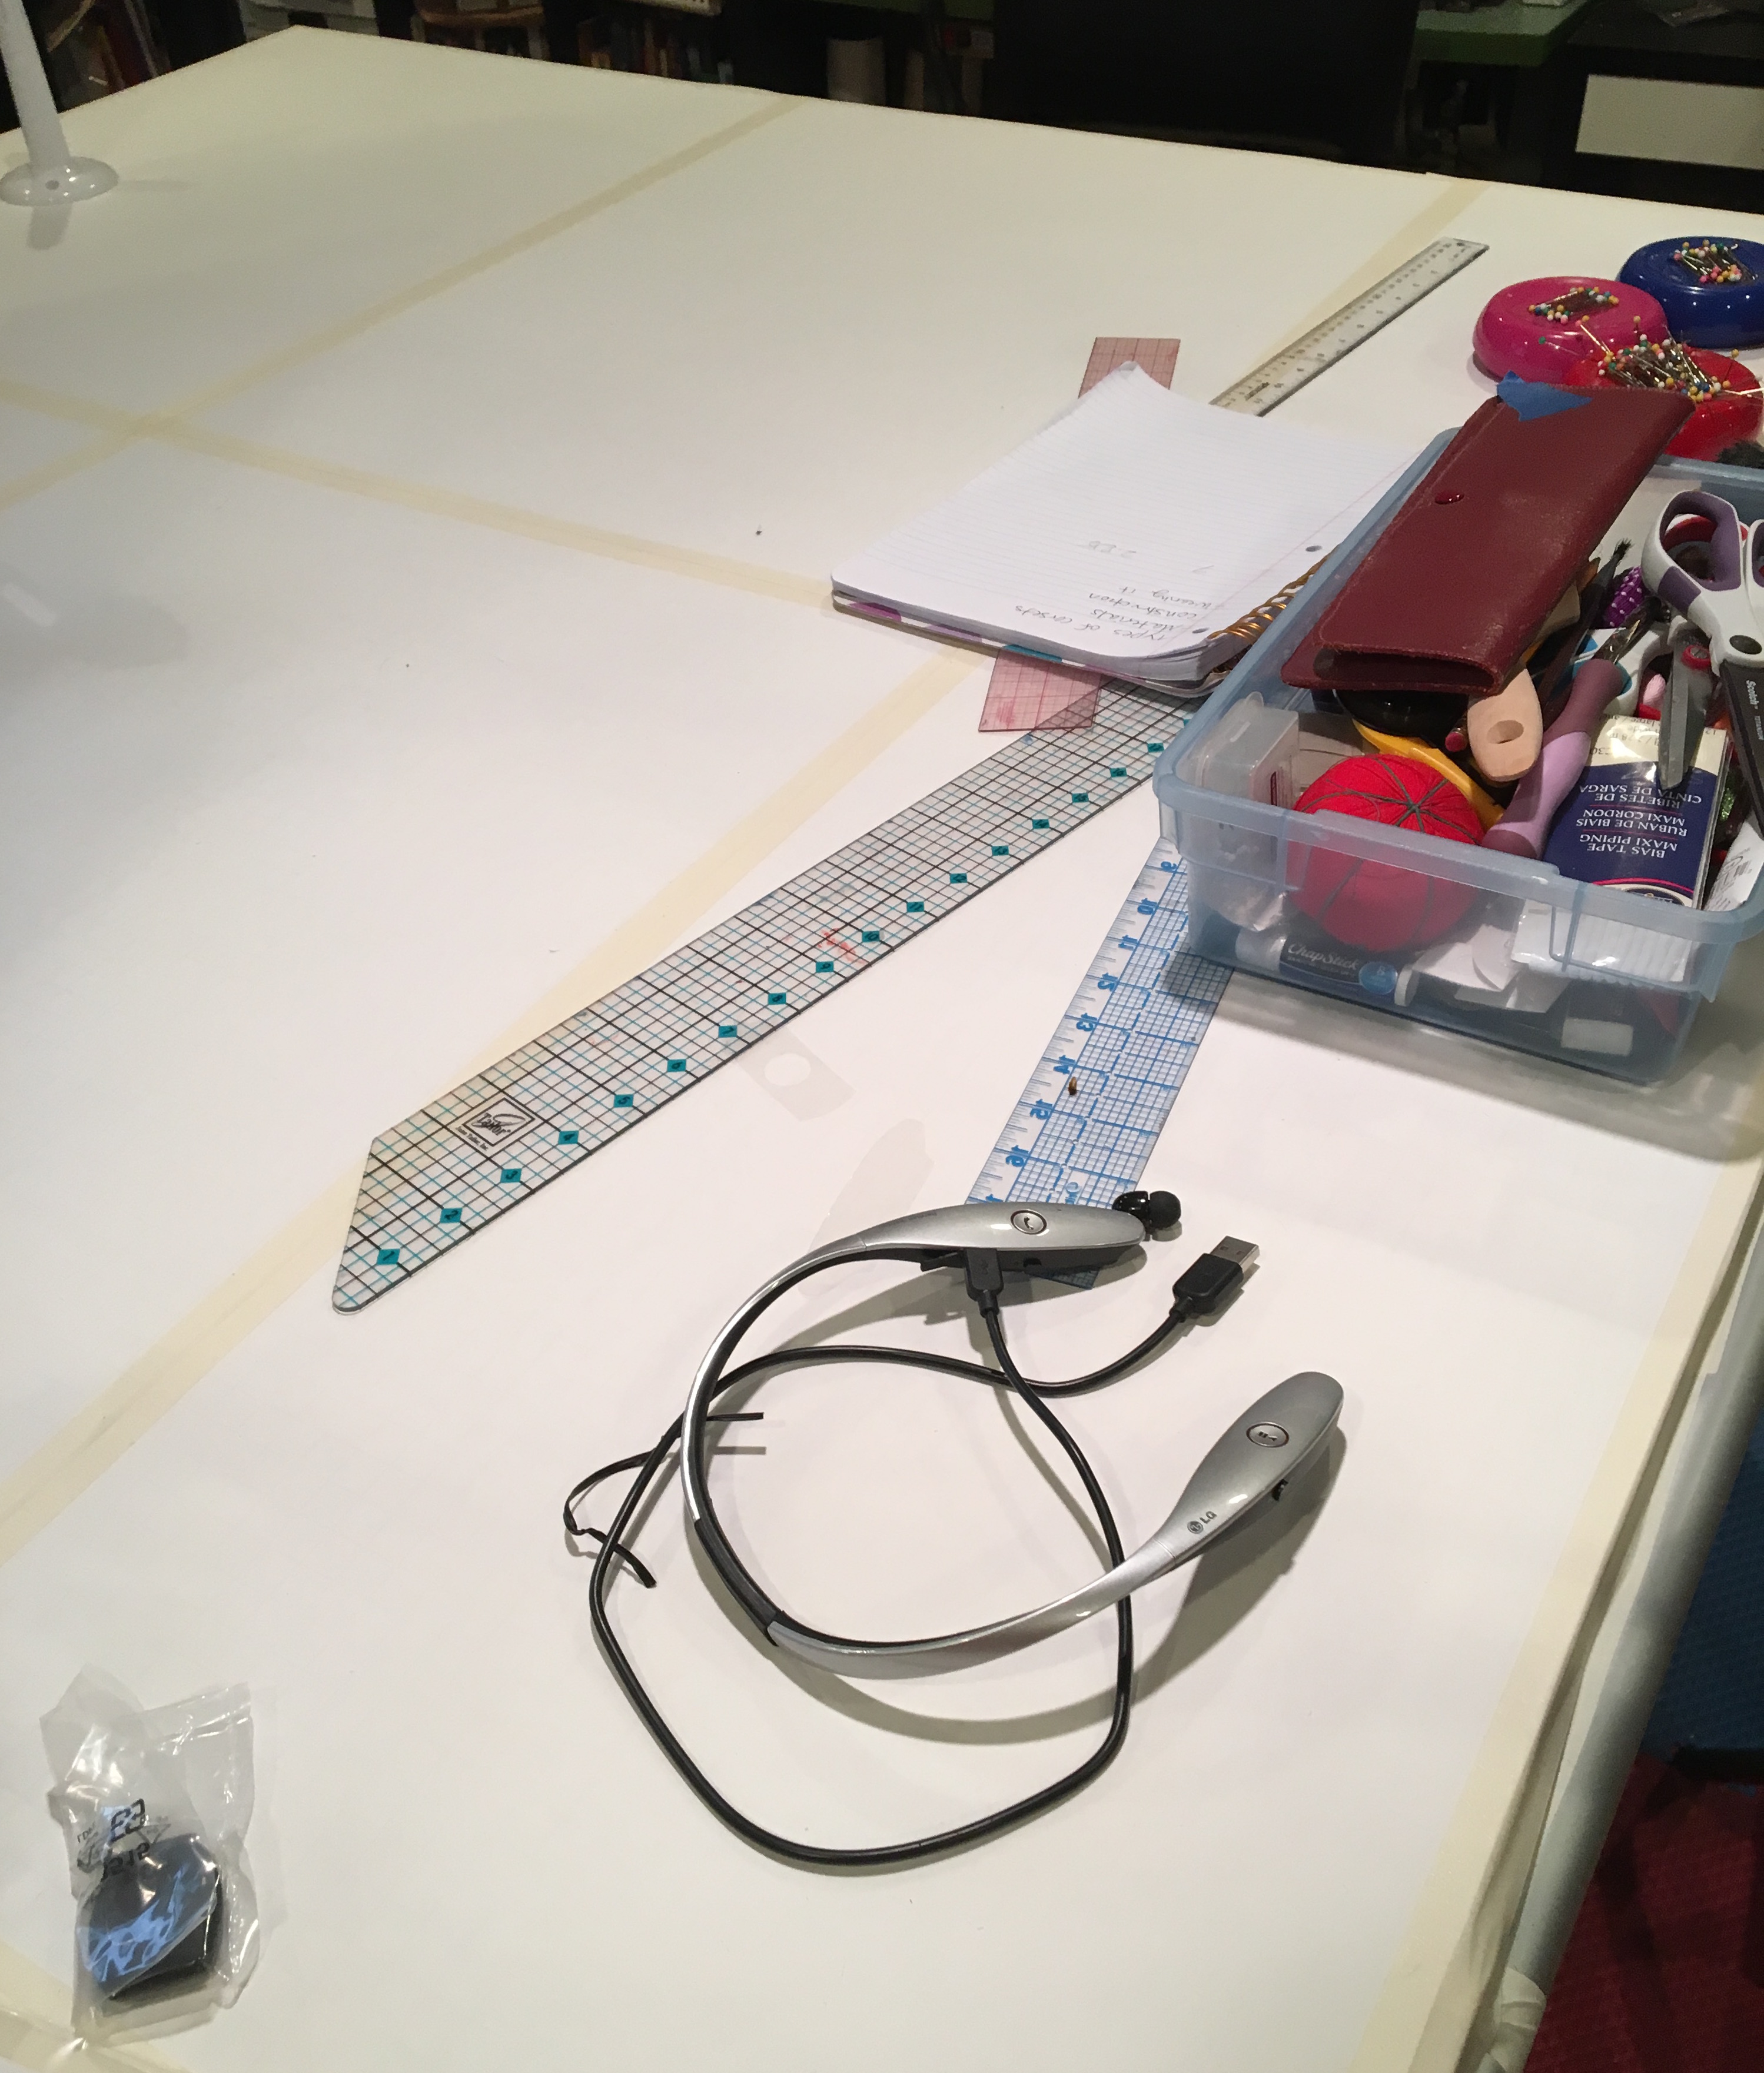
The best material to use is tag paper. It's easy to get and cheap to replace if you want a clean work surface. Butcher paper can work as well but won't hold up as well. Use the masking tape along the seams of the paper to finish off the table and give yourself a smooth work surface.
YOU'RE DONE! :)
Have fun with your awesome new cutting table!
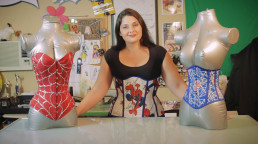
Corsets 101: Picking Your Corset
Don't waste your money on a bad corset! Learn how to tell if a corset is high quality so that it fits you right and will last for years! There are lots of tricks and tips that will help you get the corset that is right for you!
Post any questions in the comments or reach out on social networks! Thank You for Watching! Subscribe if you want more Golden Lasso Girl videos!
Watch More GoldenLassoGirl Videos: http://tinyurl.com/glgvideos
Subscribe to GoldenLassoGirl: http://tinyurl.com/glgsubscribe
Twitter: https://twitter.com/goldenlassogirl
Instagram: https://instagram.com/goldenlassogirl
Facebook: http://fb.me/goldenlassocosplay
Do-it-Yourself: Easy Metal Etching
A simple, safe way to etch designs into metal costume and cosplay pieces. This will also work for metal knives and tools!
Materials:
1 9 volt battery
2 low voltage wires
4 alligator clips
1 cup salt water
Many Q-tips
Electrical tape/nail polish/vinyl sticker
Metal object
Post any questions in the comments below or reach out on social networks! Thank You for Watching! Subscribe if you want more Golden Lasso Girl videos!
Watch More GoldenLassoGirl Videos: http://tinyurl.com/glgvideos
Subscribe to GoldenLassoGirl: http://tinyurl.com/glgsubscribe
Twitter: https://twitter.com/goldenlassogirl
Instagram: https://instagram.com/goldenlassogirl
Facebook: http://fb.me/goldenlassocosplay
Do-it-Yourself: Crafting Safety
Safety is something that many of us slack on when we are crafting! Check out this short video to learn the 5 things you should have to keep yourself safe while creating your cosplay or other craft project.
Post any questions in the comments or reach out on social networks! Thank You for Watching! Subscribe if you want more Golden Lasso Girl videos!
Watch More GoldenLassoGirl Videos: http://tinyurl.com/glgvideos
Subscribe to GoldenLassoGirl: http://tinyurl.com/glgsubscribe
Twitter: https://twitter.com/goldenlassogirl
Instagram: https://instagram.com/goldenlassogirl
Facebook: http://fb.me/goldenlassocosplay

Do-it-Yourself: Metal Armor & Accessories
My first YouTube cosplay tutorial is up! I often am asked about my metal Wonder Woman armor, so I decide it would be a great topic! Check out the video to see how I make metal armor and accessories without power tools and on a small budget!
This tutorial does have some sharp edges! Please use the proper safety gear. Crafters under the age of 18 should only attempt this tutorial with parental permission and supervision.
Materials:
Craft Foam
Scissors/Exacto Knife
Pencil & Sharpie
Aluminum Kick Plate
Aviation Snips (min.18-gage)
Block Sanders
Hammer & Nail
Dremel (optional)
If making Wonder Woman tiara you will also need:
Metal Star
Stain Glass Window Paint
6 inches of 1/4 inch elastic
Adhesive Putty or Double Sided Foam Adhesive Strip
TO ADD THE ETCHED LINES INTO THE METAL USE THIS TUTORIAL: https://www.youtube.com/watch?v=XOQM9kBG2JA
Post any questions in the comments or reach out on social networks! Thank You for Watching! Subscribe if you want more Golden Lasso Girl videos!
Watch More GoldenLassoGirl Videos: http://tinyurl.com/glgvideos
Subscribe to GoldenLassoGirl: http://tinyurl.com/glgsubscribe
Twitter: https://twitter.com/goldenlassogirl
Instagram: https://instagram.com/goldenlassogirl
Facebook: http://fb.me/goldenlassocosplay

Volumizing Your Hair for Cosplay

I struggled for years with styling my long hair. When I started cosplaying, I tried everything to get great "comic book" hair consistently, but completely failed. Some days I looked great and other days I was left with a stringy mess! Finally, I had a hair stylist teach me this trick for getting the perfect sexy hair style every time!
You will need:
- Hair dryer
- Mousse
- Rubber Hair band
- Hair Spray
- Curling Iron
- Aluminum Hair Clips
- Scissors (NOT for your hair)
Step 1: Hair Prep
Start by washing your hair and hand drying it with a towel. It should be damp but not dripping wet. Measure an egg sized amount of mousse in the palm of your hand and work it though your damp hair. Spread it out evenly starting at the roots and moving towards the ends, if you have long hair you may need to use a little extra mousse. Once this is done, blow dry your hair in sections until it is completely dry. Now your blank canvas is ready to begin!

Step 2: High Ponytail
For step 2, be sure to select a low cost rubber hair band. It will get cut later in the process, so don't pick one that you aren't comfortable destroying.
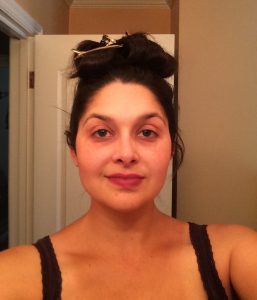
Think 90s ponytail for this step. Bring all your hair up into a tight ponytail on the very top of your head and secure it with the rubber hair band. The tighter you can get it, the better! Give your head a light spritz of hairspray when it's done. (Please ignore the complete lack of makeup in this picture! I was taking pictures for a makeup tutorial that same morning!)
 Step 3: Curling

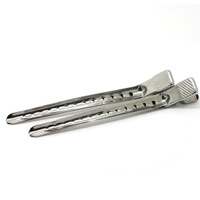 Start taking small sections of the ponytail that you made and curling those sections with a curling iron. The smaller and tighter the curls, the smaller and tighter the waves in your final style will be. Start at the end of the section of hair and curl up to the base of the ponytail. Hold the curling iron there for a moment and then CAREFULLY slide the curling iron out from the center of the curl without unraveling your hair. Don't burn yourself! Keep the hair curled up at the base of the ponytail and hold it in place with an aluminum hair clip (right). Spray each curl lightly with hair spray after it is pinned.
 Step 4: Wait

The hard part is done and this is by far the easiest step in the process. Once all of your hair has been curled and clipped around the base of your pony tail, give your whole head one more light dusting with hair spray and then do nothing to it for a while. The longer that your hair is in these curls the longer your style will hold later.
I usually start my beauty prep with steps 1 - 4, then I finish getting ready by getting dressed and applying my makeup while I'm giving my hair more time to set.
 Step 5: Take it Down

Carefully pull the hair clips out of your ponytail and let each curl fall. You can straighten them a bit with your fingers, but don't run your fingers through them or brush them out. Handling them is the deal of the curls!
Once all your hair is down use the scissors to cut the rubber band and let your hair fall. Again, avoid running a brush or fingers all the way through it, but you can shake your head or use your hands to shake your hair until it loosens up a bit. You can also use your fingers or a comb to create a part, if needed. Lock it in with hairspray when you're done! (Woohoo! I have makeup on in these pics!)
 Step 6: Enjoy!

Enjoy your sexy look! Rest easy knowing that you can look this good whenever you want and without spending all morning on your hair!
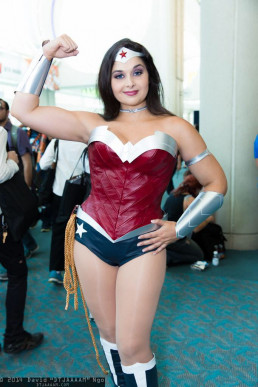
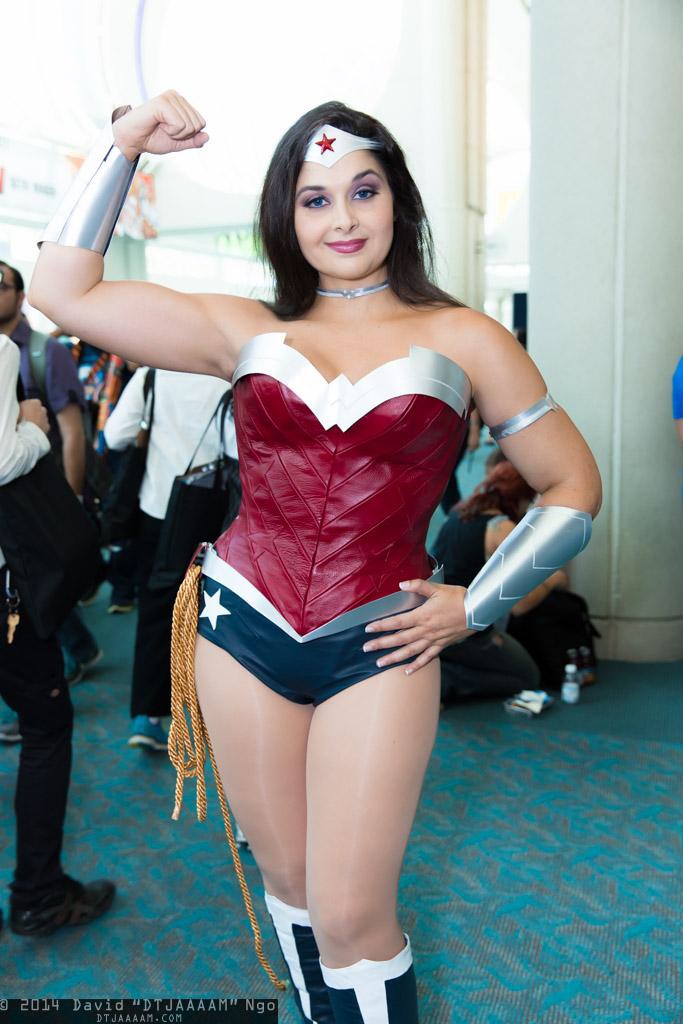
Do-it-Yourself: New52 Wonder Woman Corset
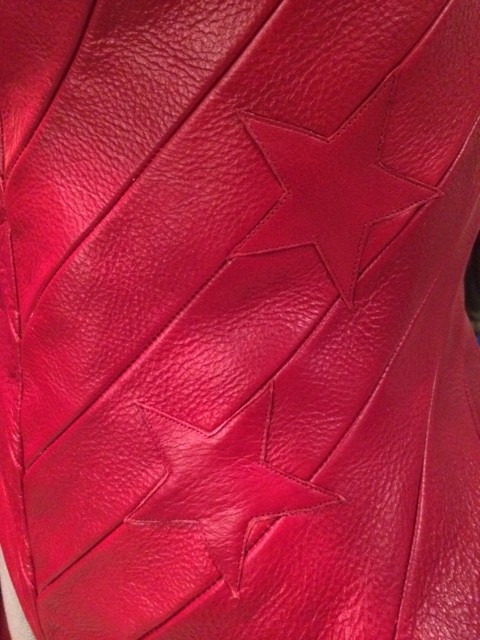
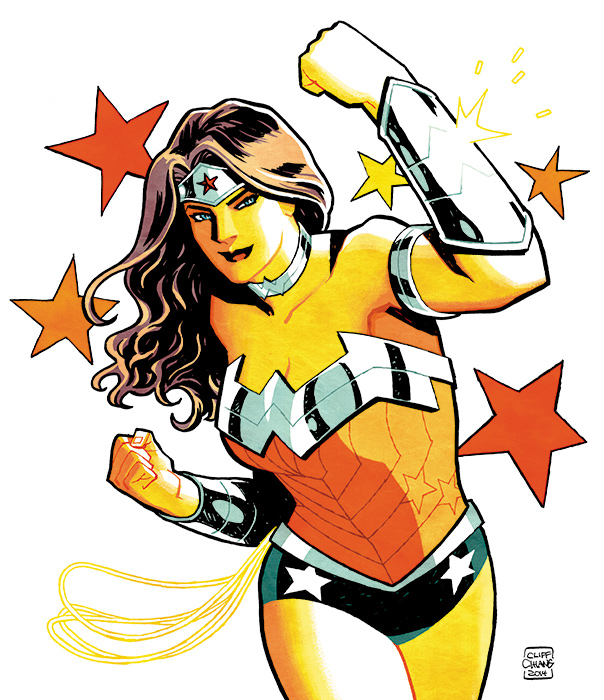 Wonder Woman's corset in the New52 is stunning. The complex chevron pattern combined with stars is intricate and eye-catching. As difficult as it is to draw, it's even more difficult to sew. Chevrons are quite a challenge and are also very time consuming.
Now there are two ways to make this corset, the easier way (still not super easy) and the hard way. The easy way would be to buy/make a corset, then make the straight lined chevrons out of a stretch fabric to cover that corset. I was hesitant to use this method because it can result in the chevrons looking warped as the fabric stretches to match the curves of the body, and because I wanted my corset to look like it was made out of leather.
Thus, the hard way.
Please Note: This is a difficult project that requires pretty advanced sewing skills. You will need to be familiar with making corsets and have a corset pattern that works for you as a base for this tutorial. You will also need a walking foot for your sewing machine if you are using leather.
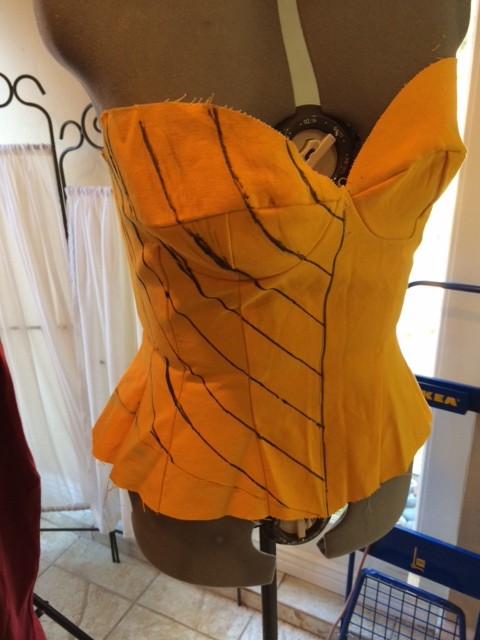
Step 1: Use your corset pattern to make a mock-up. Make sure you use the same type of fabric that you will eventually use for the base of your final corset, I recommend something heavy like duck cloth.
Step 2: Put this mock-up on a dress form, a volunteer, or yourself if you have a friend to help. Then draw chevrons on half of the mock-up. Measure equidistant meeting points on the center front of the corset as a base, then draw out from there. The trick is that these cannot be straight lines drawn with a ruler. You will get a tube shape if you tried to make a corset out of straight lines that would not form to the contours of your body correctly. You have to draw chevrons that form to the body's curves and appear to make straight chevrons. YOU WILL GET LOTS OF FREAKY SHAPED STRIPS. THAT IS OK!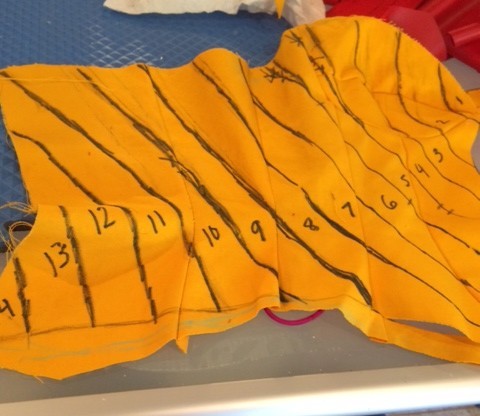
Step 3: Mark the lines on your mock-up with notches and numbers so you can keep track of which order the pieces go in, and where they meet. Cut the mock-up along the lines you drew to create the pattern for your final corset cover. DON'T FREAK OUT AT THE STRANGE SHAPES YOU GET!
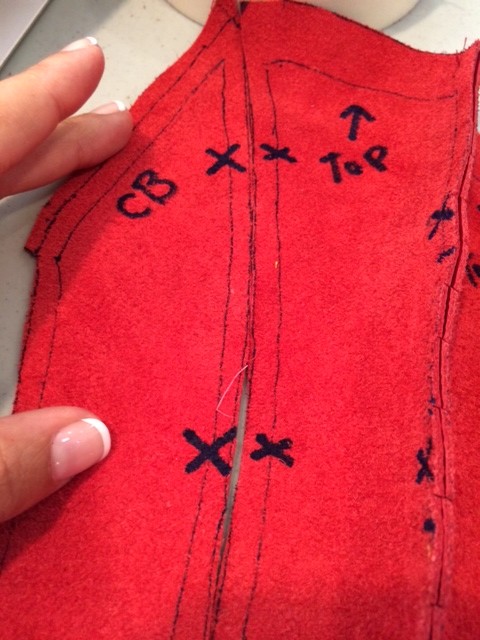
 Step 5: Trace your pattern pieces onto your final fabric and add a 1/2 inch seam allowance around each piece. Make sure you have two complete sides for your corset and the pieces for each side should be a reflection of each other. Make sure you copy over the notches and identifying marks onto the BACK side of these pieces. I used leather but other pleathers will work as well. Stretch fabrics will not work and will warp the final product, try the previous method listed above if you want to use a stretch fabric.
 Step 6: Carefully, starting from the top center piece, sew one side of the corset together. Make sure to line up the notches, they are your guide! Now sew the refection side of it together. You should now have two complete halves of a corset cover that are reflections of one another.
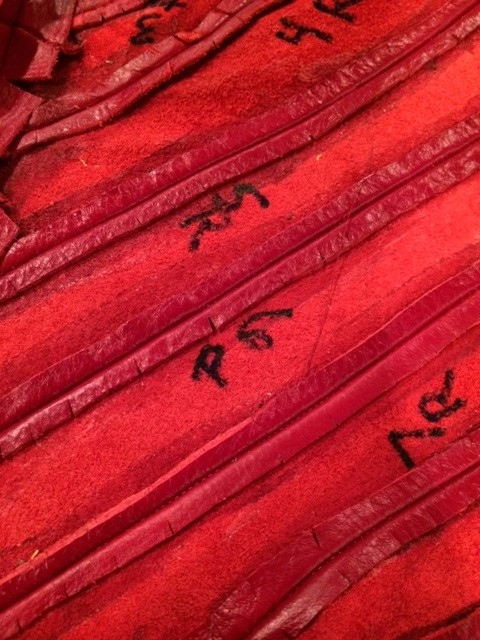
Step 7: Using rubber cement, glue all of your seam allowances flat against the back of your corset cover. Make them all as flat as possible. Flat seam allowances will make your life easier later and make your final product look better! Make sure the glue is dry before moving on to step #8.
 Step 8: Now it's time to make the chevrons happen! Meeting the right sides of the corset center fronts (those are two edges) use pins or tape if you are using a leather-like material to insure that the seams of your chevrons meet up. You might have to do a little manipulating and stretching to make the pieces line up perfectly in the front, but this is a VERY important step. You don't want your chevrons to not line up. Sew them together on the wrong side down what now is the center front of your corset cover.
 Step 9: The hardest part of your project is over!! Congrats!! Now cut out the stars from the same material as your chevrons, making sure they have the correct proportions to your chevrons. Put a small amount of rubber cement on the back of each star and place it where you'd like it on the corset. The glue will help hold the star in place while you top-stitch it down.
Step 10: Using your corset pattern, make the base corset with metal boning.
Step 11: Again using your dress form, a volunteer, or yourself if you have a friend to help you, put your 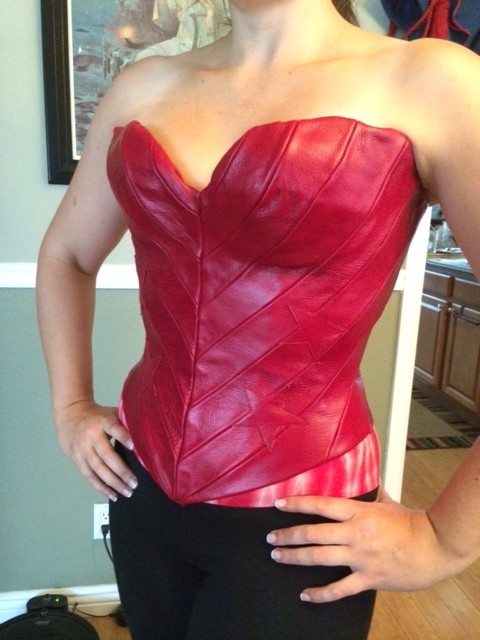 base corset in place. Then, finding the exact center, use bardge cement to glue the center seam of your chevroned corset cover to your base corset. This will keep the center front from moving around. You can also glue around the cups of the corset and along the sides and center back once the front has dried.
Step 12: Hand stitch the edges of your corset cover down on the inside of your base corset. This takes a while and you will definitely need a thimble if you are using leather. Make sure you stitch down all the edges!
Step 13: Grommet the corset.
CONGRATS!! YOU ARE DONE!! Hopefully you have an amazing piece of cosplay art to enjoy!

Renaissance Faire Survival Guide
I have been working at renaissance faires all over the Western United States for over a decade, and attending them as a customer since long before that! They are strange, but wonderful events that capture the imaginations of all kinds of people. There is really something for everyone, but a few simple tips will help you get more enjoyment from your time at a faire.
1. Water
Alcoholic beverages are the drink that ren faires are known for serving. Imbibing can be a fun part of your day, but most renaissance faires take place in the hotter months of the year. Try to match your alcohol intake with equal amounts of water. Dehydration and overheating are the most common reasons for First Aid treatment of faire customers, especially those in costume.
2. Shoes
The average renaissance faire visitor will walk over four miles at a large faire. Most of that will be on uneven dirt paths, which make the mileage even harder on your feet. Wear comfortable, supportive shoes to maximize your fun and enjoyment. I also suggest wearing closed toed shoes because of all the dirt (sweaty feet + dirt = toe mud... eww). Sexy spike heeled boots may seem like a wonderful idea when you leave the house, but you may regret wearing them by the end of the day as you're hobbling to the exit.
 3. Map
It's vital that you know where to find different shows, food vendors, and most importantly, the ale stands and restrooms. This will save you lots of time if you want to be on a schedule, or let you know which direction to wander if you don't have a specific destination in mind. Most faires hand out maps as you enter the front gate.
4. Privies
Commonly known as Port-a-Potties, these are one of the drawbacks of visiting most renaissance faires. They are not pleasant, but there are ways to make the experience less miserable. First, go to the units farthest from the entrance to the port-a-potty area. These are usually the least used and the cleanest. Leave most of your stuff with your friends when you go in, because you want to limit the contamination and avoid dropping things into the Privy abyss.
 5. Cash
Faires are a wonderful place to buy jewelry, costumes, art, and so much more directly from the artists. It's a great opportunity, however, the methods of payment that you can use may vary from booth to booth. Most merchants can accept credit card payments thanks to the magic of smart phones, but there are still a few who can't. Ale stands are usually cash-only as well, and it's good form to leave tips for servers and performers. Be ready for that and bring cash with you to avoid the crazy ATM fees and lines that happen at most faires.
6. Costumes
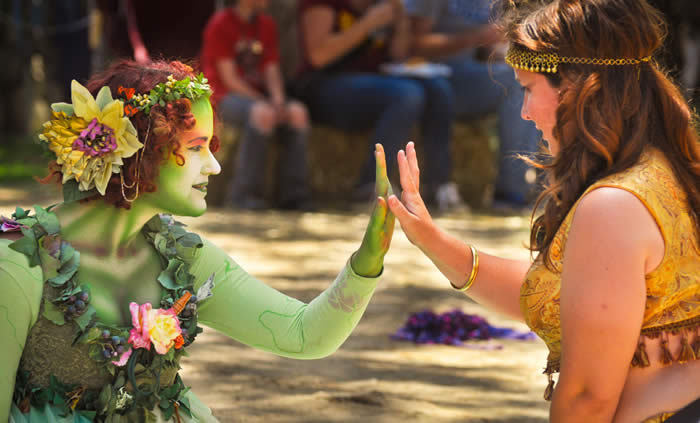
Costumes are one of the best things about visiting renaissance faires. You will see a huge variety of outfits, including stunning historically accurate recreations, pirates, fairies and fantasy creatures, vikings, Stormtroopers, and SO MUCH MORE! Feel free to dress up and join in the fun, but remember tip #2 from above. Costumes made from natural fibers are the best because they breath in the heat. Avoid large amounts of leather because it can get really hot, and avoid rubber at all costs!!!

7. Shows
I'll admit, I'm a little biased here. I love performing and faire crowds are wonderful! Renaissance faire shows will have a unique feel to them and are usually very interactive. Be sure you read signs or program descriptions before you sit down to watch something, especially if you have kids with you. Some shows contain some naughty content, but usually they are clearly marked. Be sure to buy something or leave a tip at the end of the show if you enjoyed it. Renaissance faire performers work hard for their art, and are usually paid MUCH less than minimum wage, IF they are paid at all. Show your appreciation for their hard work by helping fill their gas tanks and their tankards!
8. Safety
Renaissance faires are a melting pot of different 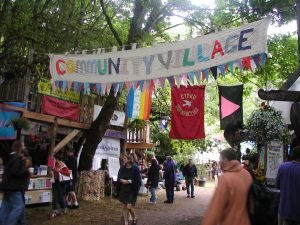 types of people, with some alcohol and costumes tossed in for fun. They are safe, but as with any public situation (conventions, amusement parks, county fairs, concerts, etc) you need to be aware of your surroundings. Inevitably, there are those few people who will get drunk and inappropriate. They may be inappropriate with you, or with each other. PLEASE REPORT THEM TO SECURITY! You can do this by finding a security person, or by telling the nearest ale stand or booth. We work very hard to create a fun place, and we don't want our hard work to be in vain because of a few jerks.
**IMPORTANT: Remember that not everyone wearing a costume is a faire employee!!! Many people dress up and pretend that they are part of the show, but they paid for their ticket just like you. These "playtrons" are usually at the root of most behavior complaints since they are not trained to interact with the costumers. If someone in a costume is making you feel uncomfortable, be direct! Tell them to stop, then report them to security so it doesn't happen to someone else!
9. Parking
Most faire parking is a big dirt field. If you're lucky, there might be some flags or lines to help show you where to go. If you are VERY lucky, there might be some people pointing for you. By the end of the day it will ALL LOOK THE SAME!! A sea of dust covered cars is hard to navigate. Use a handy Car-Finding App if you have one, or at very least, take a picture with some stuff in the background to reference later. Trust me.
10. Open Mind
Renaissance faires are AMAZING. They are such an eclectic mixing of different aspects of the human experience. A mix of history, art vendors, concert, carnivals, reenactments, conventions, food festival, and costume party! I love it! Come to faire with an open mind, ready to experience something truly unique.
To find a renaissance faire near you, visit Renaissance Magazine's Renaissance Faire List!
EDIT: I've received some great comments on this article! Here are a few more tips!
- Wear sunscreen and reapply it during the day! Hats are your friends!
- Pack well so that your things are easy to carry. Keep an eye on your stuff!
Huzzah!
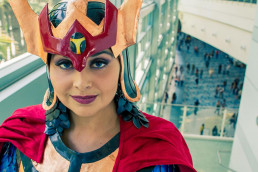
Do-it-Yourself: Costume Helmet (Big Barda)
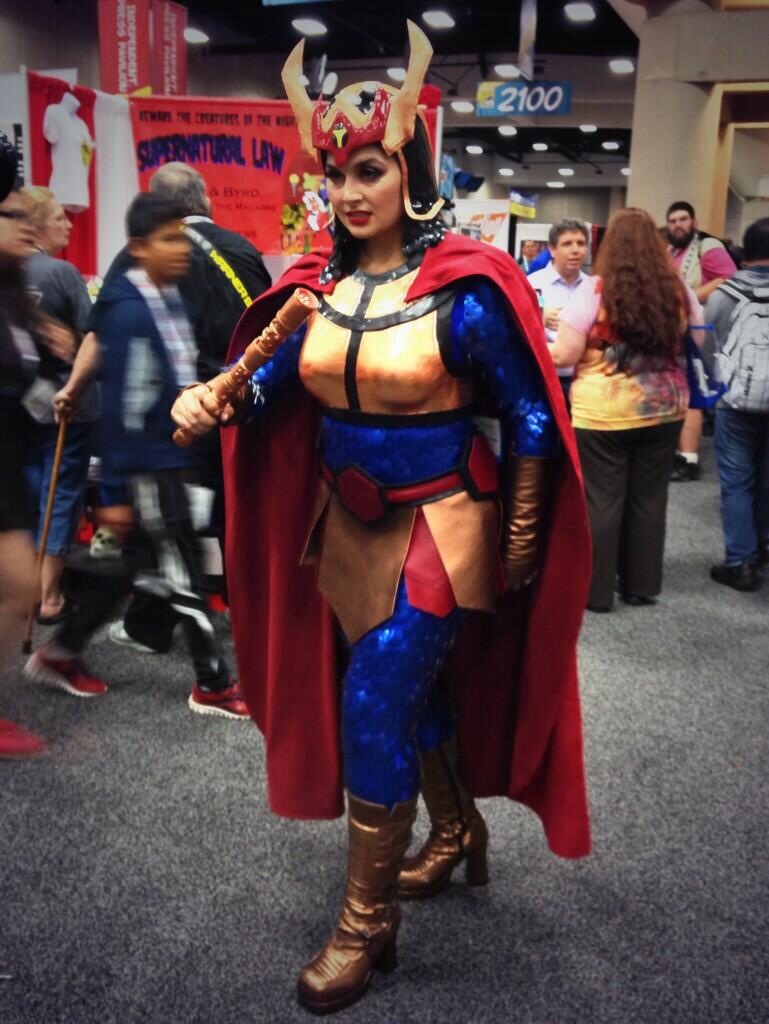
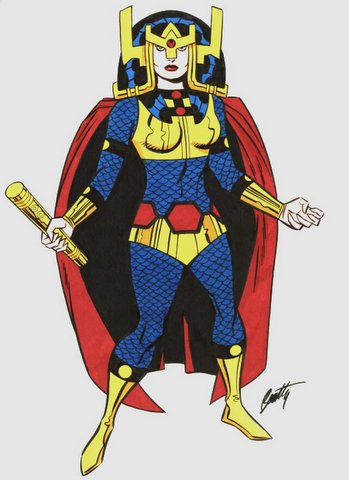 I have always loved Big Barda's design. Over the years it has changed significantly, but her samurai-inspired helmet has remained a trademark of her look. I decided early on that I wanted to go with a more real-world design for the helmet, but make sure that it was still clearly recognizable. Who am I to improve on Jack Kirby's work? Despite the sleek design of the helmet, this was easily one of the most complicated cosplay projects that I have tackled.
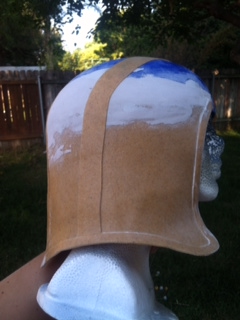
I started with a practical base, which came in the form of a child's toy Dodger helmet that I picked up at the thrift store for $2.50. I cut the bill off of it and used it for the foundation of Barda's Helmet. I then used craft foam to measure, design, and test the a few different designs for the back of the helmet that comes down around the neck. I had to be careful that I could still turn my head without trouble, but still have it come down as far as possible.
 Once I finalized the pattern for the back of the helmet with the cheap craft foam, I traced it onto Worbla and made the final version. I used industrial glue to cement the new Worbla piece to the Dodger helmet.After the glue dried, I used my heat gun to bend the Worbla into exactly the shape I wanted. This included adding a slight curl to the bottom of the helmet, and making sure it was symmetrical. Finally, I used Bondo to smooth the seam and make the Worbla and Dodger helmet look like one item. My little detail sander is a godsend for working with Bondo on small or detailed items like this. GET ONE!
 Adding more details with Worbla was the next step. Barda has very distinctive patterning on her helmet, and this is where Worbla really shines. It's so easy to cut a small strip and then bend it to fit along the edge of almost any shape. It attaches to itself when heated, but I also used glue since I'm not sure if it would have securely attached itself to the Dodger helmet and Bondo.
Then I used Gesso to make it completely smooth, by adding a thin layer then sanding, then adding another layer and sanding. Barda's helmet needs to look completely smooth and very futuristic. The Gesso and sanding made the parts of the helmet completely level and smooth, and also insured a uniform texture for the primer paint to attach.
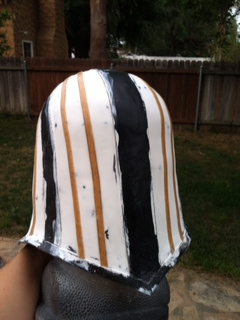 After what felt like endless hours of sanding, I added the smaller details to the helmet with Worbla. In the picture to the left, I painted the details from the previous step black so you could see the difference. The Worbla attached to the Gesso, and is always incredibly easy to use on details like this. I used Gesso where the strips of Worbla met to make the details seamless and to avoid the gaps that can sometimes show on the final process.
Now it's time to paint the helmet. Big Barda's helmet is a shiny smooth black, so this took a while. The technique is to lay a thin coat of spray paint over the whole helmet, wait for it to dry COMPLETELY, then use extremely fine sandpaper lightly on any areas that aren't perfectly smooth. After that's done, you do it again. A lot. Eventually, you will get a nice smooth finish that doesn't look like spray paint.
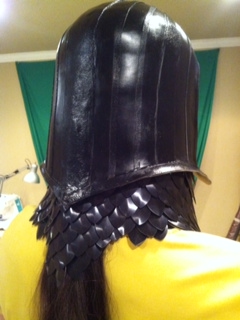
Barda's helmet goes all the way down to her shoulders, and like many comic book outfits that defy logic, she can still turn her head. Physics doesn't work like that for me and so I had to come up with an alternative. I used black scale maille around the neck to extend the look down to give the illusion of the helmet reaching my shoulders. It ended up matching perfectly, and is one of my favorite details on this cosplay. I created the scale maille piece and attached it with Velcro to the inside of the helmet. The fact that it was removable made painting and finishing the helmet easier.
 Clear coating can be one of the most stressful parts of a project. I wanted maximum shine on my helmet, so I used a high gloss clear coat. I highly recommend that you use the same brand of paint throughout a project (if possible), and ALWAYS test different paints together on scraps before using them on your work in progress. Nothing is more heartbreaking than having something almost finished and then watching the paint bubble or flake because of a chemical reaction. I carefully added multiple clear coats, leaving many hours between each coat to insure that it was completely dry when the next was added. THIS IS REALLY IMPORTANT!
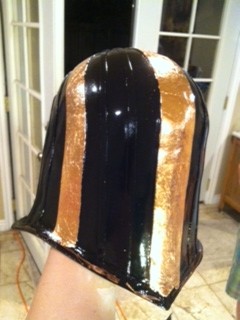
I used copper leaf to add the metallic shine. As always, practice leafing on scraps before working on your final piece, and take your time. Fine paintbrushes are very helpful for leafing corners and edges. It can be really tricky to get it looking right. After I finished leafing the main helmet, I added more layers clear coat. This i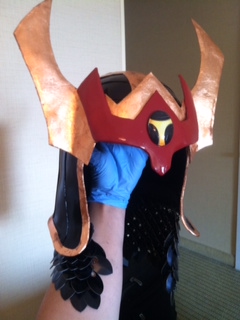 s a vital step after leafing and prevents the metal from tarnishing or peeling off.
Now the majority of the helmet was done, and I could create the decorative front. I wanted it to have some weight and depth to it, so I used Kamui Cosplay's tutorial and sandwiched a layer of craft foam between two layers of Wonderflex. The Wonderflex should be larger than the craft foam so that you can heat seal it around the edges. I molded these pieces with heat to perfectly fit to each other, and to the finished section of the helmet. After these pieces cooled, I painted them or copper leafed them just like I did the other parts of the helmet. To finish it off, I used industrial glue to attach these pieces to the rest of the helmet.
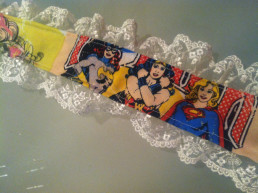
Do-it-Yourself: Geeky Wedding Garter
 Making your own custom garter is a very easy sewing project! It adds a delightful surprise for your wedding, costume, or lingerie! It's great for the crafty geek who wants to have a little fun!
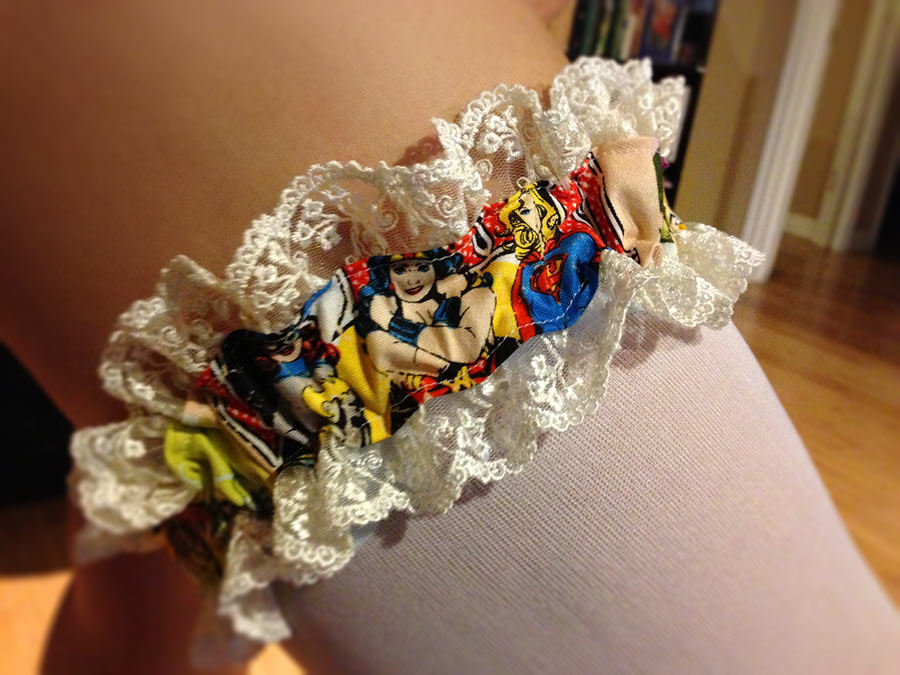
Step 1:Measure the circumference of your leg with a tape measure. Garters are traditionally worn about two inches above or below the knee, so be sure to measure where you want to wear your garter.
Step 2: Buy your materials! You will need:
- About half a yard of fabric (I used a cotton print)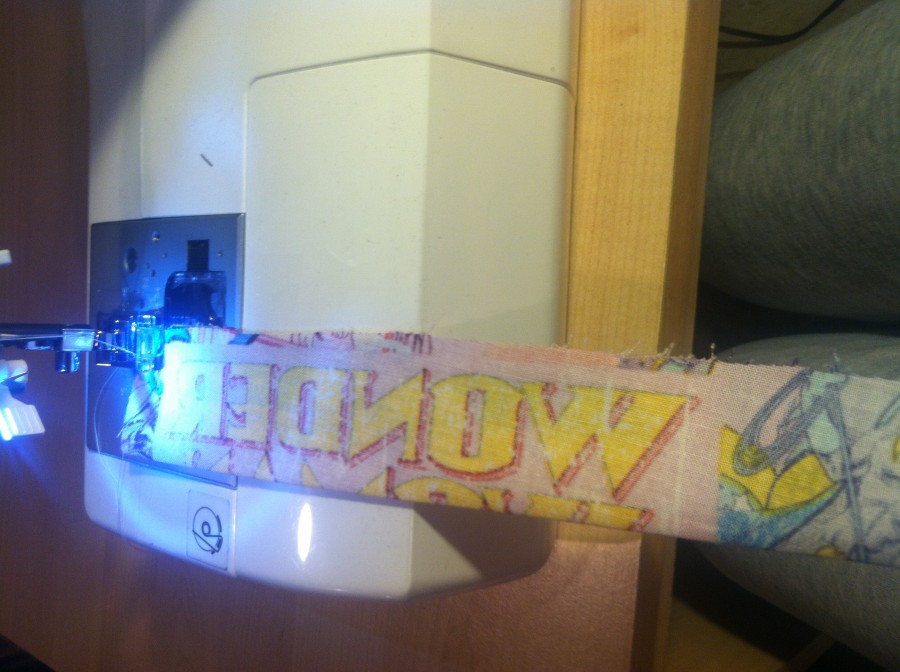
- 2 pieces of lace, each one matching your leg circumference measurement
- 1 inch wide elastic that matches the length of your leg circumference measurement
Step 3: Cut a strip of your prewashed fabric about 4 inches wide and about 10 inches longer than your leg measurement. Once you cut this strip, fold and iron it in half length-wise with the WRONG side of the fabric out. Then sew the open length closed so that you end up with a tube with the correct side of the print on the inside. Once that's done, pull the tube so that the correct side of the fabric is on the outside.
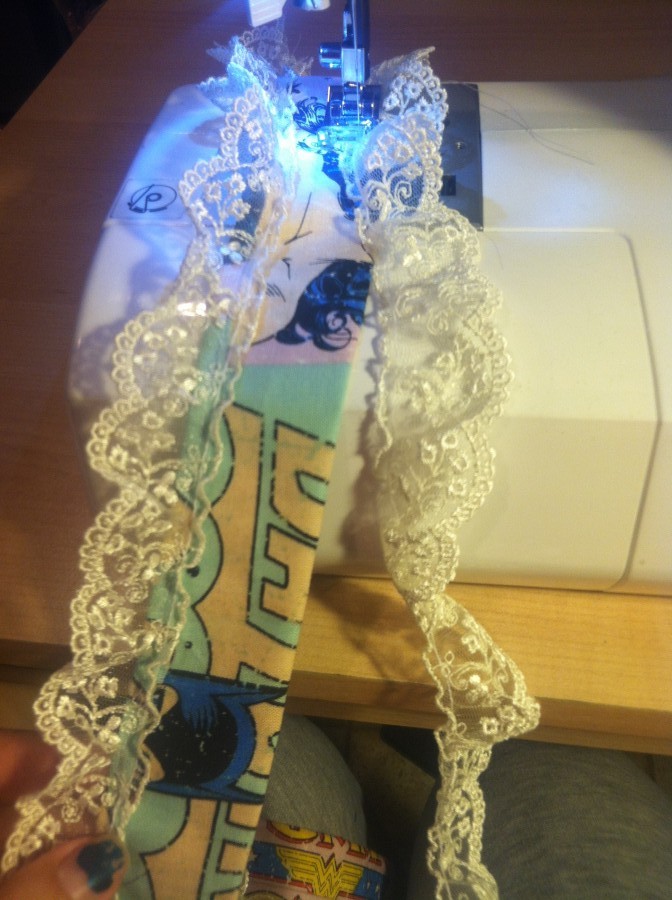 Step 4: Choose which side of the tube you like best, this will be the FRONT for the continuation of this tutorial. Now, pin and sew the lace along the both edges on the BACK of your tube. You need to stay fairly close to the edges so that you still have at least 1 inch between the seams on the tube for the elastic later.
Step 5: Stretch the elastic around your leg where you want the garter to sit. Tighten it enough to stay in place by itself, but not so tight that it is uncomfortable or cuts into your leg too much. Trim the elastic to that length.
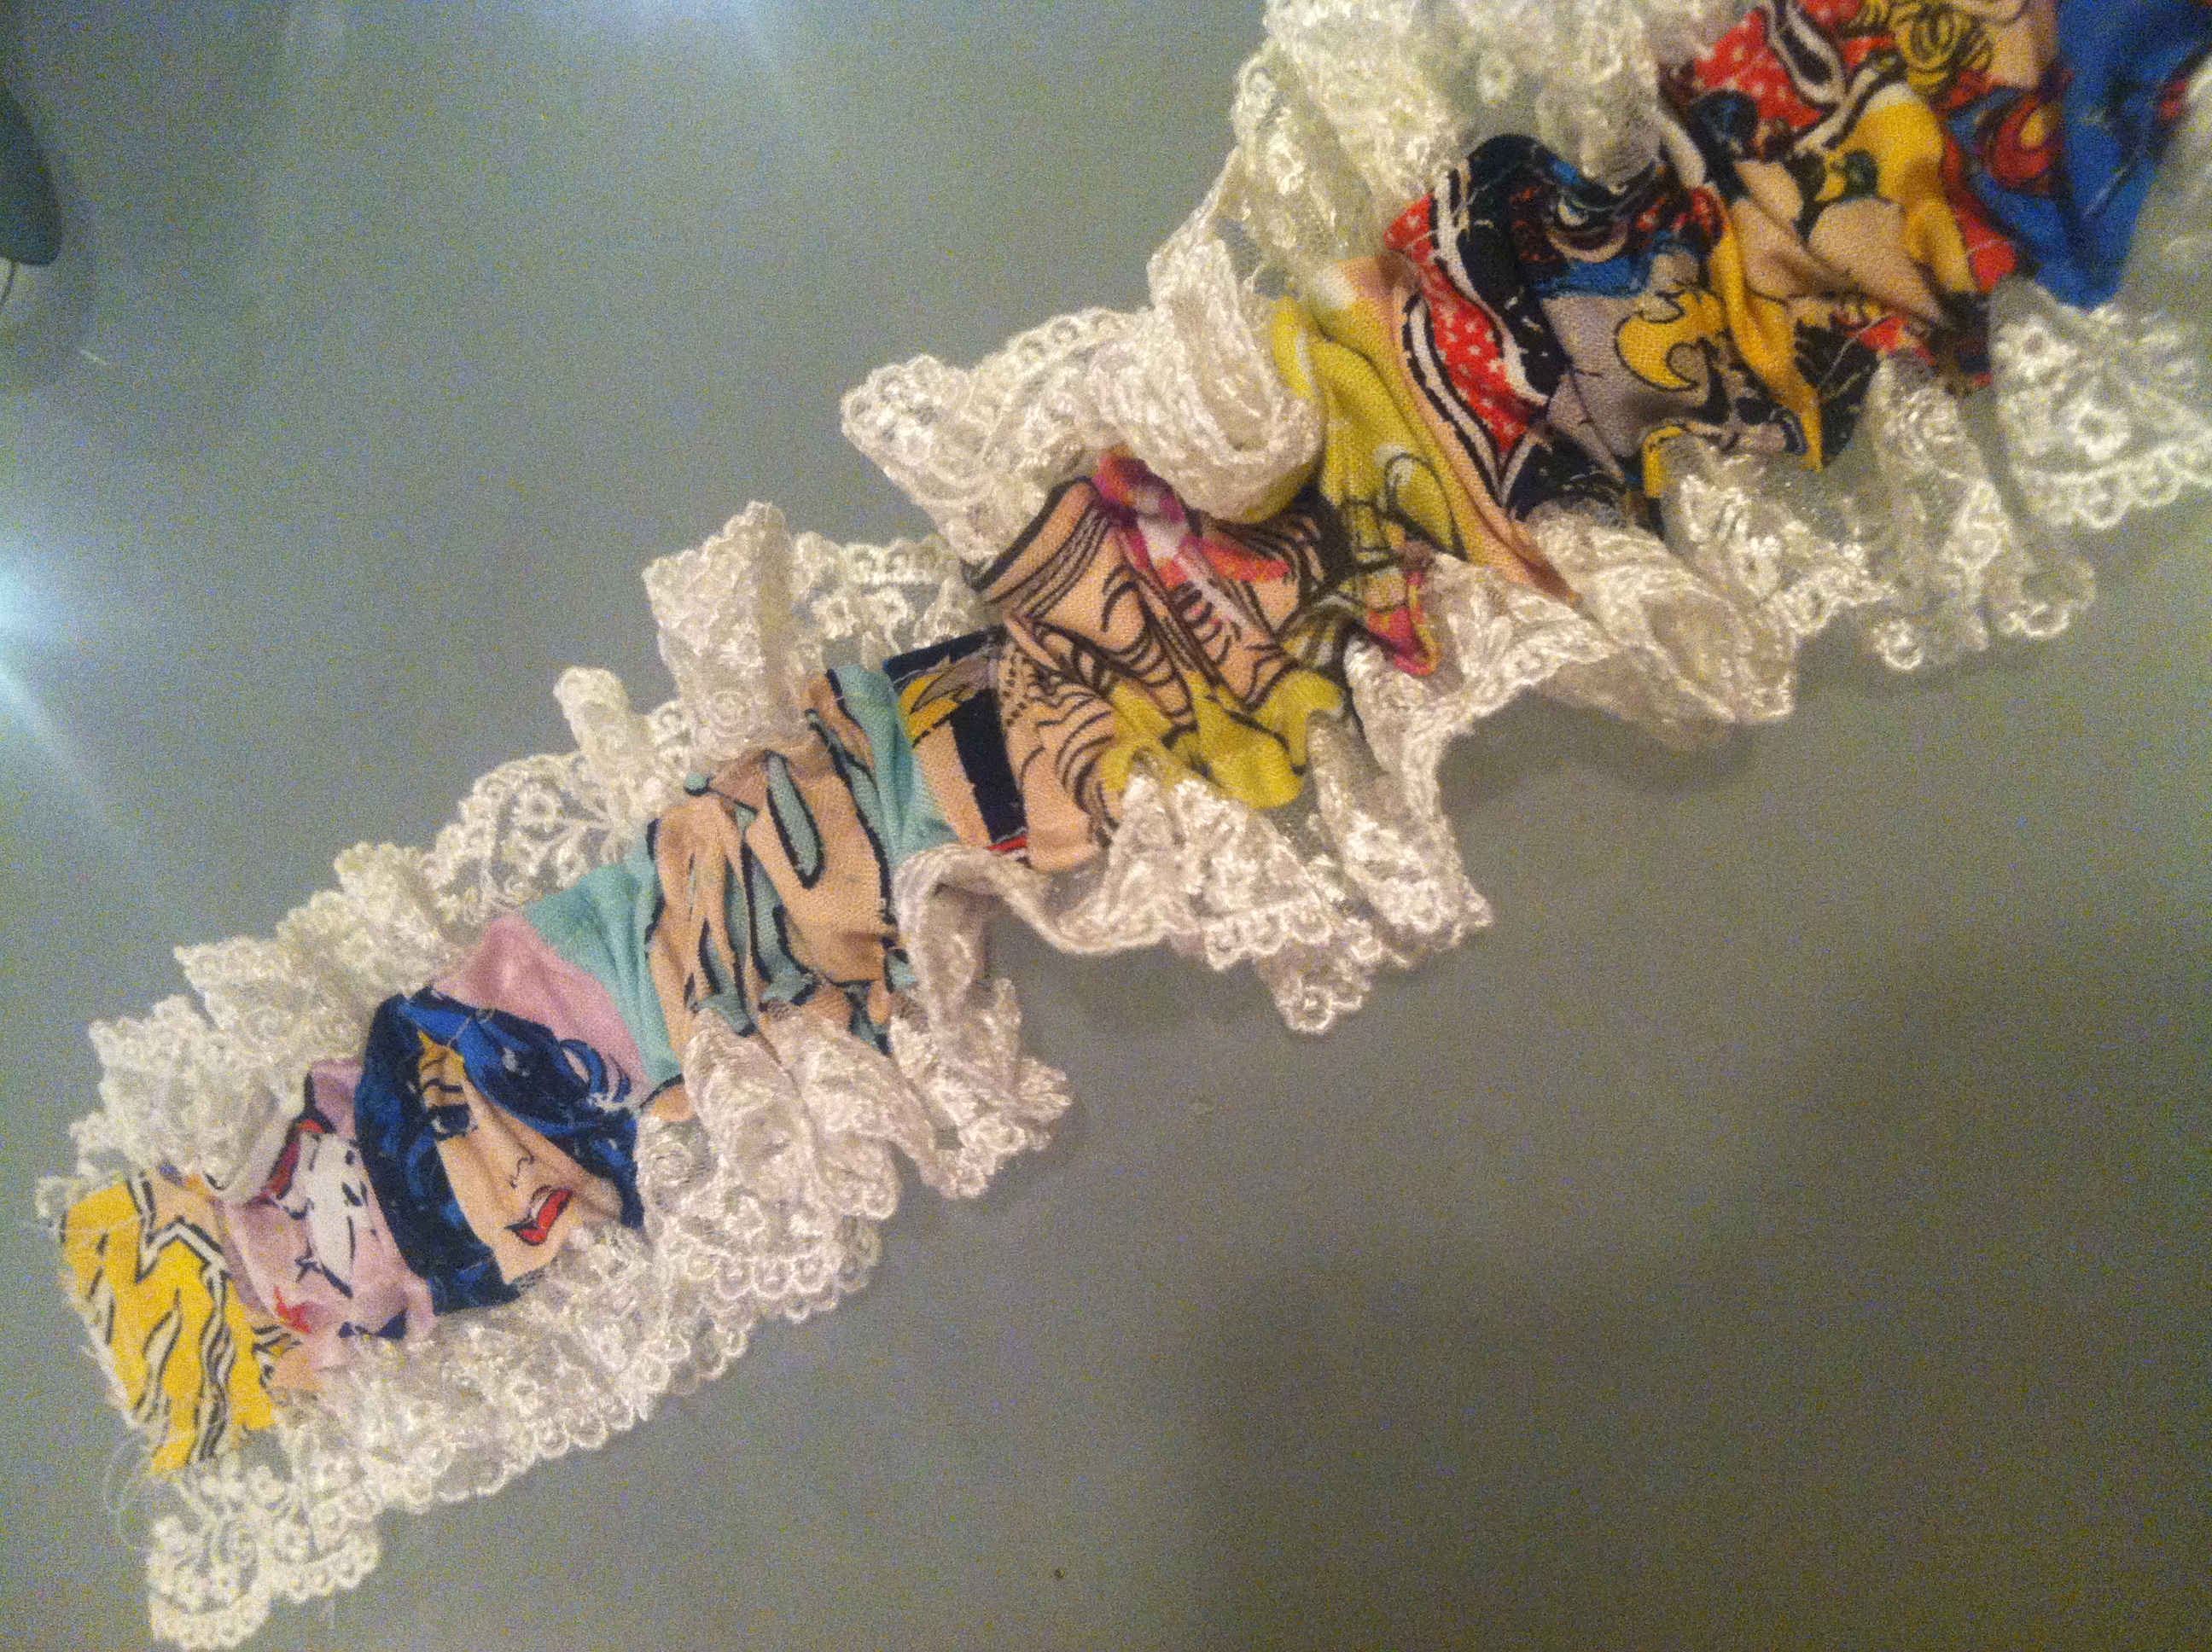 Step 6: Slide the elastic piece through the tube and stitch across each end so that the elastic is sewn to the cloth tube. Gather the tube evenly along the elastic piece to create a ruffled effect.
Step 7: Pin the ends of the garter together in a teardrop shape, make sure the FRONT is on the inside and the BACK is facing outward. Stitch these two ends together and then stitch over the edge with a zig-zag stitch so that the edges don't fray.
Step 8: Surprise everyone by wearing your lovely custom garter!