Dealing with Player Ignorance

I have GMed many convention games, but I ran into a new problem a few months ago. One of the players in my game had a fundamental misunderstanding of a pretty simple scientific principle. I will not go into specifics because I do not wish to embarrass that player or narrow down which game I am discussing.
The players were engrossed in the game and having a blast trying to come up with a solution to my challenge. They were all great people and it was a very positive game, however suddenly one of them suggested an action that defied the laws of physics. Two other players jumped on board, and the remaining players looked at me with their eyebrows raised.
I casually asked for clarification, hoping they'd catch the mistake themselves. No luck, so I very politely questioned their logic, asking if that was really what they meant to say. Surely, their basic elementary school knowledge was just a little rusty, right? Wrong. They defended their position, restating their faulty understanding of earth science. The logic behind their actions was sound, they just didn't state the right materials to do what they wanted. I was at a crossroad, do I impose my scientific understanding on the game to insure it's correct and risk embarrassing the player, or roll with it and prioritize fun over academic correctness?
Against ever instinct in my teacher body, I rolled with it. Why? Well there were two main reasons.
First, I didn't want to penalize the characters for the players' ignorance. They had found a good solution, but simply did not have the scientific background to choose the right materials to make it work, even though the materials were available to them. Often we play characters with knowledge or qualities different than our own. Shy players can roll skills to give speeches and technology dummies can roll to hack computers, so it didn't seem fair to kill their creative idea when their character would have known exactly the right material to choose.
More importantly, I didn't want to kill the fun. It was a one shot game with people I didn't know well. If it had been my normal gaming group, I might have argued the point and then bought the player a beer. I didn't know these players well enough to push them. They might have gotten mad and walked away, or been perfectly polite but not enjoy the rest of the game. We were all there to have a good time and it seemed pointless to risk that over a small mistake in their plan. That said, if this had been a campaign I would have pressed the point because I wouldn't want the physical laws of my universe to be altered long term, but again, I would know players in a campaign game enough to debate it with them.
Did I make the right choice? I still ponder that question. The game finished smoothly and everyone seemed to enjoy themselves, but maybe they would have enjoyed themselves if their plan had failed. It really boils down to an individual's personal goals for the game. Mine was for my players to enjoy themselves, and I succeeded, but I might not make that same choice again.
Oh, and after the game I casually brought it up to the player privately and suggested they look it up when they got home. The teacher side of me couldn't give up completely.
10 Convention Necessities for Cosplayers
 Cosplaying completely changes the convention experience. The crowds, schedules, lines, and costs are only more stressful once costumes are added to the mix. Here is a list of "must-haves" that will make your cosplay experience easier.
1) Emergency Repair Kit
This is a large kit that you keep in your car or hotel room for the length of the convention. It should include a sewing kit, duct tape, fashion tape, a hot glue gun, industrial glue, masking tape, permanent markers or touch-up paint in the colors of your costume and props, stain remover, and fabreeze. Crazy things happen at conventions and it's best to be prepared for anything.
2) Business Cards
These make a cosplayer's life a lot easier. Nobody wants to take time to spell out their Twitter handle or email address in the middle of the busy convention floor. You don't have to spend money on these. Even if you just write your contact info on a bunch of post-its ahead of time, photographers and other cosplayers will really appreciate it.
PRO TIP: Be careful not to put your personal phone number or full name on these cards, unless you are willing to deal with stalkers showing up at your house. Set up a cosplay email account if your email address includes your last name... or if you have a crazy complicated email address.
3) Pockets
Pockets are one of the most difficult things to build into a costume, especially women's costumes. A place to store your cell phone, your ID, and a credit card are worth more than gold when it comes to working the convention floor. Whether it's a hidden pocket glued into the top of your go-go boots, a small matching bag that you make out of extra fabric, or a significant other who is willing to follow you around with a backpack, it is vital that you have a way to transport your stuff. Make sure you at least have your ID somewhere on you in case something happens.
4) Floor Kit
This is the mini version of your emergency repair kit and should go with you around the convention. I highly suggest fashion/2-sided tape (the pre-cut strips are best), small tube of super glue, eyelash glue, and lipstick are the musts. If you have room in your bag or pockets, I also suggest masking tape.
5) 3 Different Poses
You will get asked to pose for pictures so put some thought into it before you arrive at the convention. Photographers will usually shoot a few pictures in a row, but they will lose interest faster if you stand frozen in the same pose for all of them. Try to hold a pose for a few seconds, then switch it up. Practice poses at home in front of a mirror, or have a friend shoot pictures of you. Most people at conventions are not professional photographers and they will do you no favors by setting up the shot or making you look good. Practice makes perfect!
6) A Posse
Conventions are big places where all manner of people are shoved into a high stress environment together. If you can, attend a convention with friends or other cosplayers. They will hold your props while you stand in the bathroom line, help keep an eye out for up-skirt camera pervs, and take pictures of you when you see your favorite celeb.
7) Snacks & Water
Dehydration and empty stomachs can ruin your day very quickly. It's easy to forget to take care of yourself when you are caught up in enjoying yourself. Suddenly you realize that you haven't eaten in six hours and the line for the nearest food is 45 minutes long. Have a granola bar hidden somewhere on your person. Water is harder to transport (and bathroom breaks are a pain in some costumes) so be sure you hydrate extra in the days leading up to the convention.
8) Gum or Mints
Conventions are crowded. Bad breath sucks. Enough said.
9) Costume Check List
These will help you get your entire costume to and home from the convention. Nothing sucks more than getting dressed and realizing that the amazing belt buckle that you made is still on your sewing table. It's even worse when you realize that you left a vital part of your cosplay at the hotel when you were in a hurry to head home. A check list makes sure every little bit stays with you. It's worth the extra effort.
10) A Plan
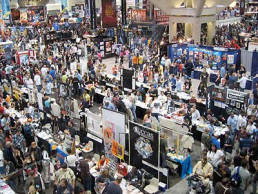
Conventions are becoming very popular. Parking, tickets, hotel rooms, and panel lines can be a real nightmare. Trust me, there is NOTHING worse than showing up for a convention in costume and figuring out that the only open parking is six blocks away. Do your research ahead of time. Know where the parking is and how much it costs, buy your tickets days or weeks before, and know the costume and prop rules for the event. It will save you a lot of time, stress, and disappointment in the end.
Debut of Sif & WonderCon
 What a crazy weekend! I am still recovering and it's Thursday. Seriously, who's idea was it to have my Irish music persona and cosplay persona collide? Two days of cosplaying at a convention with a concert and night of heavy drinking in between is not the best idea. Fun, but not the best idea.
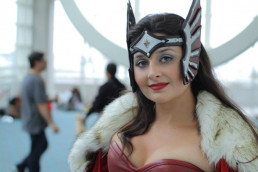
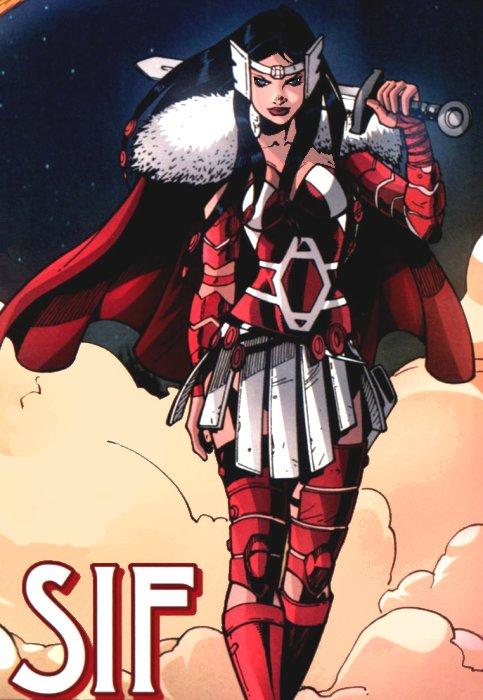
Sif debuted at WonderCon and was a huge success. I was asked to pose for more pictures than ever before and got more complements than ever before, despite the fact that most people couldn't identify my character. Oh well, they still appreciated the craftsmanship and the overall impact. I consider this to be my most successful cosplay to date.
There are many reasons for this, but here is a list of the biggest differences between Sif and my previous cosplays:
- I was the only Sif at WonderCon (I'm pretty sure) and this made me stand out. It also helps that I was nearly 6ft of bright red woman warrior. I did not blend in.
- I finally invested in a good quality makeup kit. It made a huge difference in the photos and the quality of the images that were taken at this convention. I felt a little ridiculous putting it on the first day, but the impact it had on my cosplay was undeniable. I looked good the morning after St. Patrick's Day! I can't even begin to explain how amazing that is!
- I'm getting better at posing and working the convention floor. Despite my experience working at Renaissance Faire and performing on stage, it's taken me a while to get comfortable as a cosplayer at conventions. I still have things to work on, but I'm getting much more comfortable.
- I picked a character very suited to my body type and physical features. This is always a smart move with cosplayers. A woman as tall as I am can look awkward in group pictures, but when you're supposed to be a Norse goddess it makes more sense. I'm working on some cosplays for San Diego ComicCon that are not in my body type, we will see how that goes...
- My outfit is friggin' leather. That's just stinkin' impressive and badass. Not to brag, but it is!
I still have improvements to make to this outfit, but overall I am incredibly pleased with how everything turned out. I'm hoping to have a photo shoot with this outfit very soon and will be posting a gallery once I finish collecting all the images off the internet. If you have a good picture, please email it to me! I'd love to see it!
I did discover that this is the best cosplay to wear in cold or rainy weather. It was POURING rain on Saturday. The cloak is very resistant to water and isn't harmed by the rain! The hood flips up to protect my leather headpiece and makeup. Even the boots are actually pleather rain boots! It was unplanned, but it worked out very well on this stormy WonderCon weekend.

WonderCon was a very fun convention, and I hope it returns to Anaheim again next year. There is a bigger variety of vendors at this show since the booths are probably much cheaper than at SDCC. The crowds are also much smaller. Everyone says it's like SDCC was 10 years ago, but I wouldn't know. I love the current Comic-Con for all it's crazy size and commercialism, but I really enjoyed WonderCon as well. The parking was a mess. The traffic in the whole area was terrible and the shuttle buses were a mess because of it. We spent a very large percent of Sat dealing with that situation. Not fun. I highly recommend getting a hotel in walking distance, or if you wait until the last minute like I did, get a hotel with a shuttle. Sunday was very much improved because of my Saturday night hotel stay and the parking/shuttle it provided. That was my only real problem with this convention, and it was made worse by the rain. I hope they can come up with some productive solutions for next year to keep the traffic flowing more smoothly.
Overall, it was an amazing weekend that I will never forget! I met and got to spend time with so many incredible people and revel in my two favorite pastimes, performing (cosplaying and an MWOW concert) and drinking. What could be better?
WonderCon Countdown: Sif's Belt and Skirt
WonderCon has arrived in Southern California! While this has caused many Northern California people sorrow, I am happy to have an event before SDCC to debut my Sif cosplay! There is only one problem... it's not done yet. I have made a lot of progress and will be able to finish tonight, but sleep may be sacrificed. Everything is looking great and I am very excited!
Belt
Sif's belt is a trademark of her costume. No matter how many times she is redesigned, she almost always has a prominent, geometric belt buckle in the center of her abdomen. I started with a faux leather corset belt that I got on Ebay for $6.99. I really liked the pattern the sections made and how it added texture. Plus, it's stretchy without being spandex. Bonus points! The biggest problem is that I wanted the pattern in the belt to accent and frame the Sif buckle, which meant I had to move the buckles already on the belt. I removed them with a seam ripper and restitched them on the opposite side of the belt which would be on my back. I stitched the front together to prep it for the Sif buckle.


 The buckle was actually much easier than I expected. I measured and cut the basic shape out of an old teaching poster I had. It was stronger than poster board, but not as thick as cardboard... plus I already had it. I'm not planning on teaching Kindergarten again anytime soon, so it's not a huge loss. I cut up the rest of the red leather purse that I used to make straps for my leg armor, and covered the polygon (see? I'm such a teacher...) by gluing it and then stitching the edges. I was happy that my new sewing machine could handle the laminated poster board and leather.

The white boarders on the belt were the most time consuming piece, just because they needed to be perfect. I traced the finished, red leather polygon on the back of my white leather hide and measured out the designs. Then I carefully cut out each section so the lines would be perfect and keep the geometric look. Once it was cut I sewed white stitches 1/8th inches from the edges of the white. These served no structural purpose, but added texture and gave the illusion that the white was stitched onto the red. Then I carefully used barge cement to glue the white onto the red. This was the most stressful part, because if I messed up I'd have to start ALL over again. I also had to glue the white leather on perfectly so the lines and angles would stay straight. Luckily, non of the leather had stretched, and it ended up looking great.
Skirt

The skirt was fairly simple, but time consuming. Lots of measuring and cutting very straight lines. I had it basically put together, but realized that it looked like cheap plastic from even just a few feet away. I decided that adding metal studs would give the leather a little more weight and help give it more texture. I carefully added them to each strip of the skirt. This is pretty challenging since the leather was very prone to wrinkling under the studs and the wrinkles showed up a lot on the white. Once this was finished, I put the waist band on over my corset, inside out. I than taped (you don't want to use pins on leather because they leave holes) each strip in place to get the desired look. It's important to do this with the corset on, because the measurements will be very off otherwise. Finally, I sewed everything down and added Velcro to close it at the top. I'd usually use laces to close a leather skirt, but it's not going to show and I wanted it to stay as flat as possible under the corset.
To Do
I still need to finish the garter belt that will hold up my leg armor, and my sword belt tonight. My first try at making a cosplay sword ended in a very unremarkable, heavy sword that flakes paint at every turn, so I will be wearing my backup LARP sword this weekend. It's very lightweight and doesn't distract from the outfit. The armor will be the most difficult part, so I hope the concept for the garter belt works. Wish me luck!
I'll be posting pictures from WonderCon and from the Merry Wives' St. Patrick's Day concert this weekend, so check out my facebook page or twitter feed to see them!

Lady Sif's Cape
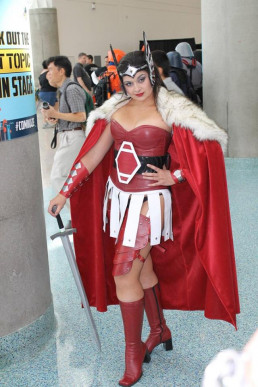
 Sif is an Asgardian goddess in Marvel comics, and is based on a beautiful (blond!) goddess in Norse myth. Her current costume pays tribute to this with a red cape adorned with large amounts of white fur.
As with all my cosplays, I wanted to make her cape as realistic and functional as possible. This meant changing it into a cloak so that it could actually do some good in the frigid Norse climate where her myth originated. It also meant finding a use for the furry shoulder pads, which seem very functional but would keep the wearer much warmer if they were located on the inside of the cloak. Once again, I fell back on historical costuming for the answer.
The Kinsale Cloak is a traditional design that originated in Ireland. It is very popular with historical reenactors because of it is a very attractive garment and is incredibly functional. It is a lined cloak that will keep you very warm, but its trademark piece is the hood that hangs down around the shoulders when not covering the wearer's head. I decided that I'd get the desired Sif look by lining the Kinsale cloak hood with fur, then wearing it around my shoulders.Plus, I already had the pattern. Huzzah!
I am very happy with the results... ignore my exhausted face and pajama pants.


This was the first time I had worked with (fake) fur. It was challenging, but I was lucky enough to get some pointers from very experience friends.
- Cutting - Don't cut through all the hair! It will ruin the texture and make your edges look bad. Flip it over and make shallow cuts to the fabric at the base of the hairs.
- When sewing, pin the hairs flat away from your seam allowances before you pin pieces together. Yes, this takes a LOT of pins, but it keeps you from sewing the hairs into your seams and messing up the cool look of your fur. It may seem time consuming, but it will save you a lot of time later and really improve the look of the whole garment.
The fur will get EVERYWHERE, but once you finish off your garment it *should* stop shedding since it should only be losing hair around the edges where you cut. Be sure you have a good quality lint roller on hand to clean up your garment after you finish.
I have about a month until WonderCon, and I still have to finish Sif's belt, skirt, and sword. Those are all fairly simple pieces that are very similar to previous projects, so I might actually be done early. Amazing!
OrcCon 2012 - Laser Ponies Game for Adults
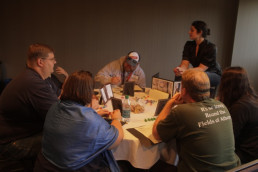
I didn't know what to expect when I ran my adult-theme Laser Ponies convention game at OrcCon 2012. Convention games are an unpredictable beast. You never know who will show up at your table, or if they will buy the concept that you have spent endless hours prepping. This concept was especially risky with Laser Ponies, but I hoped that anyone who signed up for a twisted game of alien ponies would show up ready for anything.

I love having an amazing setup for my players when they arrive. I also like the players to be surprised by the characters that they get. Usually, my players have little clues when they arrive at the table, but nobody gets to see their character sheets until everyone is seated and we get started. For this game, each player had a bag waiting for them that contained their character sheet, a map, a set of My Little Pony stickers (just because they were fun!), and a customized toy version of their character. On each bag was a picture that represented the character inside, and that was their only clue.
The customized ponies were the biggest part of my prep time for this game. Lots of people were very excited because of the crazy description and because we'd been talking about the game on the Happy Jack's RPG podcast for months. EIGHT people were signed up, so I had to make a lot of ponies! They took about two weeks to complete, but I loved the challenge and the creativity involved. I sanded small toy horses that I bought at the Dollar Tree. Then painted each one with spray paint and puffy paint to make them look unique. I was thrilled that the players were so excited to get them.


I was supposed to co-GM this game with my friend Casey, however he fell ill about 10 minutes into the game intro. Things went smoothly and the players bought into the crazy concept that we had created. Basically, the home of the Laser Ponies is being overrun by a drug cartel. The only ponies who can take a stand against this threat are the P-Team. Yes, we ripped off the A-Team, but damn did it make for a funny game. Each character had weaknesses, like uncontrollable lust, war flashbacks, drug addiction, fear of flying, and more. These weaknesses have to be rolled so the players never know when they will kick in. It made for a very adult, but very funny addition to the game.The players got so into it they started rolling their weaknesses, even when I hadn't asked!

The game went incredibly well, and was one of the most fun games with which I have been involved. The players were what really made it magical. They were incredibly creative and energetic. The started making creative props of their own and kept acting out scenes using their toy horses. The insane plot ideas that they came up with were so unexpected, but it really made the game. Multiple times in our 4 hour game we had to stop because we were all laughing too hard to speak. I feel bad for the other Happy Jacks games that shared the room with us, but holy cow was it fun! The 4 hours flew by, and the game timed out perfectly, ending 10 minutes before the cut off time.
The one thing that I wasn't prepared for was combat. I had planned to co-GM, and Casey is a numbers guy. I had read the rules a few days before, but I couldn't recall the exact damage rules once it was obvious that Casey wasn't coming back. I was subtly trying to look up damage rules while I started the first scene. It didn't impact the game for the players (as far as I could tell!) but it made those first few moments stressful for me. Lesson: Always have the book/PDF with you (huzzah! I did that!) and always read the combat rules before the players show up if its a new system to you.
This was a REALLY amazing game. REALLY. I won't be sharing any plot points here since I may have to run this game again. I might have to retire from adult Laser Ponies forever though, because I doubt any game could live up to the original P-Team.
Laser Ponies RPG
For the next Strategicon gaming convention, my friend Casey and I decided to run a game called Laser Ponies. No, I'm not kidding. It's an actual RPG game that you can buy. It was mentioned in the first season of the Happy Jack's RPG podcast (which I often host) and has been a running joke since then. We thought it was a great idea to design and run an X-rated Laser Ponies game.
What can I say? We were very, very drunk at the time. Never promise to GM a crazy game on-air during a live podcast when you are inebriated. Trust me.
I don't want to give too much of the story away, but I did want to comment on the PDFs we bought to run this game. We bought the Laser Ponies PDF and the QAGS System PDF from Drivethru RPG. The Laser Ponies book is less than $2 right now, and you can actually run the game entirely from this book. You will also be able to enjoy the amazing artwork that comes with this book...

Stop laughing! I'm not kidding! It is really a system book!
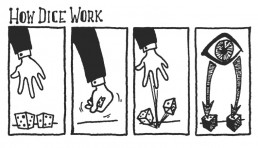
The QAGS (or Quick Ass Game System) book is one of the most entertaining system books I have ever read. I know that isn't the hardest thing to do, but it is very funny at times. It starts with the very basics and moves on from there.
 Actual image from the QAGS Book
The system is pretty simple and can work for any setting. I haven't play tested our game yet, so I will hold off on my review until I've run something with it. However, I will say that for under $10 you can get both of these PDFs, get drunk, and have a lot of fun coming up with insane ideas for the most warped Pony-verse ever.
Wild Talents Review
A review I wrote in March of 2011 for The Douchey DM, my friend Stu's gaming rant-blog. It is also the official rant-blog of the Happy Jack's RPG podcast. I had just run my first Wild Talents game at OrcCon 2011 with my buddy Frey. I have since run the system at other cons and my Salem Witch Trials game has become the stuff of Happy Jack's legend. Enjoy.
. . . . . . . . . . . . . .
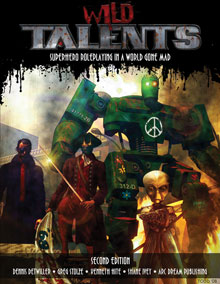
At OrcCon, The Amazing Fray™ (also known as Fray) and I ran a new-to-the-Happy-Jacks-crew system called Wild Talents. It is a system specifically designed as a superhero RPG. Arc Dream Publishing released it in December of 2006.
This is my n00b friendly review of that system. I’ll be breaking the game down into four basic categories and then giving an overall opinion, a format I hope to follow with all my future game system reviews. Basically, I’m going to share my opinions on new-to-me systems so people who haven’t played them can figure out if they are interested. This is not a player guide! You do not need to know how to play the game to comprehend this review. A complete explanation of how to play can be found on the Arc Dream website. I won’t bore you by rephrasing what someone has already done a great job of writing. If you are interested in the system after reading this blog post, check that out… or buy the damn game.
Cost – 5/5
This system is nice to your wallet, especially if you plan on designing your own world and adventures. Fray and I ran our game with the compact Wild Talents Essentials Edition. The Essentials Edition is all you need to create and play a Wild Talents game! It includes the very basic character creation and play mechanics. It’s a paperback, the pictures are in black and white and it’s easy to fit in your purse (because I know you were all wondering that!) The book runs around $10 and is available on multiple websites, including Amazon and Arcdream.com. The PDF of the Essentials Edition is available on RPGnow.com for $5. They even have $5 versions of this edition for the Kindle. Geektastic!
Wild Talents does have a pre-designed setting and adventures too. Information on them is not included in the Essentials Edition, so the cost goes up a bit. The full Wild Talents Second Edition costs around $50 (it’s on sale on Amazon for $32.90 right now, only 12 left!), or you can pay $30 for the PDF. There is no Kindle version. Again, this is the only book you will need to run a game. This book is hardcover and has full color artwork inside. It’s the normal size you’ve come to expect with RPG books. Second Edition is thicker than some DnD books, but not as thick as HERO. Hmm… maybe I shouldn’t compare sizes… size doesn’t matter…
Setting – 4/5
Wild Talents is a superhero game, but it’s really flexible. With some work you could use the mechanics to create any type of game, although why reinvent the wheel when there are tons of great systems out there for other genres? The feel of a Wild Talents game is easily customized by point limits. The books give lots of tips about designing the feel of the game you want. If you are the type of GM who loves to let your imagination go “wild” (haha), you will like this aspect of the system.
GMs who like to use pre-generated worlds and adventures (often known as “Guy with a Day Job” or “Dad”) will do well with this system too. There seems to be plenty to choose from for Wild Talents. The Second Edition is a follow up to the setting in Arc Dream’s other game GODLIKE, where super-powered humans started to appear during WWII. It’s a crazy place where supers come in direct conflict with one another. This Favored Land is a sourcebook that sets up the appearance of supers during the Civil War. There are other sourcebooks for Victorian London settings and modern games that include sorcerers and the occult. I have not played in any of these settings, but I love the variety. It seems like there is something for everyone. The extra sourcebooks and adventures are available at Arc Dream’s website.
Character Creation – (5/5 Customization) (3/5 Ease)
Customization: If you can dream up a super power, you can make it in Wild Talents. The books have a good bank of pre-generated powers to select from and include point costs and which dice to roll. If you want something specific that isn’t on the list there are directions for creating your own powers. Creating powers gets a little complicated. You can get any powers you want, but it takes a little work. It’s still nothing compared to systems like HERO. Stats and skills are easily customized to fit a character’s role and back-story by spending points.
Ease: Really this system needs two scores for ease. One for if you design your PC from the pre-generated power bank and another for if you get your hands dirty and create your own powers. Creating a character with the pre-gen powers is a no brainer. Pick and choose what stats/skills/powers you want until you hit the point cap the GM set. If you create your own powers you will spend more time and brainpower (and money on beer), but you might come up with something really unique and amazing. It adds complexity to character creation, so it lost a point there.
For the GMs: Wild Talents also lost a point in Ease because of how difficult it can be to keep the game balanced. It is a DEADLY system. One extra die and a PC or NPC will be very over powered. Fun system and easy to run, but play test if it’s your first time. If you are having your players create their own characters, check them before you play. It’s a system that can easily be min/maxed (and they admit that), so be sure you know what you’re in for and can plan accordingly (or nerf the hell out of them!)
Combat – (5/5 Speed) (4/5 Ease) (5/5 Fun)
I love the combat system in Wild Talents. The game uses the ORE (One-Roll Engine) mechanic and it really speeds things up. Our game had some of the fastest combat rounds I have seen, and the players were actually MORE interactive than with other game systems. First, the PCs and NPCs all declare their actions. Everyone is listening and paying attention because what other players say might change what you do. I noticed this seemed to increase the amount of teamwork the players used (without meta-gaming) because they didn’t have to wait for their turn. After that, everyone rolls their dice at the same time. The dice then determine who beat whom, succeeded, failed, etc. Rinse. Repeat. Very fast, interactive and fun for most groups.
The dice mechanics seem more complicated than they actually are. There are multiple types of dice and each drastically changes the power of a roll. I suggest everyone learn while playing a game. It seems really simple when you’re at the table. There are very specific dice and effects for different power types, so put some notes on the character sheets and have a book handy. After the first combat, everyone pretty much knows how their powers and dice work, so its smooth sailing from there. The regular dice mechanic is interesting since you are looking for matching die instead of adding them together. We will need further testing to determine if this makes it easier or harder to play while drunk. Volunteers?
Overall, Wild Talents is a great system. I think it’s especially good for convention games since it is very fast paced, and easy to learn. We got nothing but good feedback about the system from our players. I will definitely be running more Wild Talent games at future conventions and buying a TON of d10s.
PLEASE NOTE: If you create Radioactive Cheerleaders for a combat, the players will find a way to skip them EVERY TIME YOU RUN THE GAME. Not kidding. What a waste of spiky pom-poms of death…